- INTRODUCTION
- EXPOSURE METERS
- TYPES OF LENSES
- FILTERS
- DARKROOM EQUIPMENT
- PROJECTORS & VIEWERS
- TRIPODS
- MISCELLANEOUS
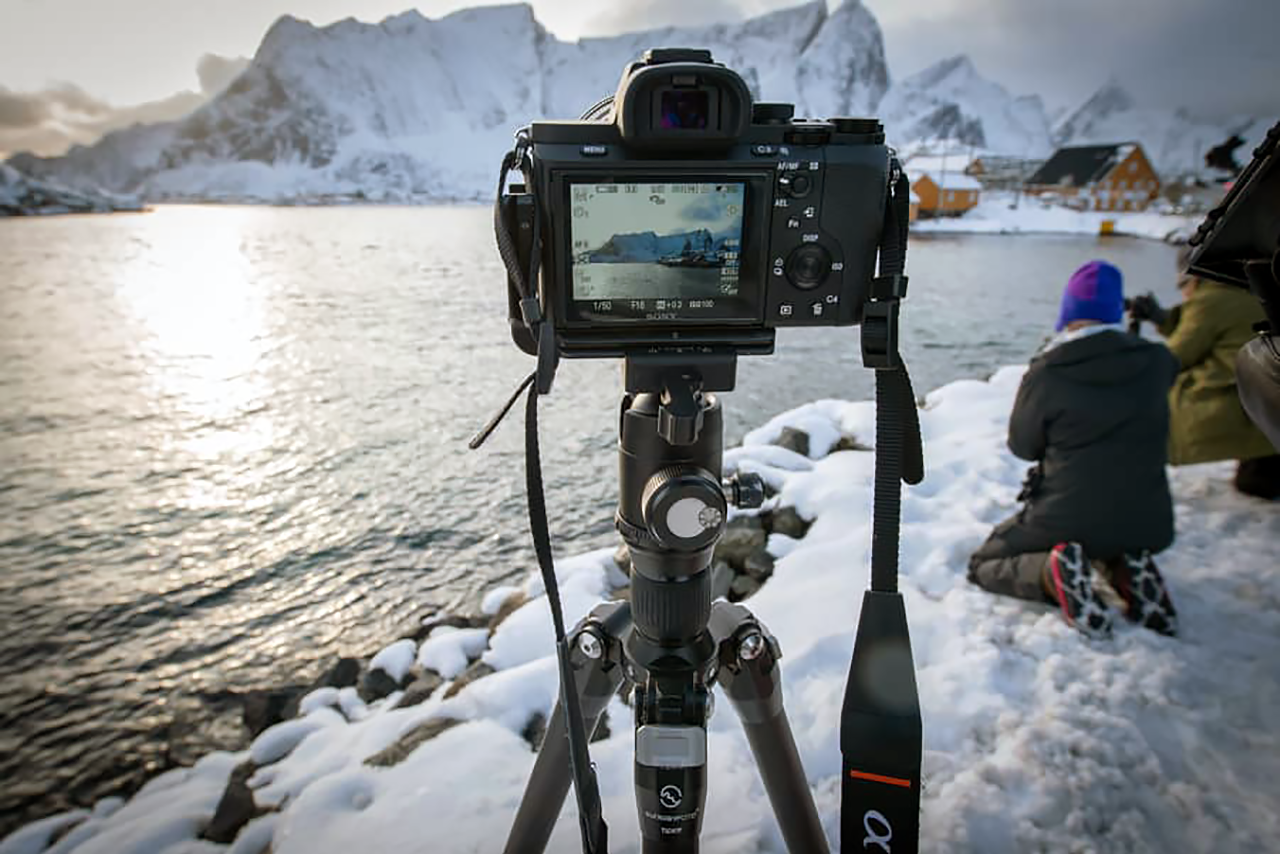
Light metering is the process of measuring the light of a scene before taking a picture
Today, we take correct exposure for granted; the camera does it all for us—automatically. However, things were very different in the past. Until the arrival of commercially available dry plates in the late 1870s there was little requirement for a meter to measure the light.
Variations in the preparation of the plate, chemicals used, age of the chemicals, and how the plate would be developed would all affect the exposure required. Judging how sunny it was was not the photographer’s biggest problem. Even when pre-prepared plates were made available commercially, there was no recognised measure for the speed of the plate which at the time were sold as ‘fast’, ‘extra fast’ or something similar. The speed would also vary between one batch of plates and another as well being dependent on their age and how they were stored. Through experience photographers would have built up a rule-of-thumb for the exposure based on their own working methods.
Before we really get started, a little bit of technology and development history in brief. Although you can read about this elsewhere more competently than I can. Nevertheless, a few basic principles are also important for the systematics of my setup.
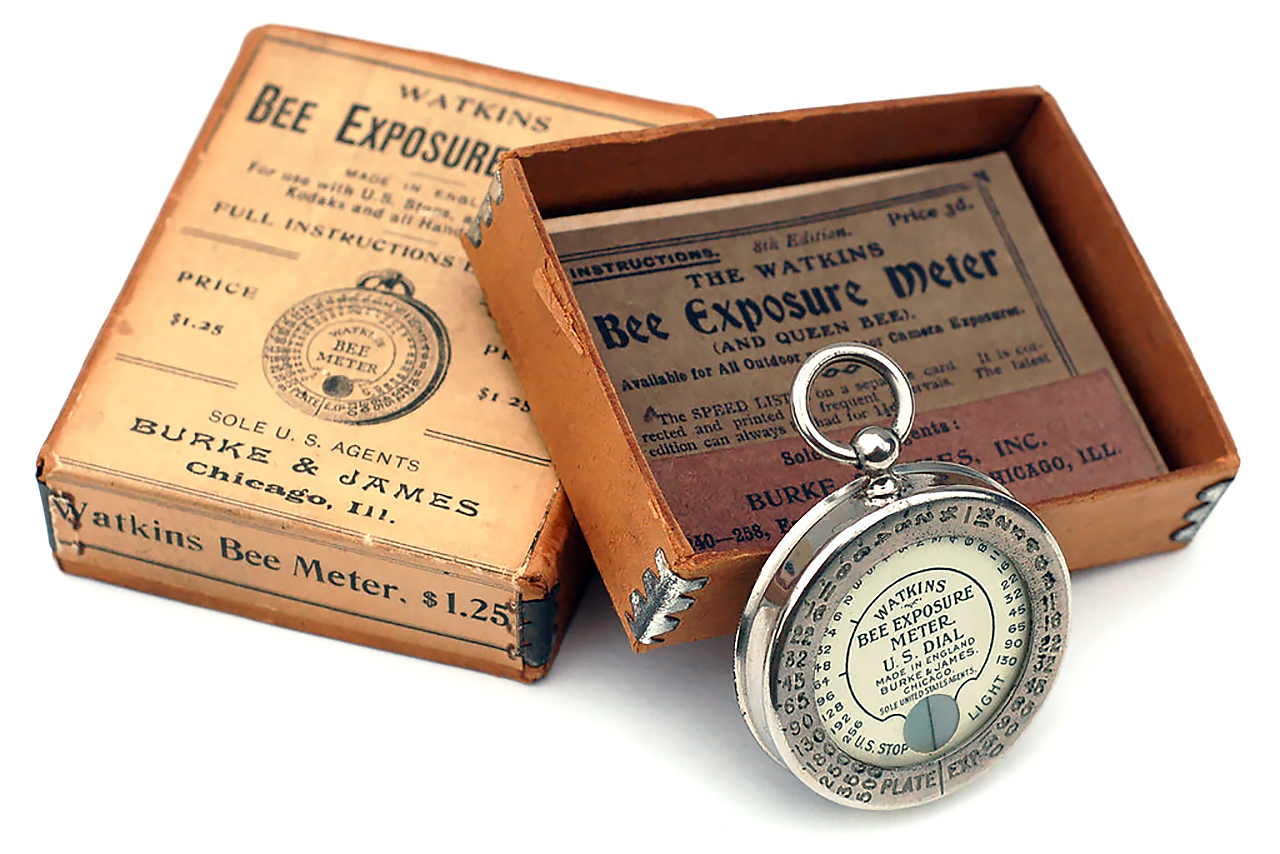
Alfred Watkins, born in Hereford, invented the Bee Meter, which was patented in April 1890. This was the first light meter to measure the relative intensity of light through Watkins’ invention of the actinometer and it allowed a numerical value to be assigned to light. The Bee Meter was a pocket calculator for determining exposure, so-called because it was small and highly efficient. It was manufactured in Friars Street, Hereford, in a building known as The Meter Works.


The measure of the measurable luminous intensity of a light source was originally the HEFNER candle (HK). Another measurement is the intensity of the light with which an object is illuminated by a light source. It is measured in lux. Lux meters are still in use today, for example to determine the beneficial or required amount of light for workplaces, for example. I don’t want to go into any further theory here; for more intensive interest, there is special literature and the Internet.
The issue of quantifying visible light became truly serious with the application of light-sensitive materials for photographic purposes in the mid-19th century. It began with aids in the form of tables, the first of which dates back to 1839 and was intended to help with the production of daguerreotypes.
The situation is different with the successors of the historical tables; They were produced in many varieties well into the 1960s and were sometimes given away as free advertising material by the camera trade. The best-known version probably comes from Agfa; It can be found in several versions, most recently as a calculator made of aluminum.
After that, things happened in quick succession, and the first photometers went on sale just a few years before the turn of the century in 1900. “Light meters” also appear for the first time, especially in Great Britain as “Exposure Meters”. The best known are probably “Wynne’s Infallible Light Meter” and “Watkins Bee Meter” in the shape of a pocket watch from 1895. The Wynne’s name is not a Neuhausian mixture of languages, the thing was actually called that!
Around 1905, optical exposure meters competed with the aforementioned photometers. This form of exposure determination deserves a few additional words. It is based on the ability of the human eye to perceive differences in brightness even in extremely bright or dark environments when measuring devices no longer enable differentiation due to insufficient sensitivity. The photographer’s ability to remember comparable shooting situations is also important. The disadvantage that they cannot determine absolute values, even for inexperienced people, is outweighed by the fact that optical measuring devices can also be used in extreme lighting conditions.
What all of these devices have in common, however, is that the values determined with them still have to be evaluated or evaluated individually by the photographer in some way. This will only change after the market launch of photoelectric exposure meters with selenium cells and the standardization of aperture values and exposure times. These convert light into electrical current and thus (from around 1930) for the first time determine a real measured value which – provided the technology works properly and the scale reading is correct – can be transferred directly to the camera.
Even more confusing than the previously described aperture values, or better yet, was the information about the sensitivity of the recording material. The photographer who is now only used to DIN and ASA values will hardly be able to understand this. But in the early days of photography, each plate manufacturer cooked its own soup and the different makes were fundamentally not comparable to one another. The first generally useful information for a certain standardization comes from Hurter & Driffield (H‡) from England around 1880/90. Although modified, they remained in use until the end of the 1930s and were only replaced by ASA and DIN. In Germany, the astrophysicist Julius Scheiner developed a comparison scale in 1894, which was also only replaced by DIN and ASA. The Scheiner scale was also used in the USA, although with different values.
The light meter manufacturers therefore had to take a number of different value scales into account. Some devices also have several scales, other manufacturers include comparison tables – but each according to their own calculation and comparison criteria. You have to know that each of the different series of standards was based on sometimes completely different calculation methods. They usually refer to a specific panel material. Some light meter manufacturers also developed their own scales to which they assigned the different recording materials. That’s why there are basically no comparisons in the record era. It was only with roll and 35mm films that comparable sensitivity values were agreed upon. DIN 4519 created standards for the first time in 1934, ASA followed around 1950. Both were later changed to the value scale used today.
DIN ASA/B.S.I. arythm. B.S.I. log. GOST WESTON SCHEINER Europe SCHEINER USA ILFORD H. & D. WATKINS WYNNE's Warnerke Eder-Hecht General Electric GE
5 1 6 13 11 42
6 2 8 18 12 45
7 3 9 22 F20 13 48
8 3,5 12 28 F23 14 50
9 5 17 35 F28 15 53
10 6 25 45 F32 16 56
11 7 30 51 F36 17 58
3 13 8 35 74 F39 18 61
4 1,6 14 9 45 94 F45 19 64
5 15 10 56 120 F56 20 66
6 16 11 72 153 F64 21 68
7 3 16 2,5 17 12 A 91 195 22 71
8 17 18 13 117 250 F71 23 74
9 6 18 6 3 19 14 150 318 F78 24 77 8
10 8 19 8 6 20 15 B 190 406 F90 25 80 10
11 10 20 8 8 21 16 240 516 F111 26 82 12
12 12 21 11 10 22 17 310 659 27 84 16
13 16 22 16 12 23 18 C 390 838 F128 28 86 20
14 20 23 16 16 24 19 500 1070 29 88 24
15 25 24 22 20 25 20 636 1370 F156 30 90 32
16 32 25 32 24 26 21 D 800 40
17 40 26 32 32 27 22 1000 50
18 50 27 45 40 28 23 1300 F181 64
19 64 28 65 48 29 24 E 1600 80
20 80 29 65 64 30 25 2000 100
21 100 30 90 80 31 26 2700 125
22 125 31 130 100 32 27 F 3200 160
23 160 32 130 125 33 28 4200 200
24 200 33 180 160 34 29 6000
25 250 34 250 200 30 G 6400
26 320 35 250 250 31 8000
27 400 36 360 320 10000
28 500 37 500 400
29 650 38 500 500
30 800 39 720 640
31
32
33 1600
Since all sensitivity series are based on individual calculations, such comparisons only show approximate values. You can also find old tables with other comparative values, but this is irrelevant for today’s purely theoretical comparisons. Only DIN / ASA can be used for direct comparison. However, ASA was redefined around 1950.
- ASA = American Standard Association
- B.S.I. = British Standard Institution
- DIN = German Institute for Standardization
- GE = General Electric, similar to ASA and Weston
- GOST = obsolete designation in the former USSR
- ILFORD = special standard from the British film manufacturer
- H. & D. = Hurter & Driffield 1890, in use until around 1930 – only replaced by ASA and DIN
- SCHEINER European scale = old German name after J. Scheiner (1894) *Scheiner degrees were originally only defined up to 20, but were modified by Eder-Hecht
- SCHEINER American scale = Scheiner scale modified and used for a longer time in the USA
- WARNERKE = early German series
- WATKINS = very old range from the historic British Beli manufacturer
- WESTON = scale of the light meter manufacturer, retained until the introduction of DIN/ASA
- WYNNE’s = very old series from the historic British Beli manufacturer
- Eder-Hecht = Old German values later developed the DIN scale
Here you will find a survey of
Types of Exposure Meters
Occasionally the same device is available in versions with a DIN scale or as an export version with an ASA or WESTON scale. Quite a few manufacturers also offered special “Leica versions” that have a scale with the sometimes different aperture values and exposure times of the early Leica.
All exposure meters can be grouped into five main types + exposure tables. You can reach the respective group directly by clicking on one of the headings.
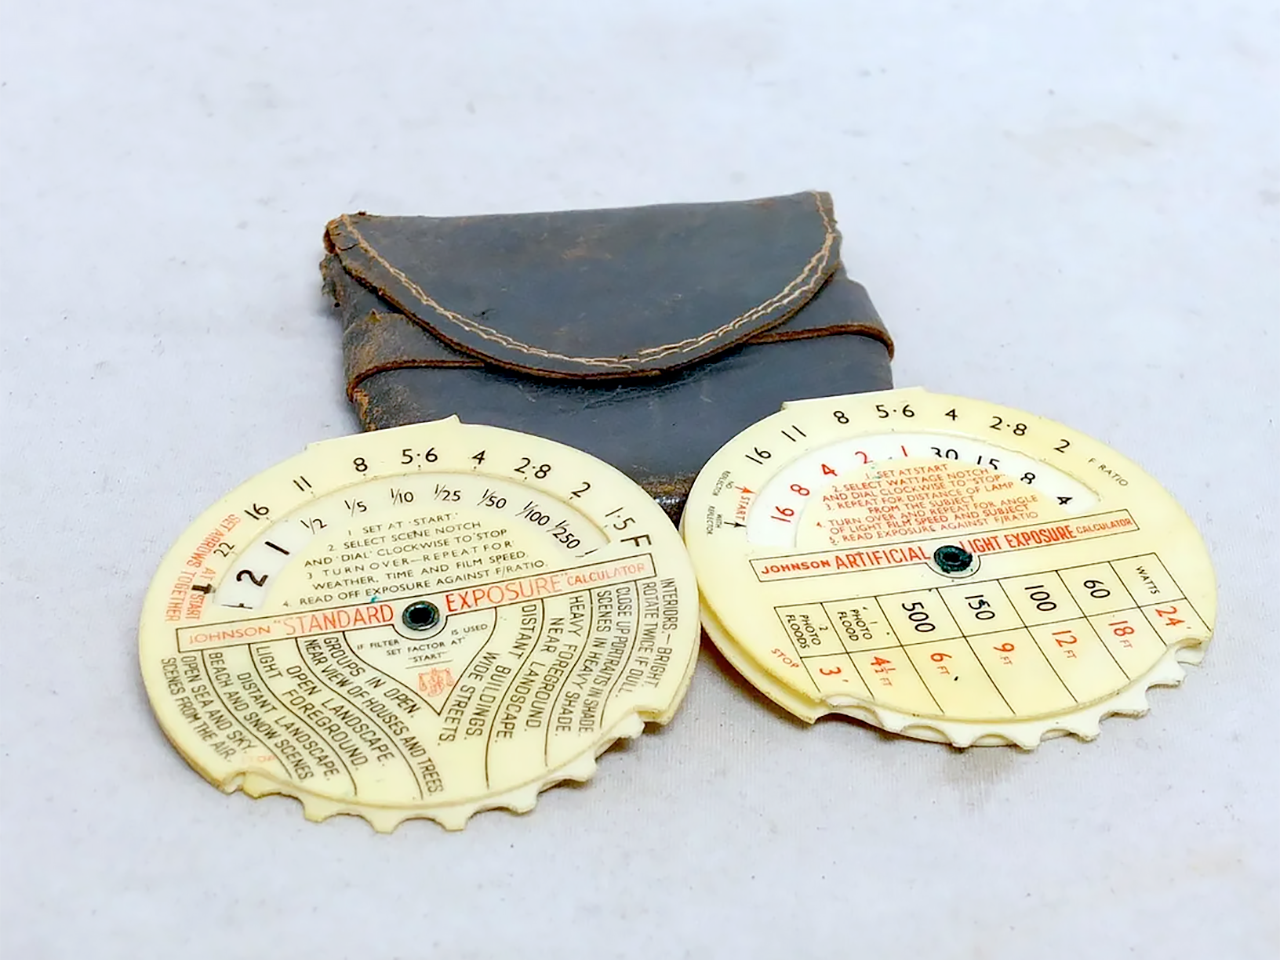
These disks and clocks, which were very popular for a long time, were important tools for determining exposure. These have various forms ranging from simple printed tables to instruments with dials or sliding scales. Usually they combine at least:
- Time of day and time of year,
- Weather, sky or light conditions,
- Type of subject e.g. open landscape,
- Plate speed.
Simple exposure guides were often included in books of the period or supplied by manufacturers in boxes of film.
Group 2 – Chemical/ optical meters (actinometers) –
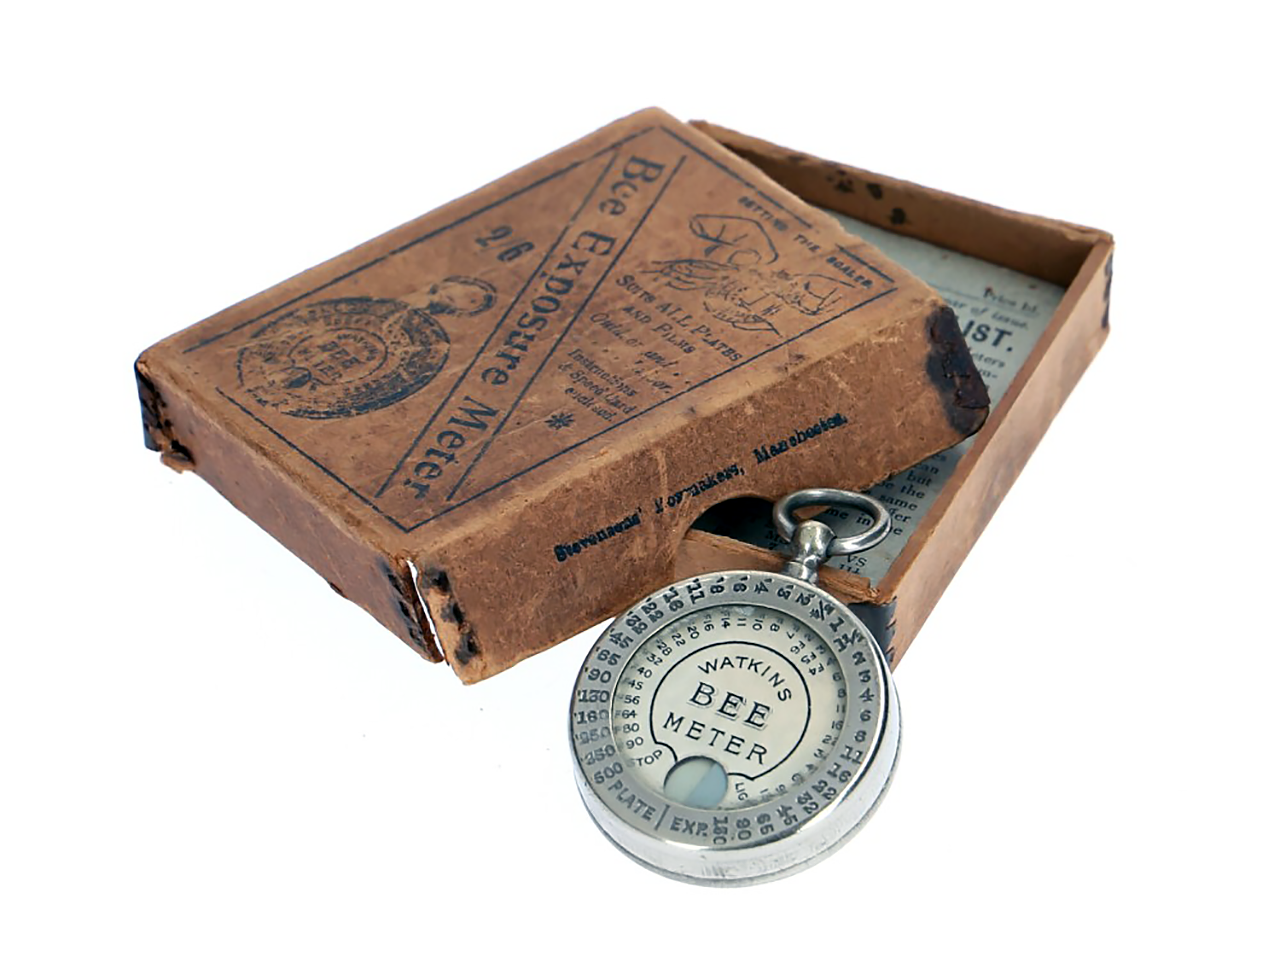
Aids for determining the illuminance that work neither photoelectrically nor optically. With the devices in this group, the exposure is determined based on the time it takes for a strip of photographic paper to change color up to a specified comparison value. The application was a complicated undertaking by today’s standards, especially since there were no standard values for apertures, sensitivities, etc. at that time.
They were on sale from 1895 until around the late 1920s. In Britain the form of a pocket watch became very popular, the Wynne’s and later Bee are two examples, each with their own sensitivity value scales.
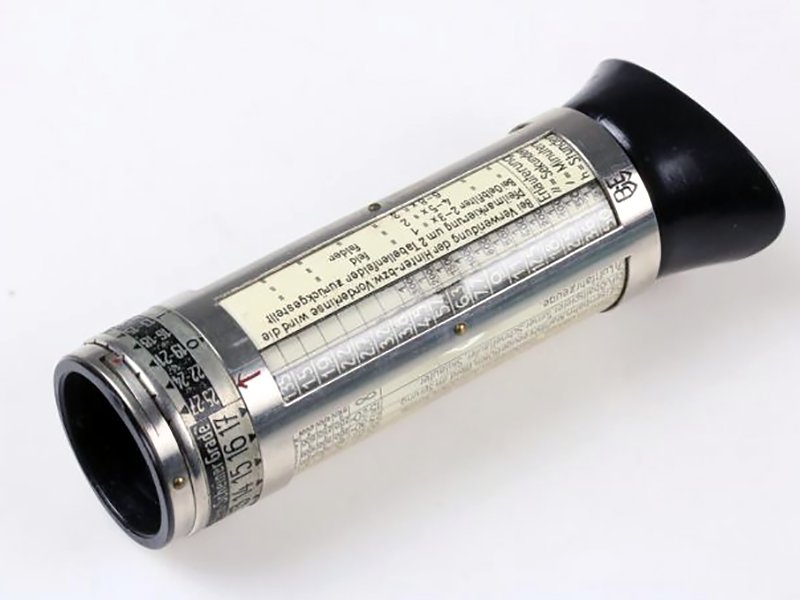
The extinction meters are commonly found in two forms: the tubular form and the open form. They were very popular in the 1920s and early 1930s and remained on sale into the 1950s. In an extinction meter the light is judged by what is ‘just visible’ when looking into the meter. A problem with extinction meters was the eye’s ability to adapt to changing light levels.
The tubular form, where the photographer looked into an eye-piece, was very popular in the 1930s. The open pattern was popular for a short time in the 1950s, it was cheap and answered the need of the rising number of amateur photographers.
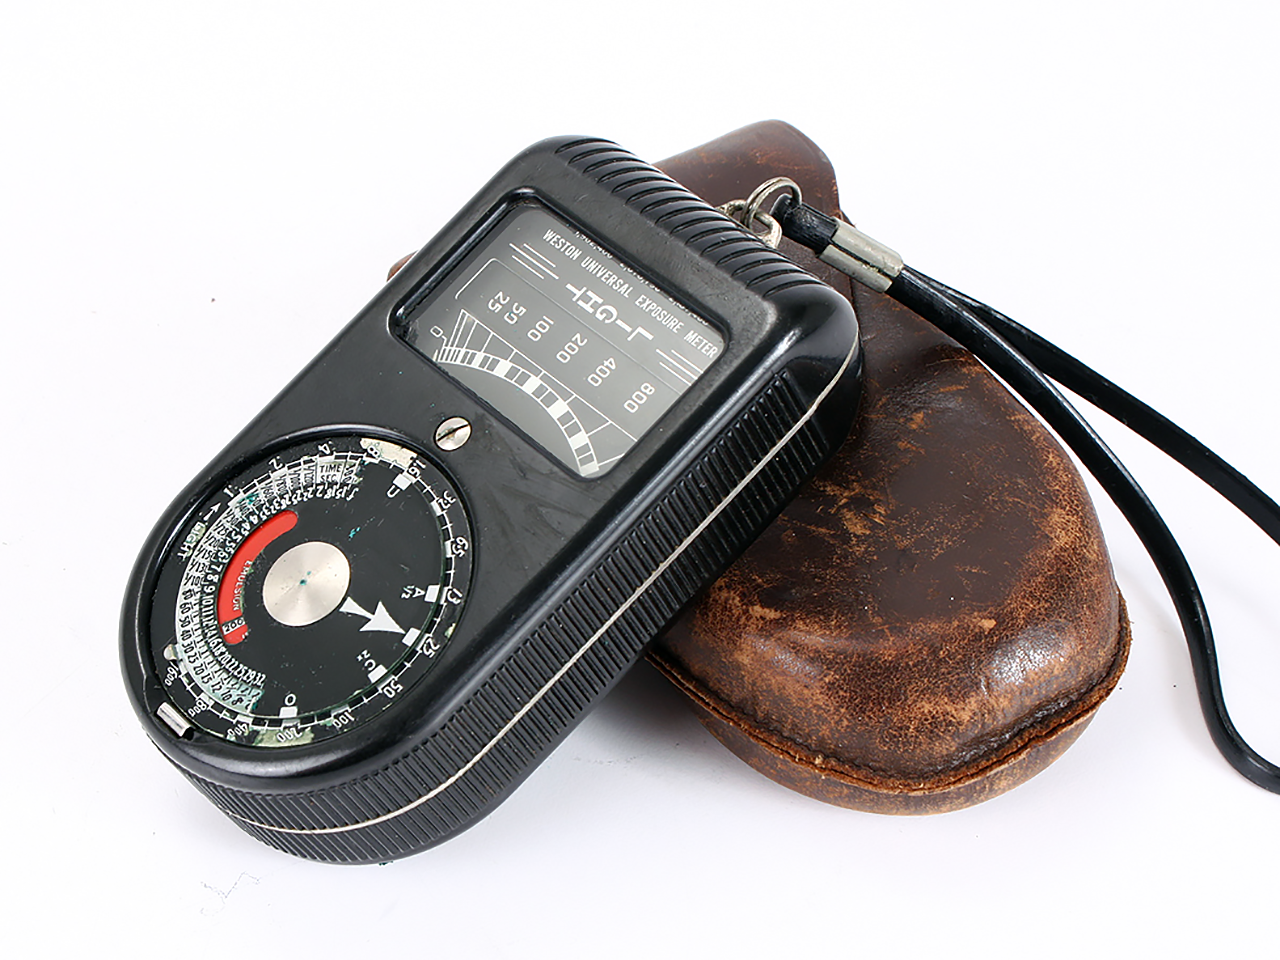
These devices actually “measure” light by converting it into electricity using a photoelement. Selenium was almost exclusively used as a photoelement to generate electricity. That means that this type of light meter does not require batteries! However, the measuring cells (selenium cells) are often no longer usable.
The first selenium exposure meters came onto the market in 1933, almost at the same time from the later eternal competitors Gossen and Weston as well as from Müller & Ziegler and Metrawatt. Popular from the 1930s onwards; increasingly found built into cameras and coupled to the shutter and diaphragm settings.
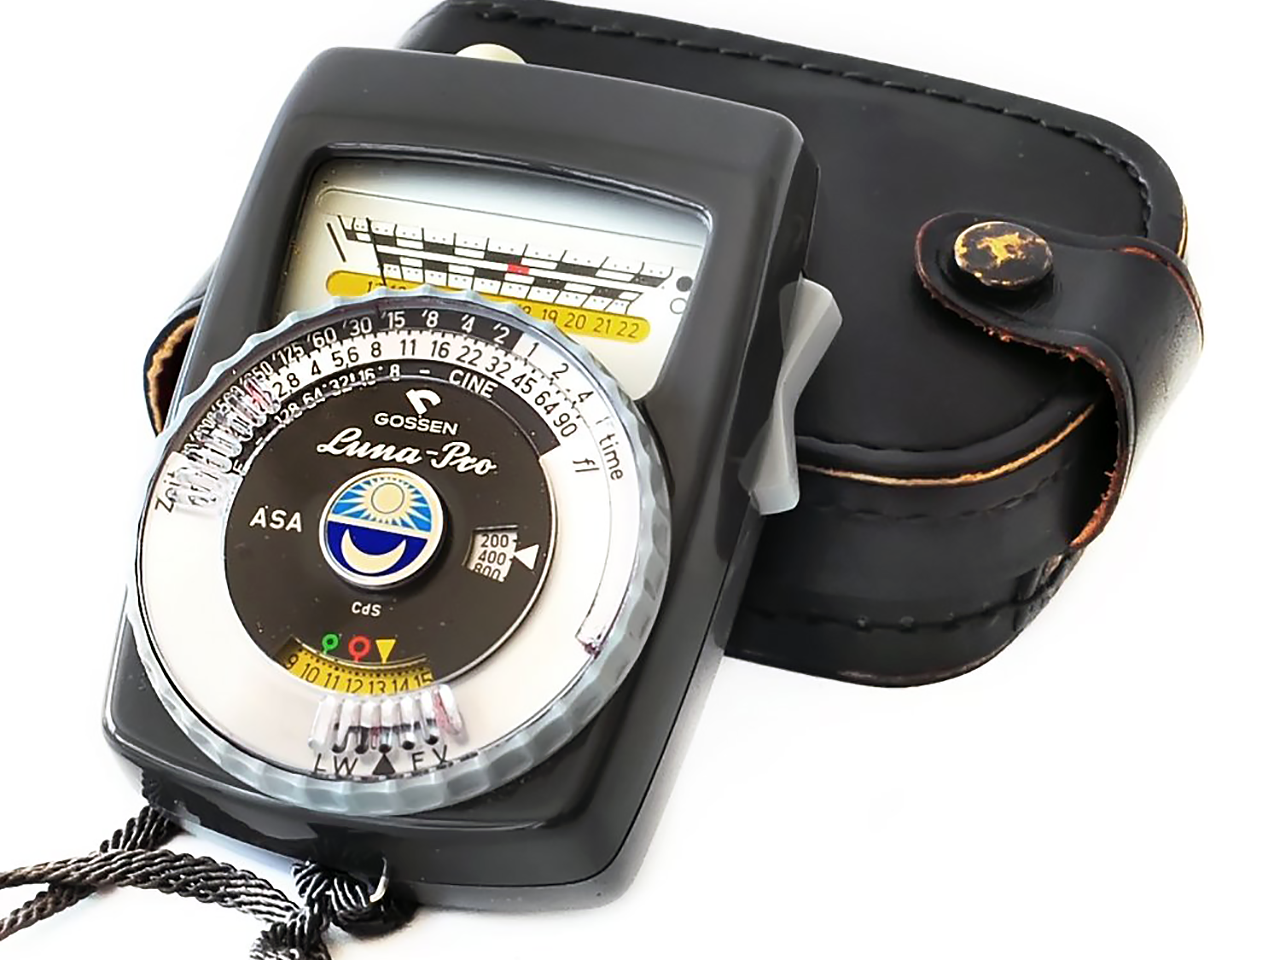
These light meters do not draw their power from a selenium cell but rather through battery operation. The battery power is used to operate a light-sensitive electronic component, which displays differences in brightness via a bridge circuit on a pointer measuring mechanism or (later) digitally. Their functionality corresponds in principle to the photoelectric light meters with selenium cells from group 4.
Sophisticated downstream electronics, measuring bridges and integrated components expand the possible applications considerably, but definitely require a power supply with batteries or accumulators.
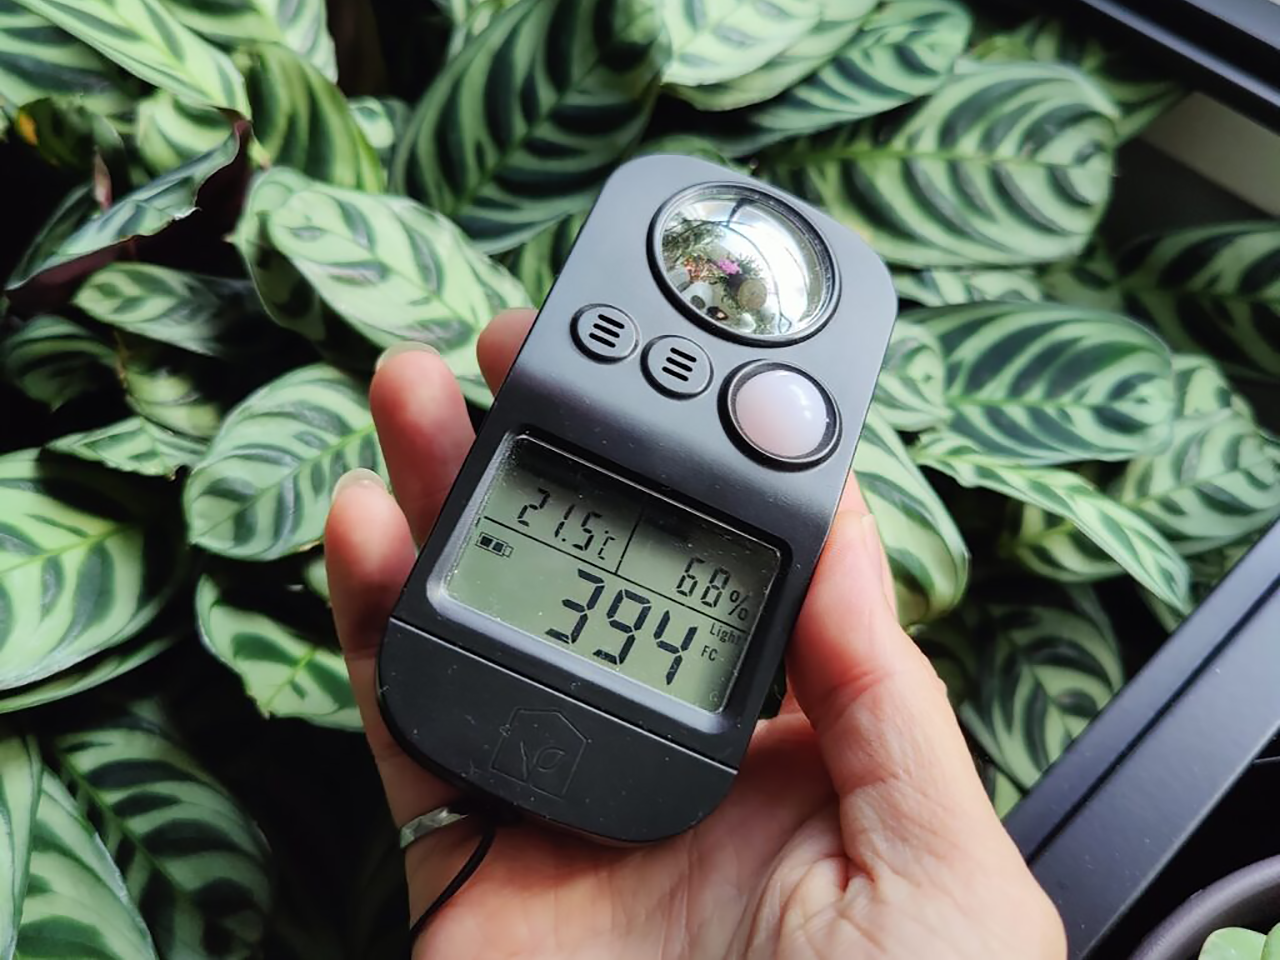
This group of meters includes measuring devices that have been designed for specific purposes, regardless of how they work. In principle, they all function in the same way as their previous group light measuring meters. However, special controls or scales make it possible to use it, for example, for flash photography (flash meter), color temperature measurement (color meter) or in the darkroom with appropriate direct reading.
Light meters also are used in the general field of architectural lighting design to verify proper installation and performance of a building lighting system, and in assessing the light levels for growing plants.
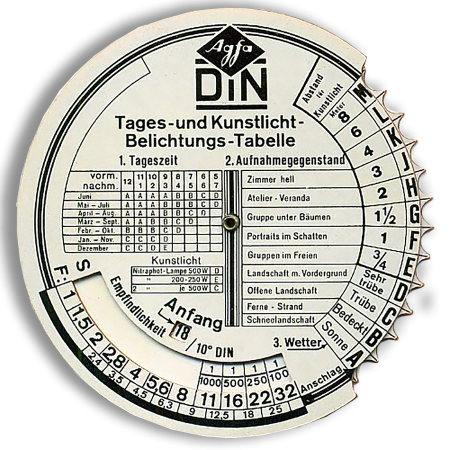
DIN daylight and artificial light exposure table as a calculator. This table made of light gray plastic (85 mm Ø) dates from the 1950s and was published by the GDR film factory “Agfa” Wolfen (later ORWO). In terms of function and data, the table largely corresponds to the version from Agfa Munich.
Value information: Film sensitivities according to DIN can be set from 3 to 24 DIN, aperture values range from 1 to 32 (also German/Leica values) and the exposure times can be determined from 16 minutes to 1/1000 sec.
Group 1
Exposure tables, clocks & calculators
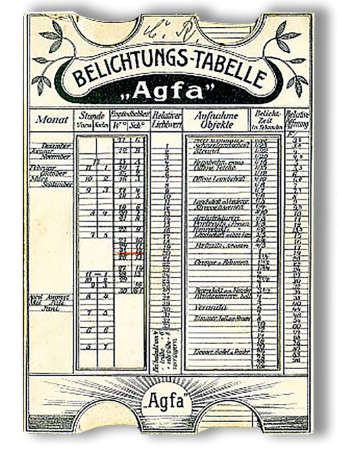
Probably the best known of all exposure calculation tables comes from Agfa. Here in the picture is one of the original versions from the years before the First World War. The table shown still bears the original name of the “Actien-Gesellschaft für Aniline-Fabrikation” founded in 1867. The Agfa trademark was created 30 years later.
The table version shown here only contains data for plates and films; filters were not yet known. The plate sensitivity is included in old German Scheiner degrees (C-17°) or 9-30 WESTON, aperture values 3.8-96. Exposure times can be read from 216 to 1/1000 of a second.
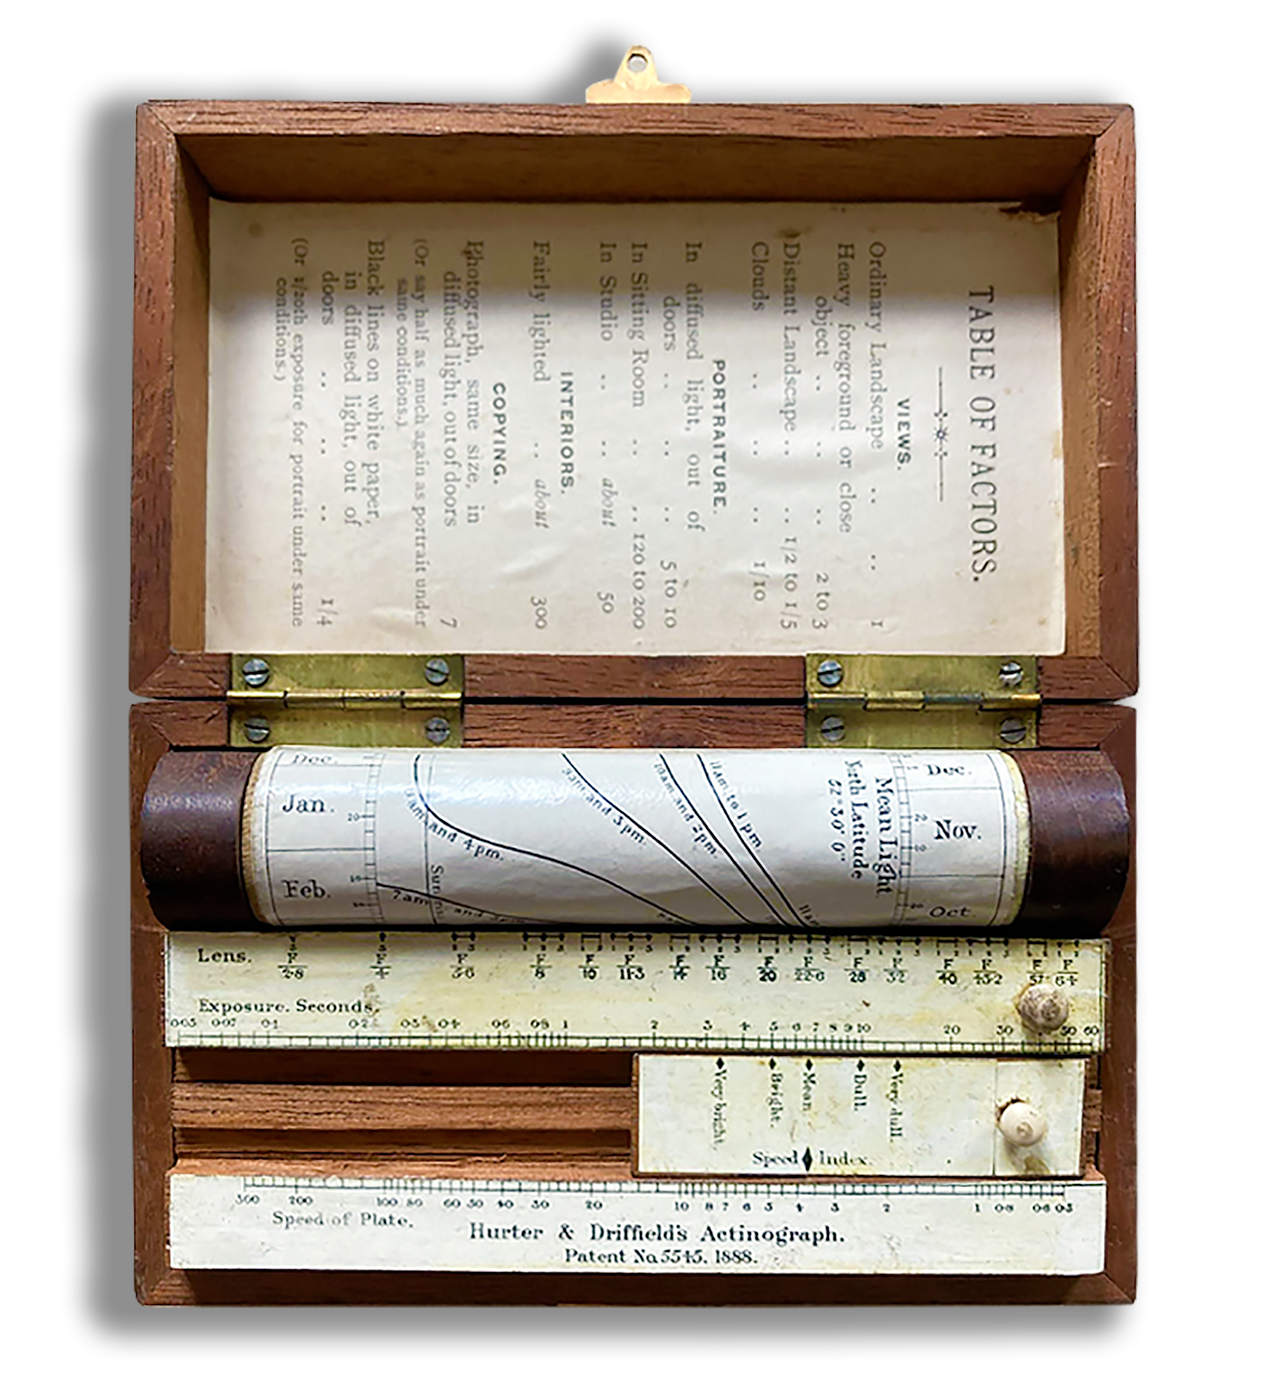
Ferdinand Hurter (1844–1898) and Vero Charles Driffield (1848–1915) were nineteenth-century photographic scientists. Among their innovations was a photographic exposure estimation device known as an Actinograph. Their sole distributor was Marion & Co. of London. This Hurter & Driffield Actinograph, which was sold from 1888 onwards, was one of the most efficient early devices for calculating exposure.
a few More details
Unless the latitude is included as a variable in the table, they will be intended for one particular region only. Tables were available from the earliest period but not commonly used until the dry plate period, they have remained in use pretty well until today (an exposure guide is usually included with a box of film).
The earliest calculator, certainly of any consequence, was the Actinograph by Hurter and Driffield (1888) which was an outcome of their work on light levels and emulsion characteristics. From then on calculators were popular especially with the occasional photographer as they were both cheap and easy to use, later models were often incorporated into diaries. A particular format was the dial calculator that originated in the 1920s, these were usually made of plastic and had small notches in the rim to move the discs.
Most of the time, numerical values (or letters) are given for the respective parameters, which, after a summary, lead to the exposure value. In these popular calculators, the values are placed on tabs, which each have to be turned or pushed to a stop.
Many of these exposure aids appeared in new editions over the years with more or less significant changes. The more complicated and extensive the value specifications are, the more precise the determined exposure value becomes. It is amazing how accurate this is determined by most of these tools, even with only a small amount of data.
Kodak Autotime
Cameras often included a reduced form of table. If the variables are reduced to two – light conditions and subject, then they can be directly set on the shutter and aperture scales. Many Kodaks had this arrangement called Autotime (introduced in 1909). The light condition was set on the shutter dial and the subject was set on the aperture scale.
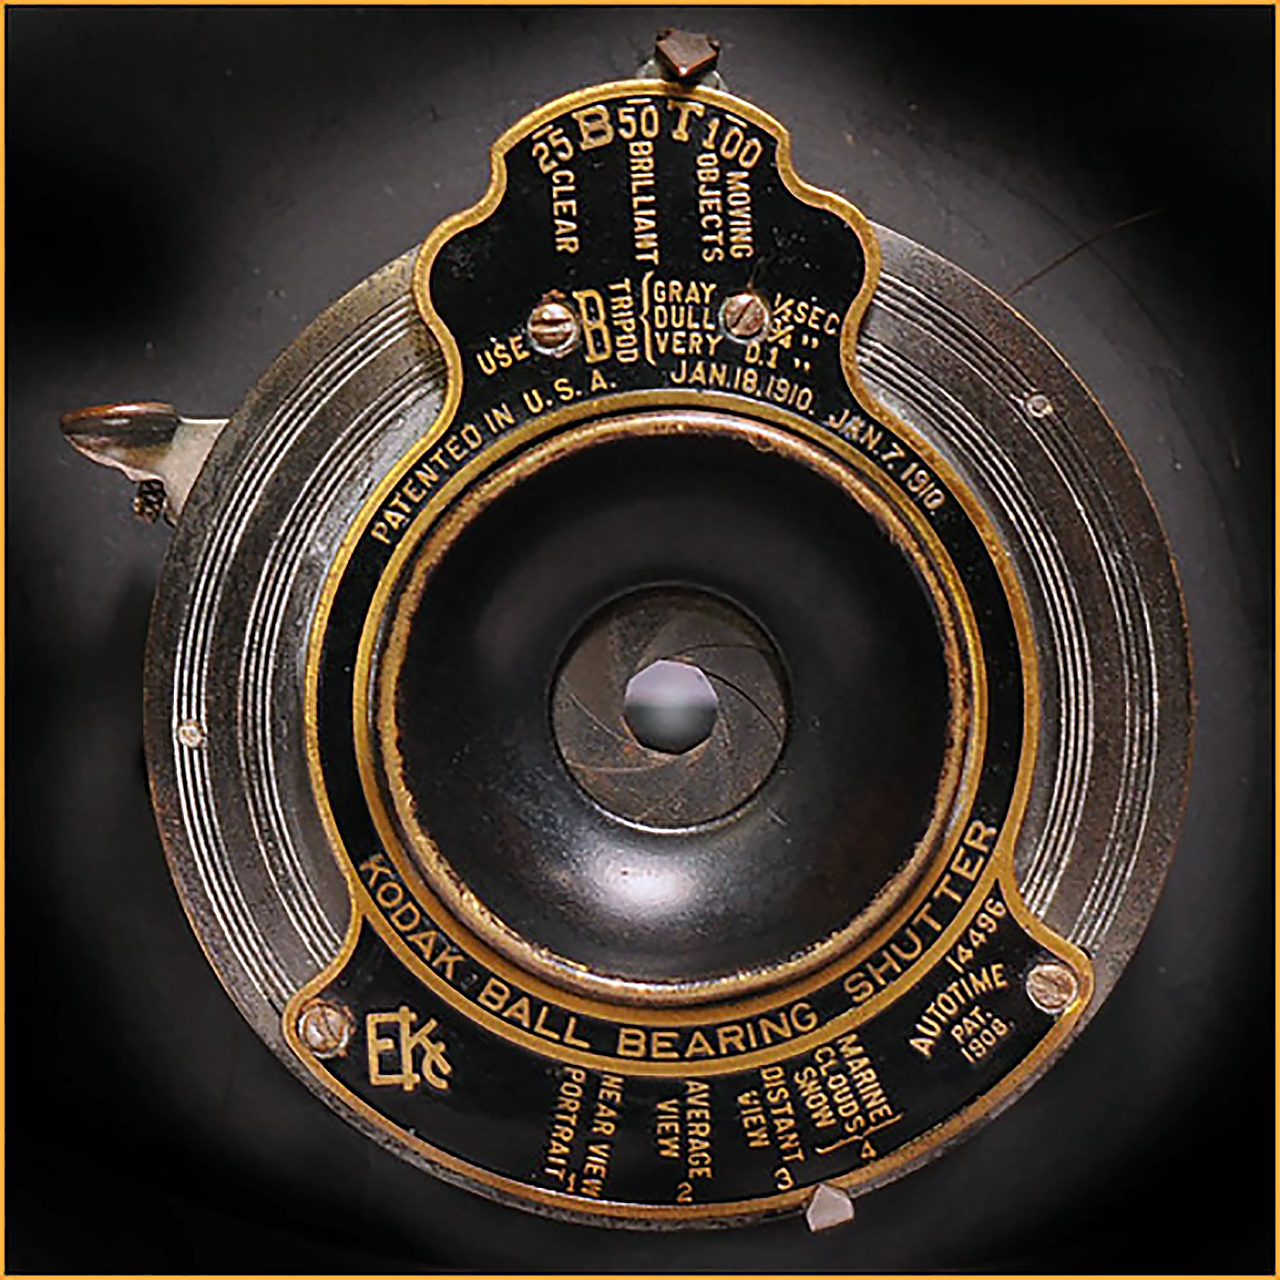
The figure above shows an Autotime fitting, the shutter has settings for Clear, Brilliant and Moving Objects, the iris settings include Marine, Clouds, Snow, Distant View, Average View and Near View (Portrait). These autotime scales features for Camera shutters were also marketed as a separate set.
A few more images of exposure tables
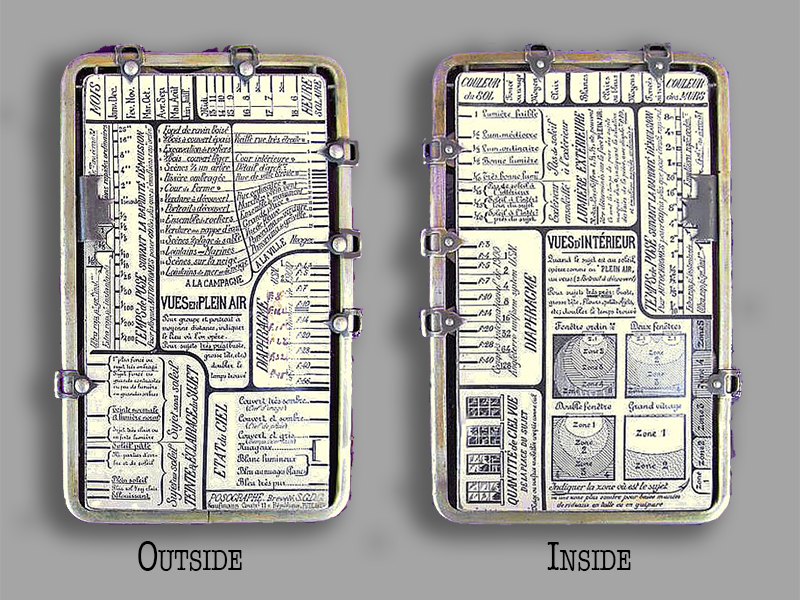
Probably the most beautiful of all exposure tables, about the size of a postcard, comes from France, manufactured by KAUFMANN, Puteaux, France in 1922. A lever system is housed in a brass frame between two celluloid tables. It was available in several languages, including French, German, English and Italian.
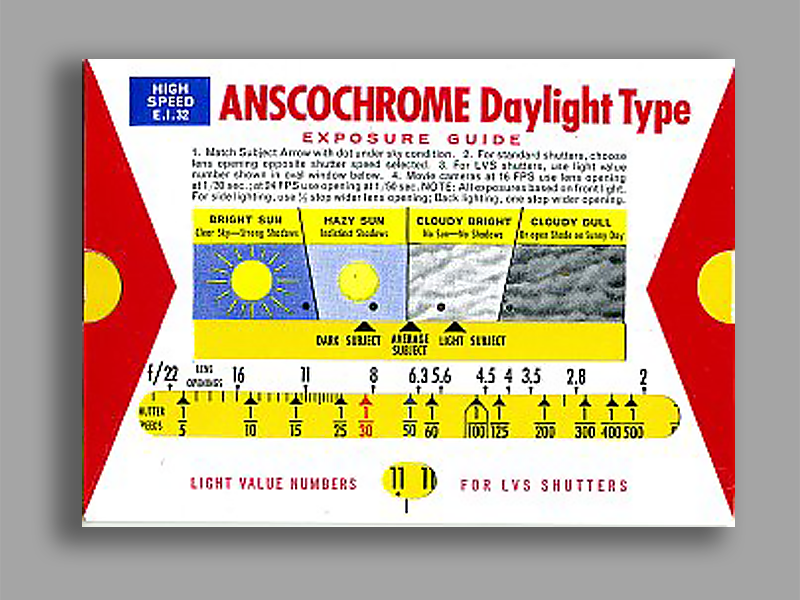
Simple slide rule exposure table with exposure values for the Anscochrome reversal film in daylight and for flash. Publisher is ANSCO, Binghamton, USA, in the 1950s.
The setting is made for three different motifs and four lighting situations. Exposure values can be read directly on the calculator disk.
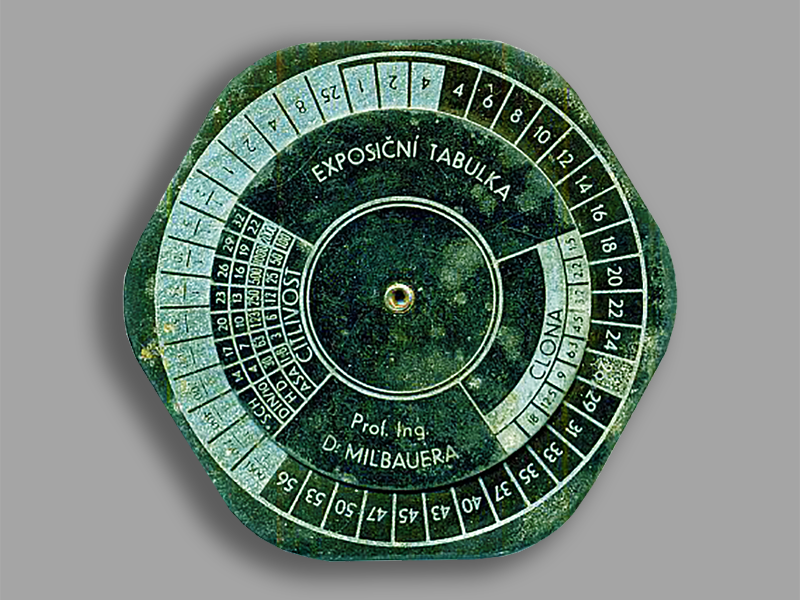
Exposure table in the form of a hexagonal calculator in Czech according to Prof. Ing. Dr. Milbauera. The table made of black printed tinplate dates from around 1940. It works according to the usual step-by-step process for table discs.
Values: Sensitivity 14-32° shiner/ 4-22° DIN/ 30-2000 H.&.D./ 1.6 – 100 ASA; Times: 56 min – 1/1500.
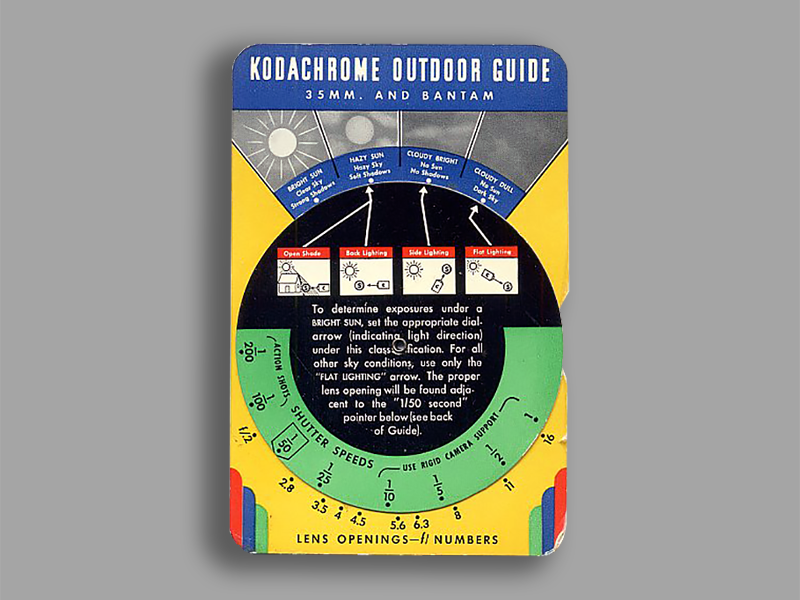
As a film manufacturer, Kodak has released a number of different exposure tables over the years. Here is a handy turntable table printed on glossy paper from the 1940s by Eastman Kodak Co, Rochester N.Y. The values apply to 35mm and bantam films. Values: Sensitivity for Kodachrome film (10-16 ASA); f/s 2-16; Times 1-1/200 sec.
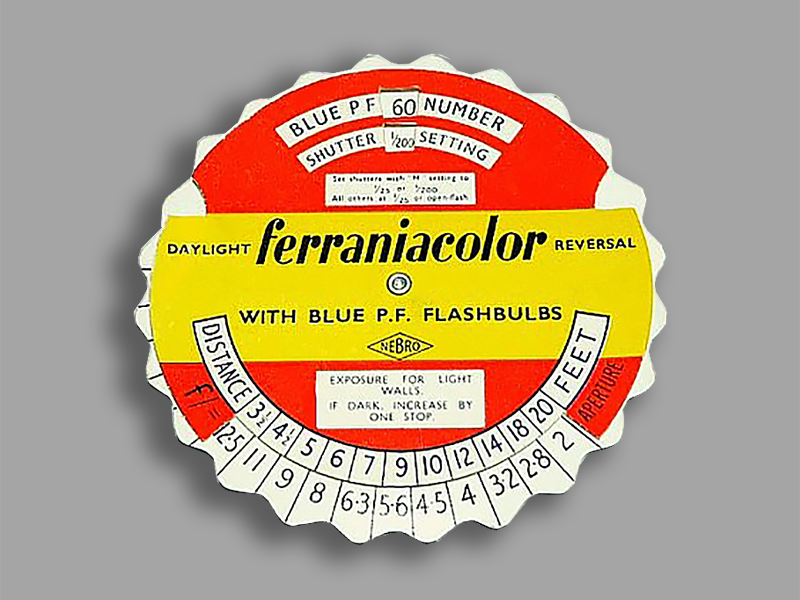
In the 1950s, the Italian film manufacturer Ferrania offered a pretty cardboard calculator for its color reversal film Ferraniacolor. The disc enables exposure calculation for photoflood flash lamps. On the front and back there are three calculators for blue flash lamps or for 2 normal flash lamps with a corresponding NEBRO correction filter.
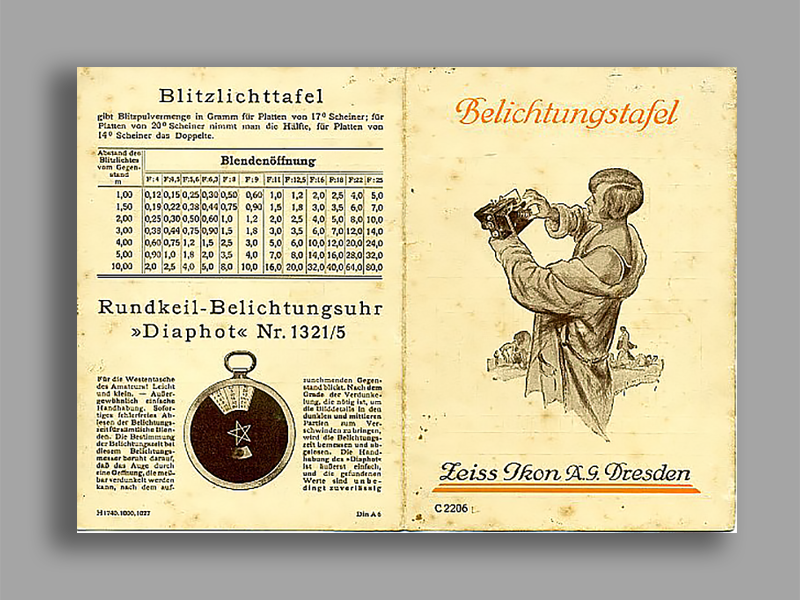
In addition to many photo shops and publishers, every self-respecting photo manufacturer also had a table ready. Here is one from Zeiss Ikon from 1927; At the same time, it promotes the Diaphot light meter. Values: plate sensitivity 8-21° shiner/40-930 H.&D.; Values: plate sensitivity 8-21° shiner / 40-930 H.&D.; Times 360 min.-1/1500 sec.
This chemical light meter in the form of a round disc was probably the most widespread of all measuring aids of this type in Germany in the first two decades of the last century. The photo paper is inserted after opening the housing. After each measurement, the housing ring must be rotated to an unused area of the photo paper. The capacity is sufficient for around 300 exposures. The manufacturer was Heinrich Klapprott, Hamburg, who later also manufactured the well-known “Autoknips” self-timer.
Group 2
Chemical/optical meters (actinometers)
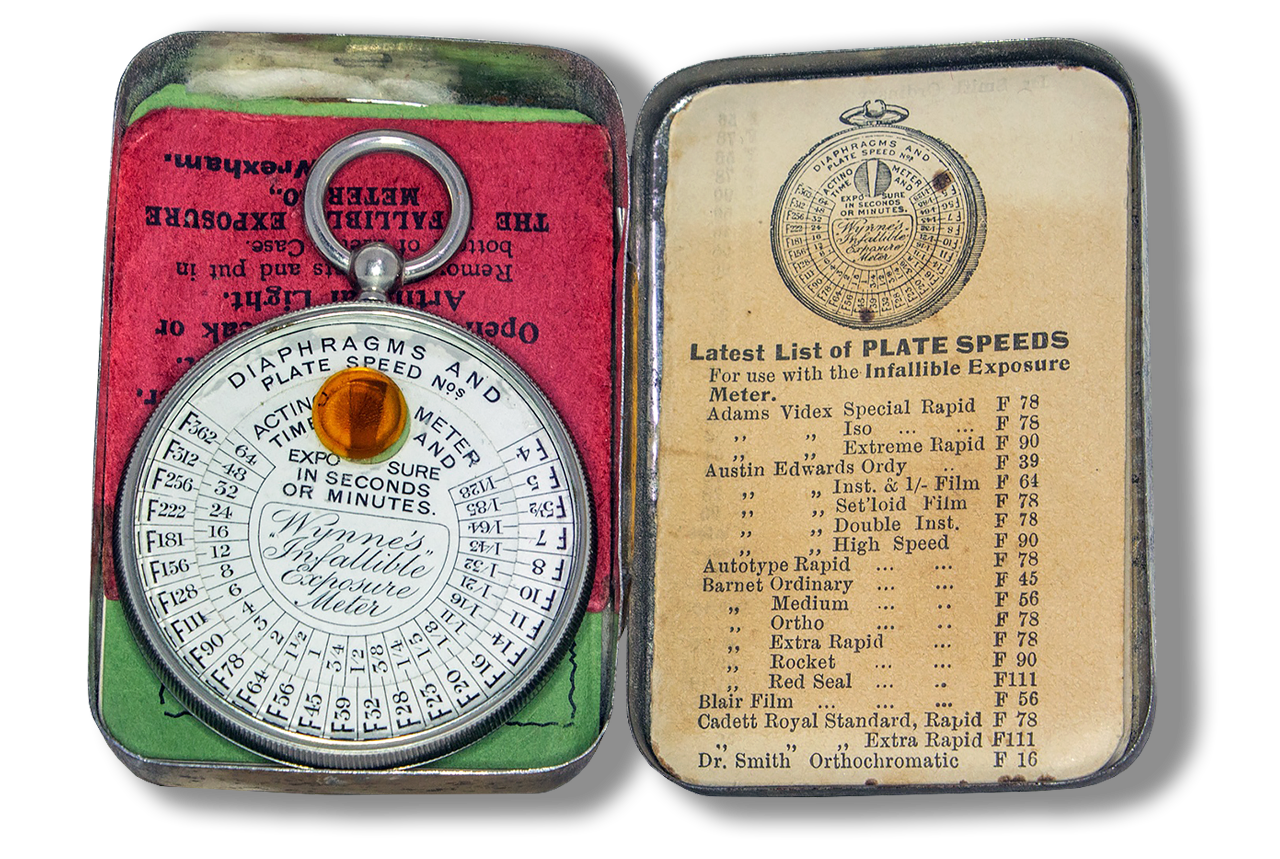
When you open the tin box of the Wynne’s Exposure Meter the contents are arranged like so: Film Speed Card in the cover on the right, the Manual, “Deadmatch” papers and Meter in the box on the left. With the Amber Disc covering the window thru which the photo sensitive paper is exposed. The Amber Disc can be moved to the side to measure light intensity. Photo paper is in the middle wedge and standard density patches are on either side of it.
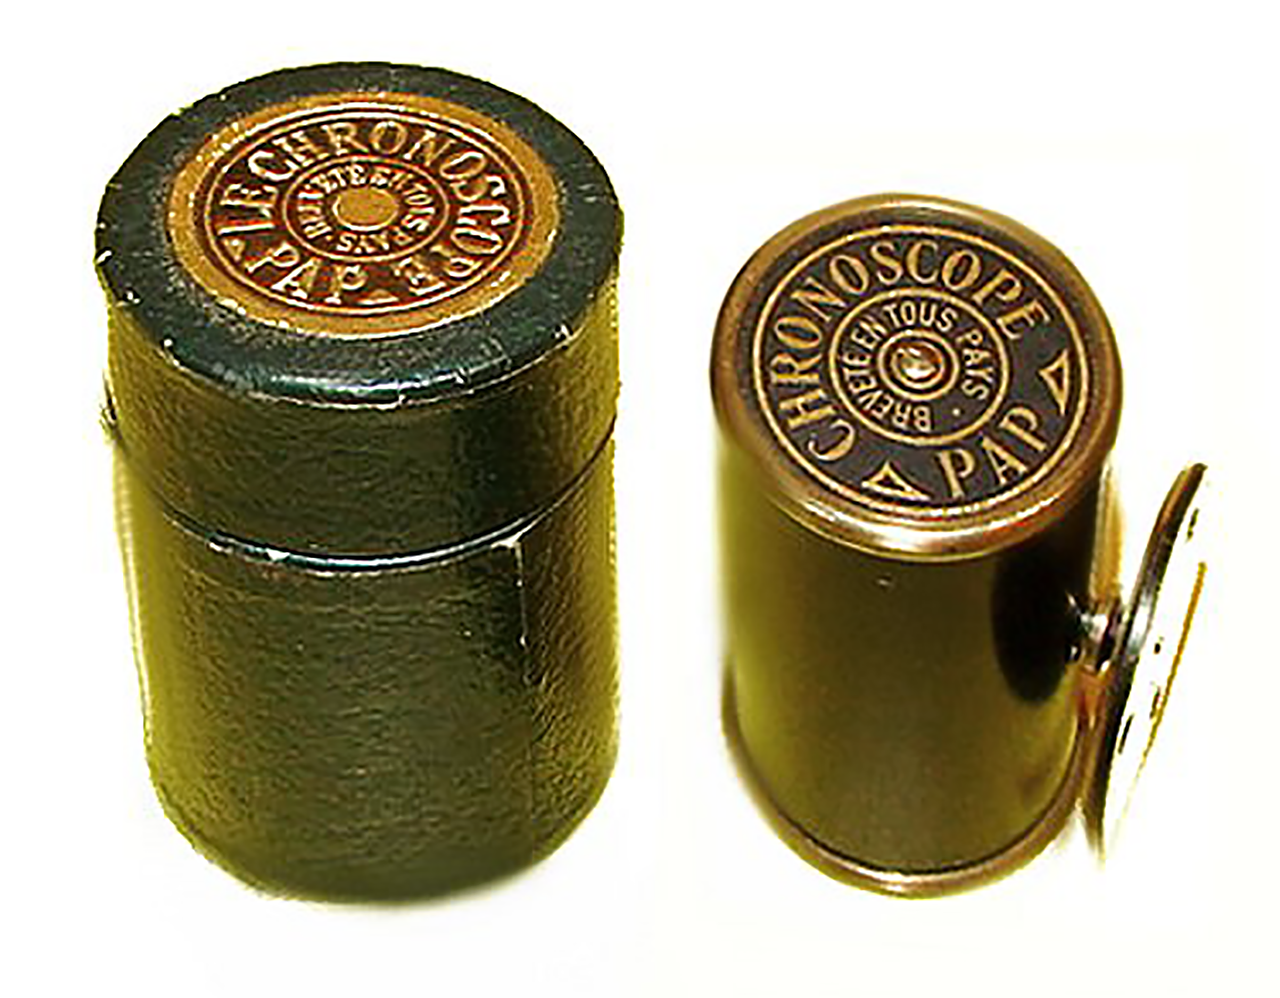
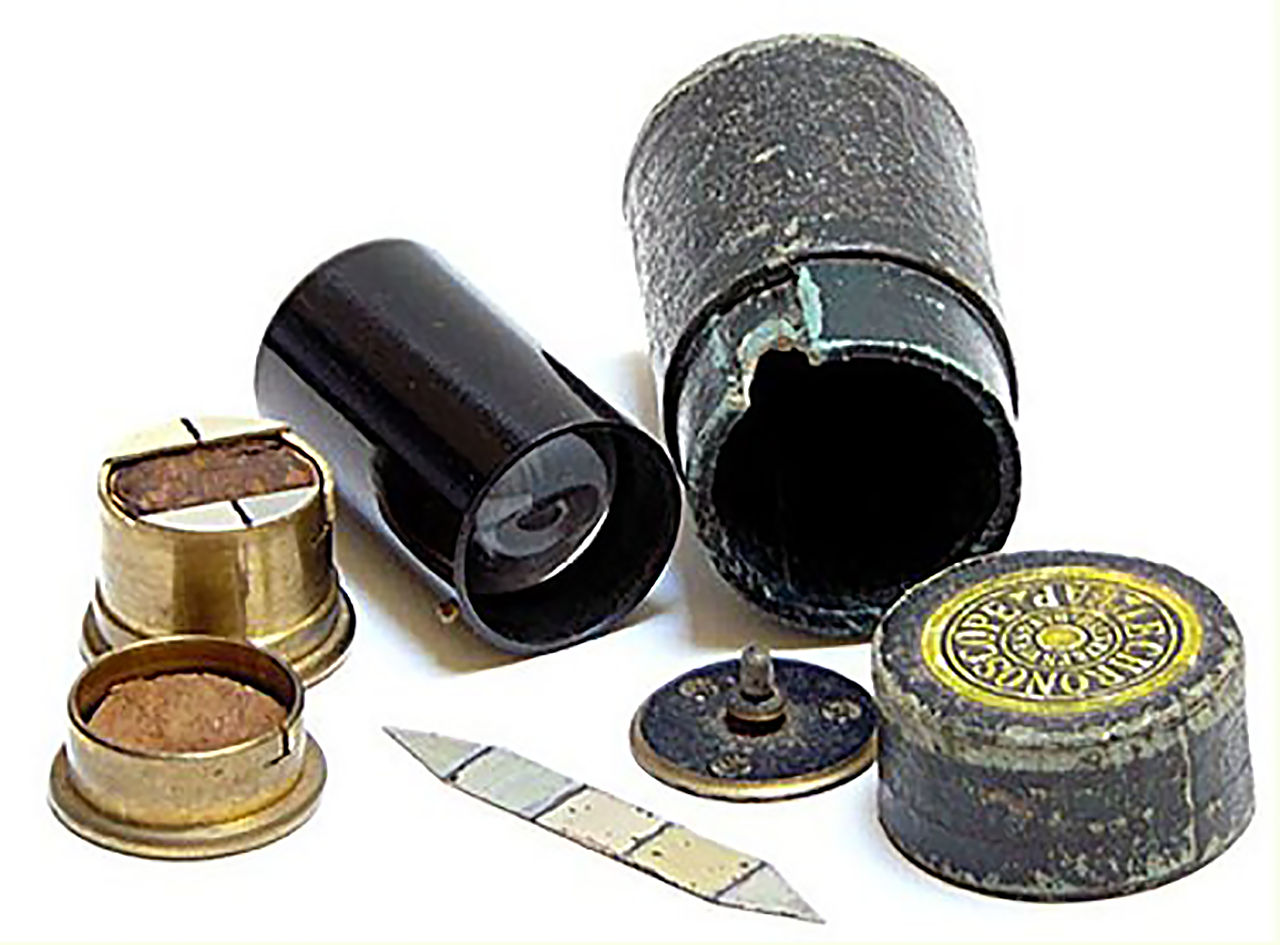
The Chronoscope PAP (Photomètre Automatique Parfait), from Lumière France, is a cylindrical, unusual light meter that – like a camera – images the subject image onto photo paper via a lens. The actinometer time and thus the exposure are determined using the 4 standard colors available next to the paper strip. The Chronoscope PAP, developed by Paul Boucher, was offered by Lumière Paris around 1910.
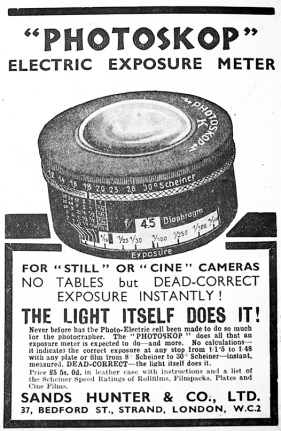
An early photoelectric meter advert from 1935.
a few More details
Optical exposure meters can be found in many different embodiments. The function of some fiddly parts is hard to tell; they are more like a broken tape measure… Some allow the subject to be observed in the measuring window and are adjustable, many only show scales with values. Others can be operated like later electric hand-held exposure meters.
An unusual variation was the Chronoscope which produced a small paper negative of the subject. The working principle corresponds to that of other photometers, but the “measuring process” is more complex.
There is a lens behind a cover on the front and a pack of silver bromide paper on the back. The lens produces a small paper negative with the motif on the photo paper. The resulting image is compared in dimmed light with the standard color tones on the paper magazine. The exposure values are determined from a table using the appropriate color tone and the actinometer time.
In all of them, however, the results depend largely on the human eye and how well the user is able to estimate brightness values in comparison. If this is achieved through practice and concentration, surprisingly precise exposure values can be determined.
Early, commercially available actinometers were by Woodbury (1879, primarily for carbon printing), Green & Füidge of 1884 and the Watkins Standard of 1890. The Standard was the first of a number of meters from Watkins, it included a subject scale and on the enlarging model a scale for bellows extension. The second form, density wedge actinometers, came to be used as darkroom print meters.
Working of anY actino meter
In an Actinometer a small test exposure is made on sensitive paper. The usual arrangement is for the paper to be exposed until its density matches that of a comparison density. A second form was for a set exposure to be given to a strip of paper under a variable density wedge.
A fresh piece of photographic paper was required for each measurement. The devices were set up in such a way that the inserted photo paper was moved a little further using the crown or by turning the upper and lower housing parts.
Nevertheless, the supply in the meter was quickly used up; replacement paper was cheap, but had to be reloaded in the dark. A dozen or more measurements could be made with a single disk of sensitive paper. Extra disks came with the device in a red pouch marked “Rapid Deadmatch Paper”. At Wynne’s, replacement paper for 300 exposures cost 80 centimes in Switzerland. In addition, the light-sensitive and heat-sensitive paper could not be stored for an unlimited period of time and measurements therefore only yield usable values when the paper is fresh.
The eye was much more accurate
But, whatever such auxiliary devices were particularly widespread in the years after the First World War and well into the 1950s. They were inexpensive to produce and were sometimes offered with sensational advertising slogans. But it wasn’t just the price of photoelectric light meters, which was often prohibitively high for the common photo amateur, that enabled their inexpensive optical counterparts to have a long life.
Electric light meters were initially quite insensitive in low light. Optical light meters offered a good addition here due to the high adaptability of the human eye, even to low levels of brightness. There are also combinations of optical and electrical exposure measurement in one device (Bertram BEWI). Optical light meters were also integrated into cameras, the best-known example being the first Braun Paxette (1949).
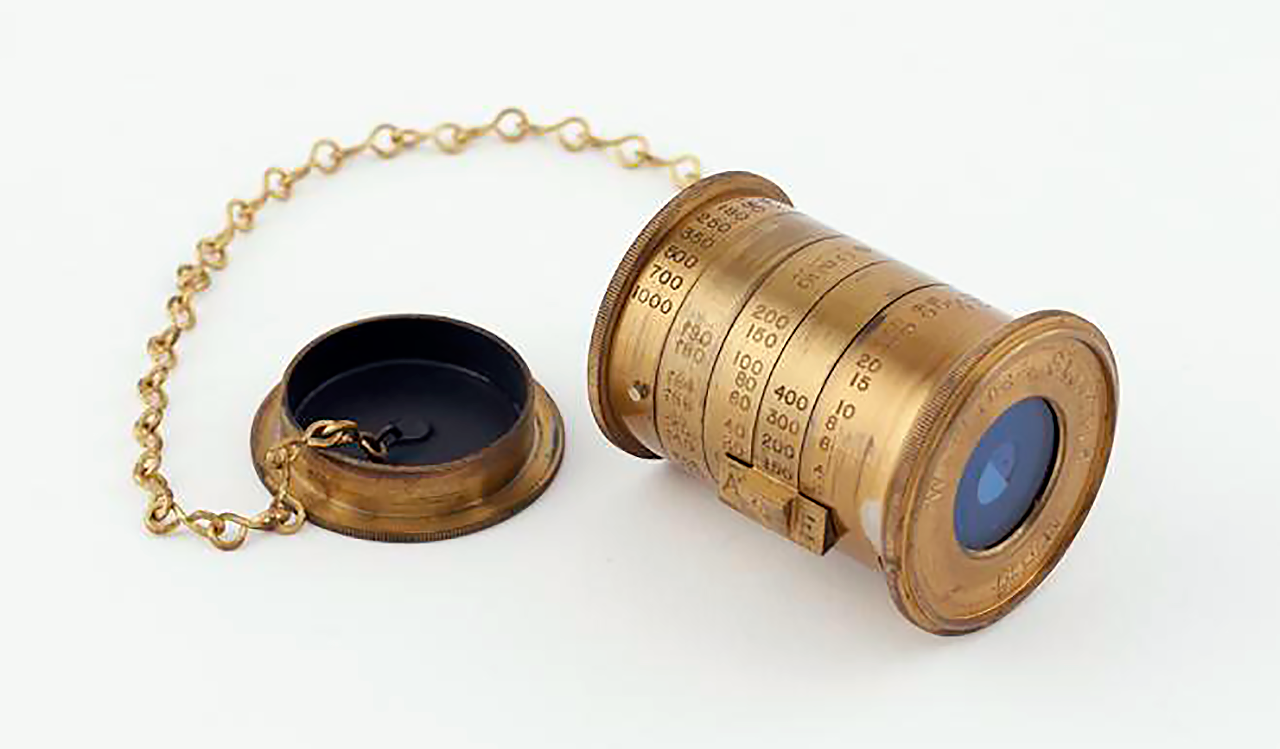
The Standard Exposure Meter made by the Watkins Meter Co. in around 1890 was the first of a number of meters from Watkins. It included a subject scale and on the enlarging model a scale for bellows extension. The Standard Meter was at first made by R. Field & Co. of Birmingham; the Watkins company took over production in about 1900. The later Watkins Bee Meter is smaller, and shaped like a pocket watch, but its principle is the same.
(all information taken from https://flynngraphics.ca/wynnes/)

So how did this Exposure Meter work? The simple answer is that a piece of photographic paper is placed beside a standard color patch and exposed to the ambient light. It is then timed to see how long it takes for the paper to darken to the color of the standard patch. This time is called the “Actinometer Time” in the Wynne’s Manual. You then look at the list of film speeds on the “List of Plate Speeds” that comes with the meter. The “F” number given is the f/stop to use if you expose the plate or film for the measured Actinometer Time.
On the Meter, which is shown above left, you will see at the twelve o’clock position an amber disk. This is a safe light cover over a wedged shaped hole through which the photo sensitive paper is exposed to light. By pushing on the disk the front glass rotates exposing the paper. On the right side of the opening is the standard color and on the left is a lighter standard color for measuring lower light levels. These never change. By rotating the back of the device a fresh unexposed portion of the test paper will be moved under the window.
To make a measurement have the amber disk uncover the open wedge shaped window, rotate the paper to a fresh patch, then begin timing from the time you move the amber disk to the side till the color matches the Standard Color patch (middle picture).
And now for the magic bit: turn the glass on the front of the Meter, which rotates the outer scale, and line up the Actinometer Time with the Plate Sensitivity “F” number and you can read all of your shutter speeds and f/stops on the dials. This all sounds pretty neat, but, it is slow and the reading can take several minutes. And comparing two colors can be tricky. But it must work because these meters were sold from the 1890’s through to the 1930’s.
six more images of actino meters
(all information taken from https://photobutmore.de)
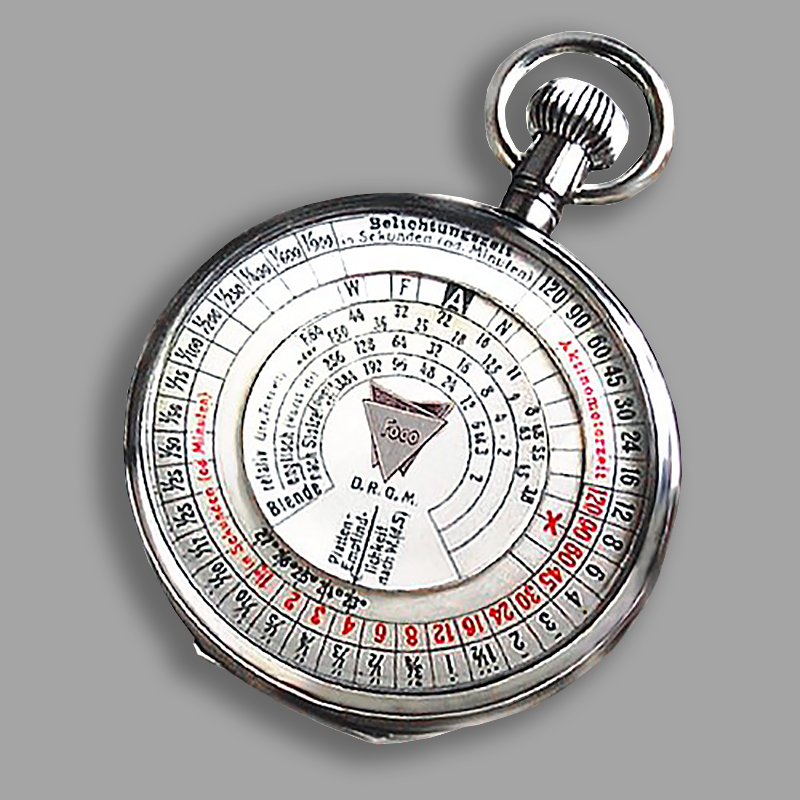
This Foco exposure timer in the popular pocket watch design is manufactured by Emil Wünsch AG, Dresden. A patent for this was granted in 1922. The procedure corresponds to the usual adjustment of an actinometer time for bromine silver photographic paper. The “measuring window” for photo paper is on the back. Since this exposure clock was only offered comparatively late, it is not widely used.
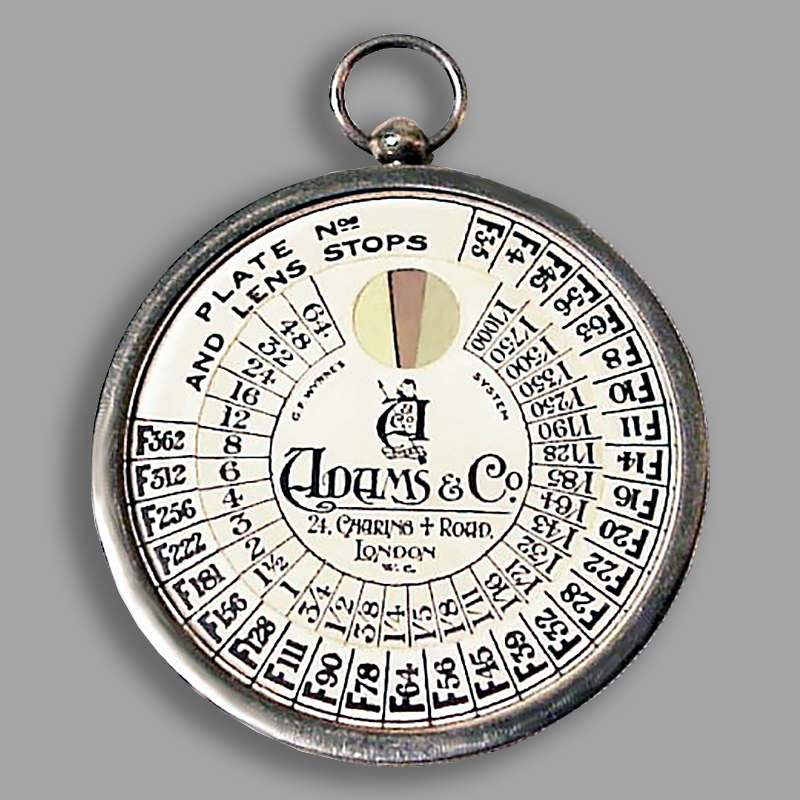
This Adams Photographic Exposure Meter is largely identical to the Wynnes Exposure Meter and is also housed in a pocket watch case filled with photographic paper.
The manufacturer or sales company was ADAMS & Co., London W.C. It is probably a licensed edition of the “Wynnes”. The (English) aperture scale starts a value earlier at F 3.5 and, like the Wynnes, extends to F 362. The time range is also extended from 64 to 1/1000 s.
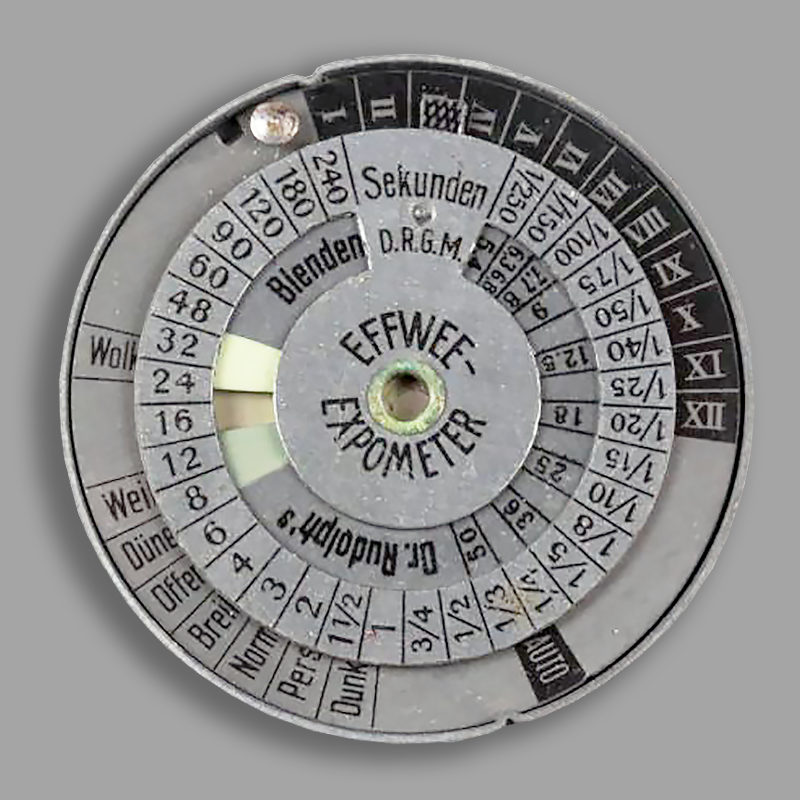
The Effwee expometer was also available in disk form with a rotating measuring scale into which the photo paper had to be inserted. This version also worked with Dr. Rudolph’s aperture values (3.2-50) from 1914. Manufacturer and sales Friedo Wiesenhavern, Hamburg. Exposure values between 4 minutes and 1/250 s can be read on the device. The aperture values according to Dr. Rudolph correspond to the later Leica apertures.
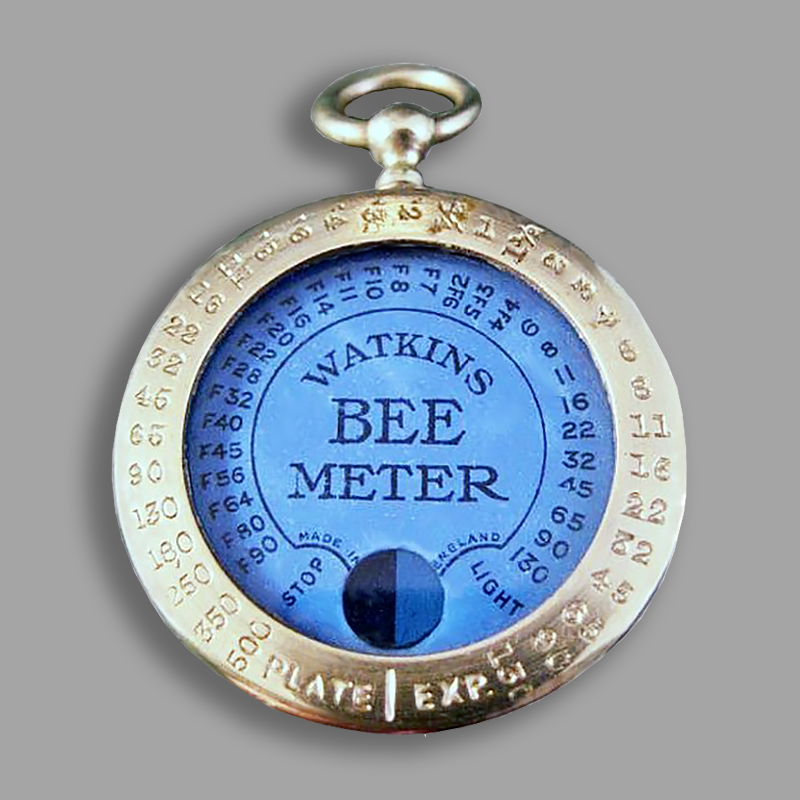
This Blue Bee Meter from Watkins Meter Co., Hereford, England follows the trend of using a blue lens for exposure determination. This was primarily intended to accommodate the yellow filters which were currently widespread. The way it works – with photo paper – corresponds to the usual way of these photochemical actinometers. It probably dates from around 1915/1925. The scales correspond to the normal Bee meter.
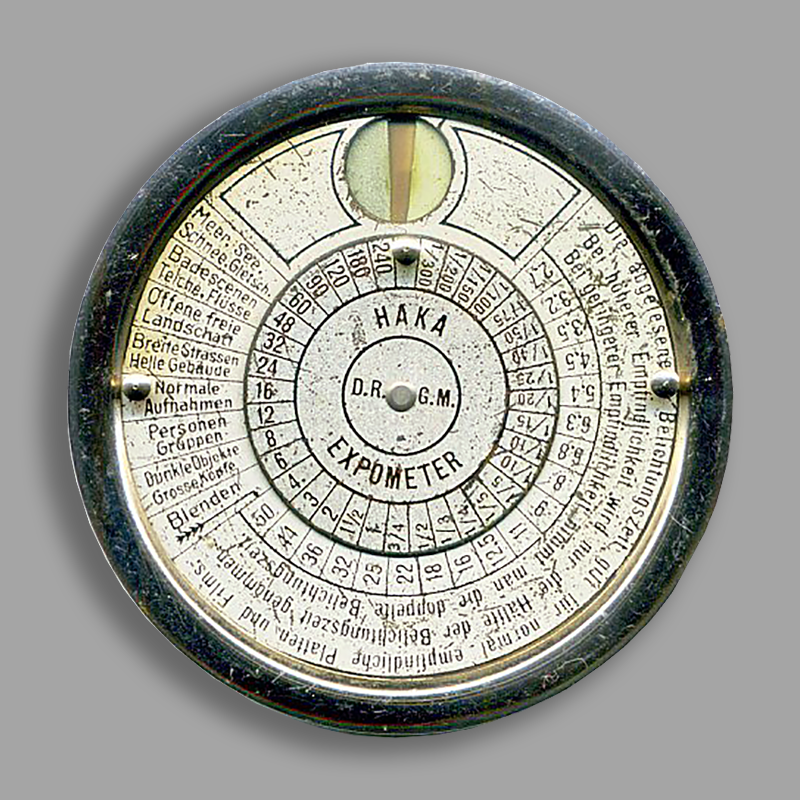
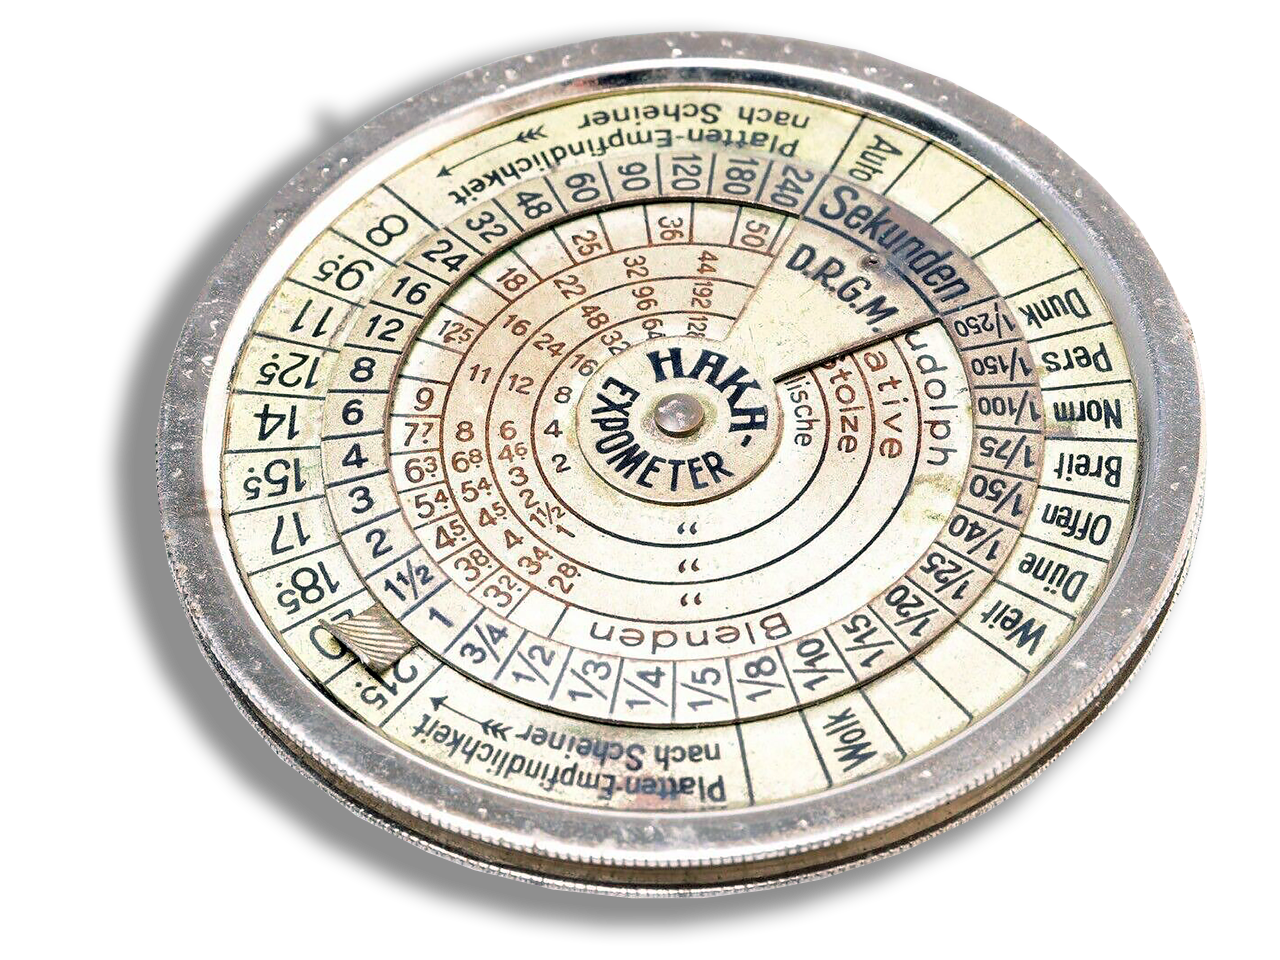
This version of the HAKA Expometer has a round Ø 57 mm, shiny chrome-plated calculator disc and was offered after the First World War until 1928. The values apply to “normal” sensitive plates, half the values apply for higher sensitivity and double the values for lower sensitivity. In this version, the measuring window and the calculator disk are together on one side. The back is bright chrome-plated.
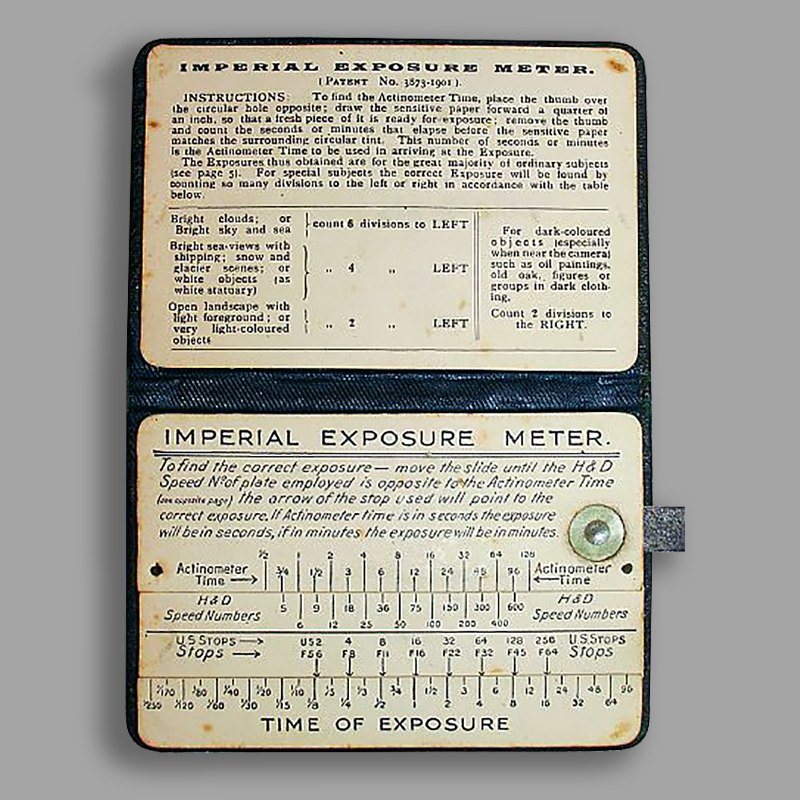
This is a Photometer from Imperial Dry Plate Co. Ltd, London (around 1900). It is a chemical exposure meter in the form of a folding pocket table. The photo paper strip is inserted to the side before each measurement in order to determine the exposure time in the round window with the yellow-green comparison frame. The cardboard tables with the slide rule strips glued into the leather case are not designed for intensive use.
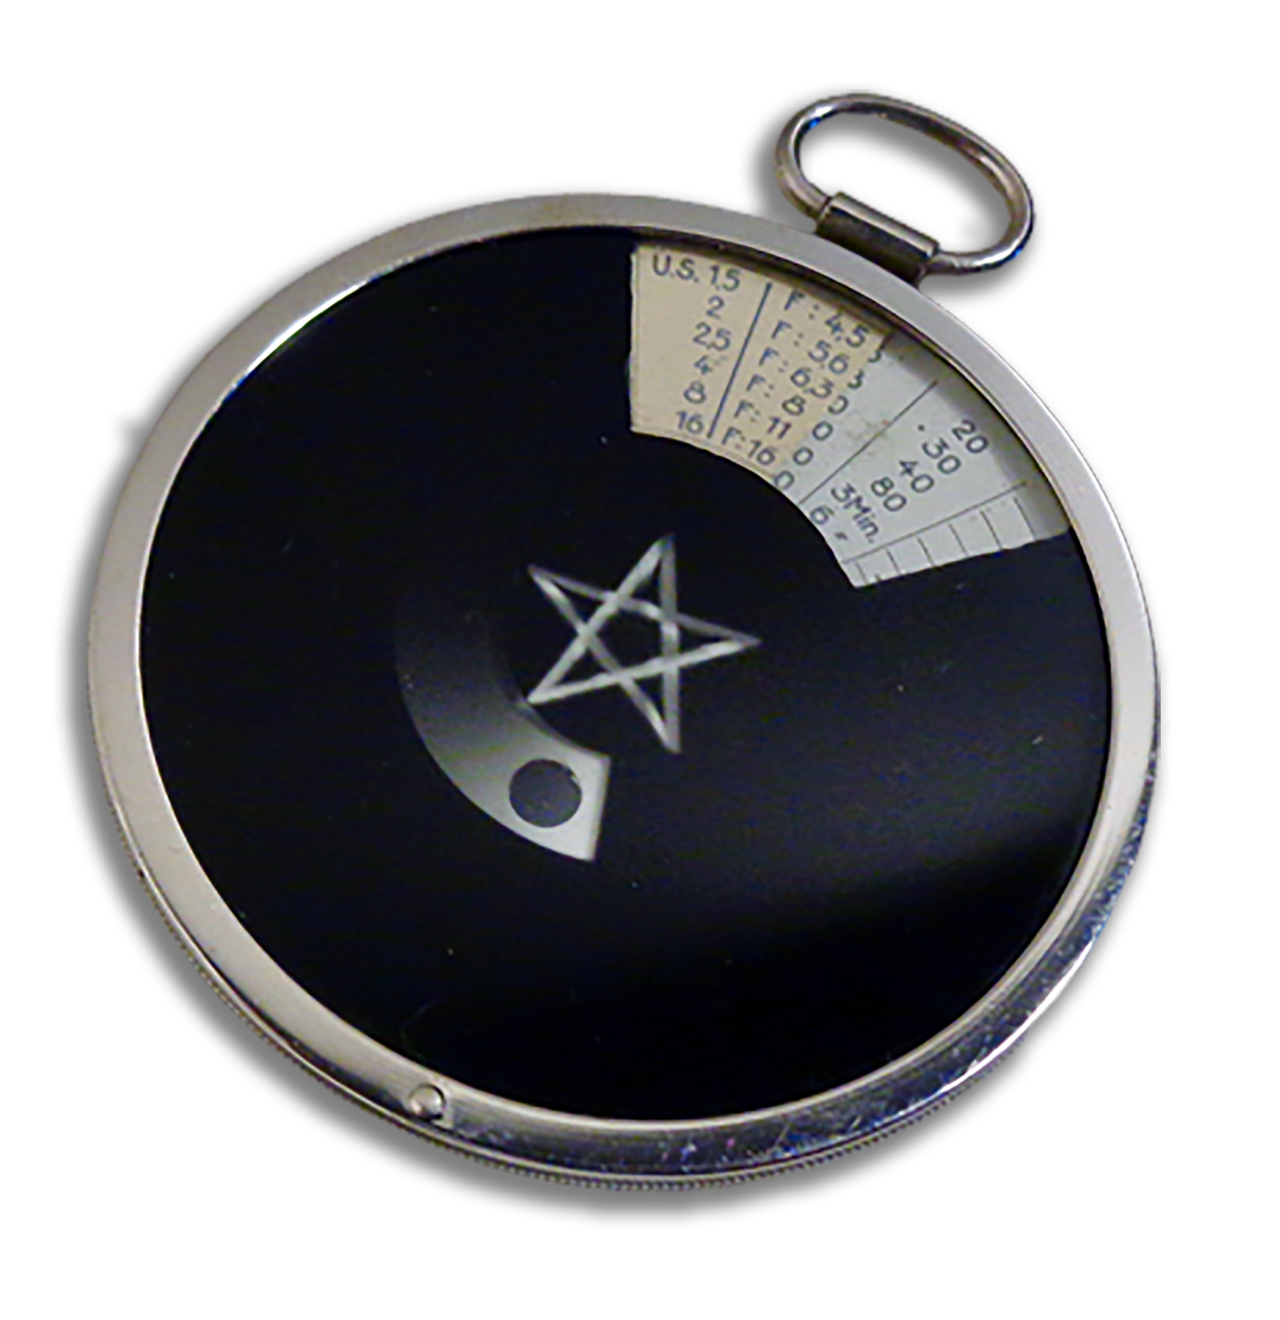
In 1921 ICA in Germany created the elegant Diaphot. This slim watch shaped meter used a blue filter and a wedge that could be rotated across the field of view until the scene shadows just disappeared. In 1926 ICA was merged into the newly formed Zeiss-Ikon group. After the merger ICA became the accessory maker for all the Zeiss Ikon companies. The Diaphot ICA created was rebadged Zeiss Ikon and continued manufacture through 1934. From 1936 to 1940 a more modern version was manufactured and sold.
Group 3
Optical extinction & comparison meters
A popular design to aid the photographer in his pursuit of the correct exposure was the extinction meter. This device relied on eyesight and utilised a variable density filter with a series of numbers. The photographer looked through an eyepiece or tiny aperture as a filter was slowly moved across the field of vision until the number that just ceased to be visible (became extinct). A dial or table would convert the just extinguished reading to a choice of aperture and speed based on the plate or roll film being used.
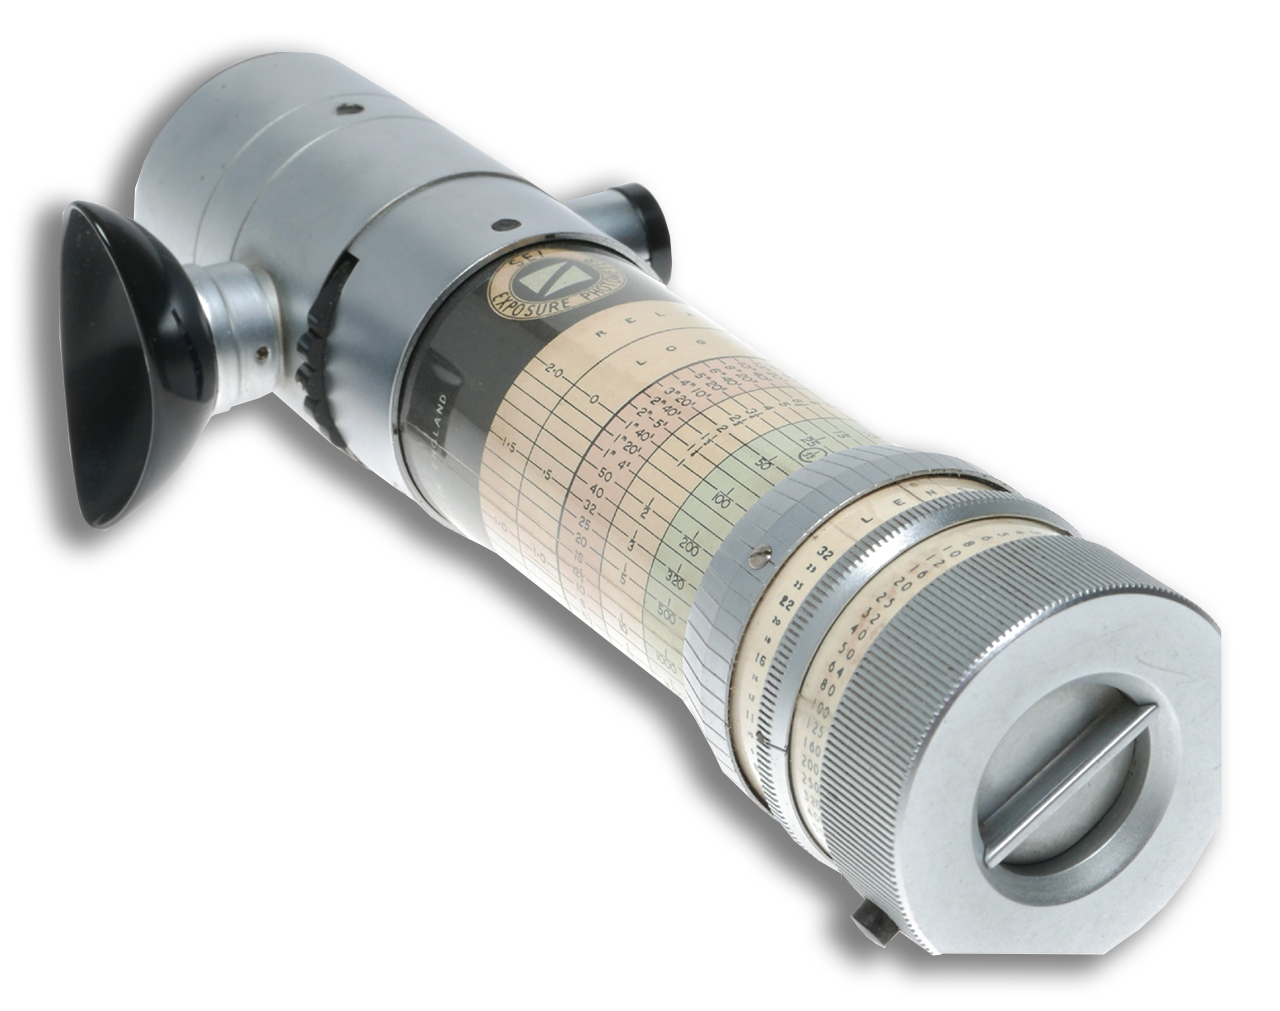
Patented in 1885, the first comparison photometer to be designed for photographic use incorporated a candle. Later devices, however, mostly used electric bulbs run from a standard voltage. The S.E.I. (Salford Electrical Instruments) Photometer was distributed by Ilford Ltd. from 1948 and (in the U.S.A.) by The Zoomar Corporation. Essentially the Photometer is a comparative method of light intensity estimation, whereby a standardised light intensity, created by an internal lamp, is matched by eye to the light intensity of the subject. It works over a narrow angle of view so can take very detailed ‘spot’ readings. It can be a very accurate, but slow, exposure metering process.
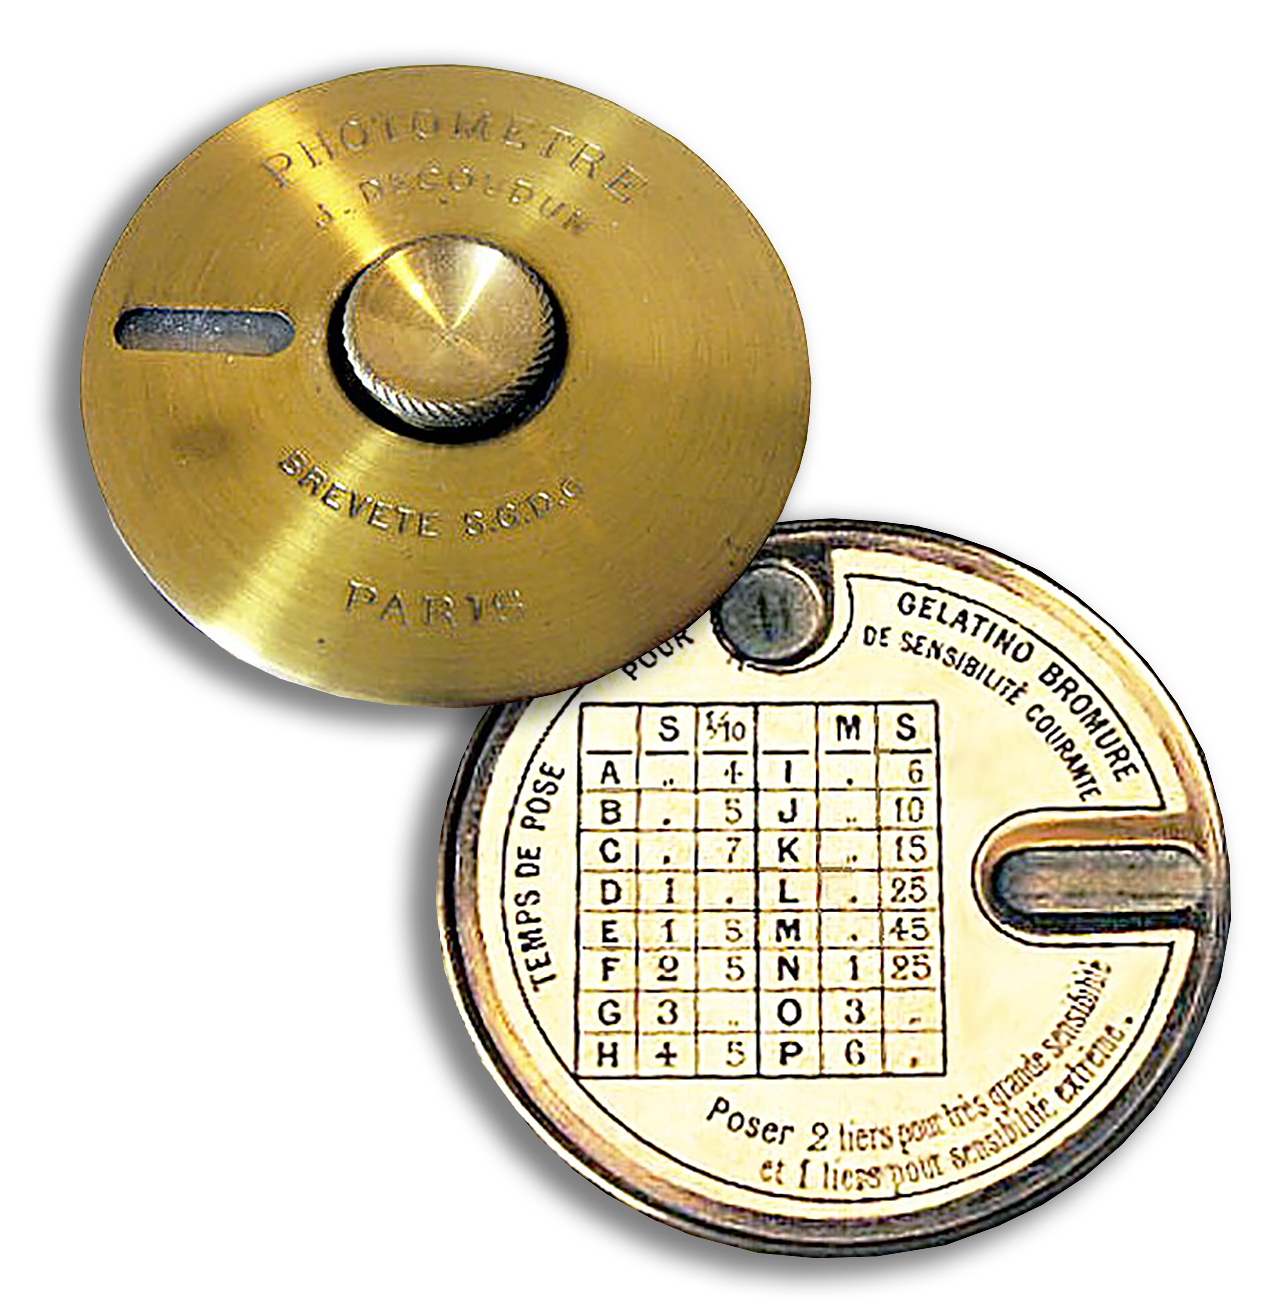
This historic device named after its designer J. Decoudun, can rightly be called the first TTL light meter. In contrast to the case engraving of the round piece sold by Jules Decodun, Paris, it is an actinometer. The extinction meter (density meter) in a solid brass housing with 66 mm Ø allows exposure to be determined on a comparative basis.
The handling was as follows: the device was held with the scale side against the focusing screen of the camera. The knurled knob was then turned until the color of one of 16 holes (labeled with letters A-P) in the oval window matched the comparison value. The letter found in the window indicates the exposure time on the scale. The respective aperture value is determined by the lens setting – the measurement is TTL. The exposure times that can be determined in this way range from 6 minutes to 4/10 seconds; this corresponded to the sensitivity of the plates available at the time.
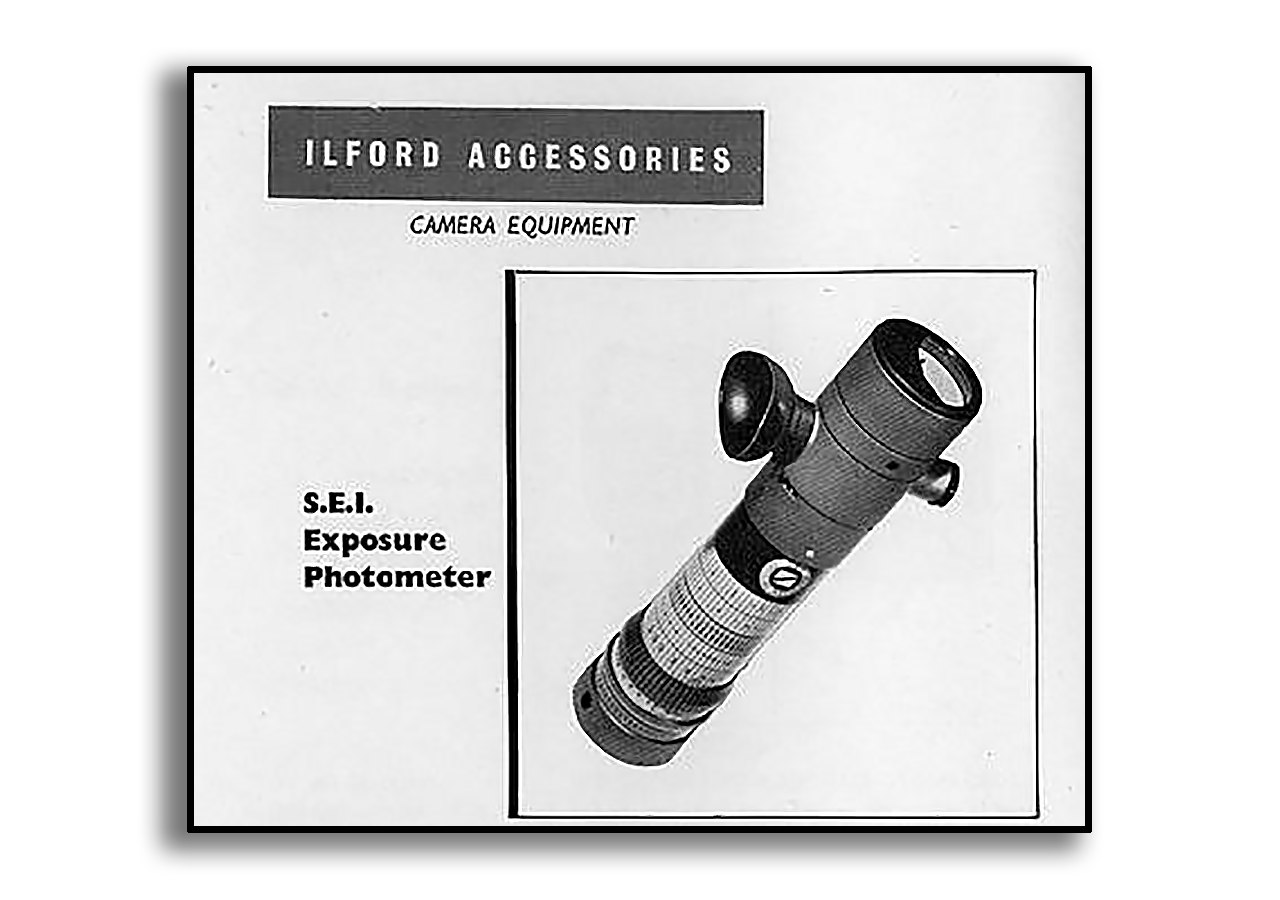
Text and Pictures from Ilford’s 1952 General Catalogue Section Eight-B: Accessories for Professional Photography:
 The S.E.I. Comparison Photometer is an extremely versatile scientific instrument for the precise determination of photographic exposures, brightness values, and, in conjunction with the accessories described on page 9 of this catalogue, for the measurement of transmission and reflection densities.
The photometer has a brightness range of 1:1,000,000 and readings can be made at a distance over a very narrow angle of view (½°), thereby enabling exposures to be calculated precisely by the brightness range method. It is suitable also for measurement of printing exposure times. The instrument has its own comparison lamp illuminated by a battery contained in the body, and a standard brilliance is controlled by means of a micro-ammeter with rheostat control.
Colour and neutral density filters are incorporated to allow for different types and different strengths of illumination. Exposures can then be read off directly in terms of shutter speeds and lens apertures whilst two other scales are calibrated in log foot-lamberts and relative density respectively. Alternative settings are provided for the measurement of exposures in general photography by the shadow method or for exposures in reversal processes by the highlight method. A leather carrying case with shoulder strap is available. Price £4 I5s 3d (£4.76p).
Extinction meters
These are commonly found in two forms:
The eye looks into an eyepiece and focuses on a screen, the light reaching the eye is gradually reduced by an iris or density wedge, the meter is set when figures on the screen or part of the scene becomes indistinct. A blue filter is often used to eliminate colour from the screen. A problem with extinction meters was the eye’s ability to adapt to changing light levels. When looking into the eyepiece the eye will start to compensate for the lower level of light, the adaptation time varies but could take 30s or more. To overcome this part of the finder could be left bright thus controlling adaptation.
The open pattern is simply a set of figures of varying opaqueness set in a housing, the meter is held away from the eye. Experts are very critical of this type of meter and point out that the eye is constantly adapting to the changing ambient light, when using this type of meter the extinction wedge is judged relative to the ambient light to which the eye has already adapted. Any accuracy comes from setting the weather or sky condition scale which is usually present.
Extinction meters were very popular in the 1920s and early 1930s and remained on sale into the 1950s.
One of the earliest produced was by Decoudun (1887), this was unusual in that the meter was placed against the focusing screen of the camera to take a reading. Much later Franke & Heidecke produced an attachment where an iris was placed on the viewing lens of the twin-lens Rolleiflex camera, the extinction point was judged on the focusing screen. A variation was to record the intensity of light on a phosphorescent tablet and then place the variable density scale over it, this was proposed by Warnerke.
 An early tubular form of the meter was Tylar’s Pickard of around 1889. 1889. It contained a numbered or lettered row of neutral density filters of increasing density. The photographer would position the meter in front of his subject and note the filter with the greatest density that still allowed incident light to pass through. The letter or number corresponding to the filter was used as an index into a chart of appropriate aperture and shutter speed combinations for a given exposure value.
Comparison meters
In this type of meter the available light is compared to a standard source, usually an electric bulb. The earliest, commercially, was by H.D. Taylor (1885) which used a candle as the comparison light source, in other respects it was modern in its design, the scene was viewed through a blue filter surrounding this was a ring of light that was reflected from the candle, a set of sliding stops was used to adjust the light from the candle.
Phosphorescent material was used as the standard source in Ballard’s meter of 1890. It was exposed so as to be fully excited and attain a constant value. It was not used to record the level of light as when used in an extinction meter. A phosphorescent ring was used that, after being fully exposed to light, was shut into a tube and compared to the subject, both being seen through an eyepiece and blue filter. The time taken for the ring to dim to the same brightness as the subject gave a value for the light level. A meter sold as the Chromophot which looked very much like an extinction meter also used phosphorescent material to provide a comparison tint. Materials that emit light when acted upon by a radioactive source were also proposed.
The standard source could be reduced until it matched the subject by varying the voltage, introducing filters etc. Or the subject could be viewed under a variable density filter. These designs were never popular with amateur photographers but were used professionally as spot meters from the 1950s.
A better version, but larger and heavier and thus mostly used in laboratories, included some sort of light standard (like a little light bulb) that could be directly compared against an unknown. The user would dial a graduated filter or adjust an aperture until the unknown light source and the “standard” were judged equal. The settings used to make the adjustments could be looked up in a table or on a calculator dial to determine the amount of light seen. This method was still being used well into the 1970s as the highly regarded S.E.I. Photometer.
But all of these methods were subjective. They required the photographer to make judgements and interpretations. What many people wanted was an objective method to measure light—something that would be repeatable and not affected by optical tricks or judgement or human eyesight.
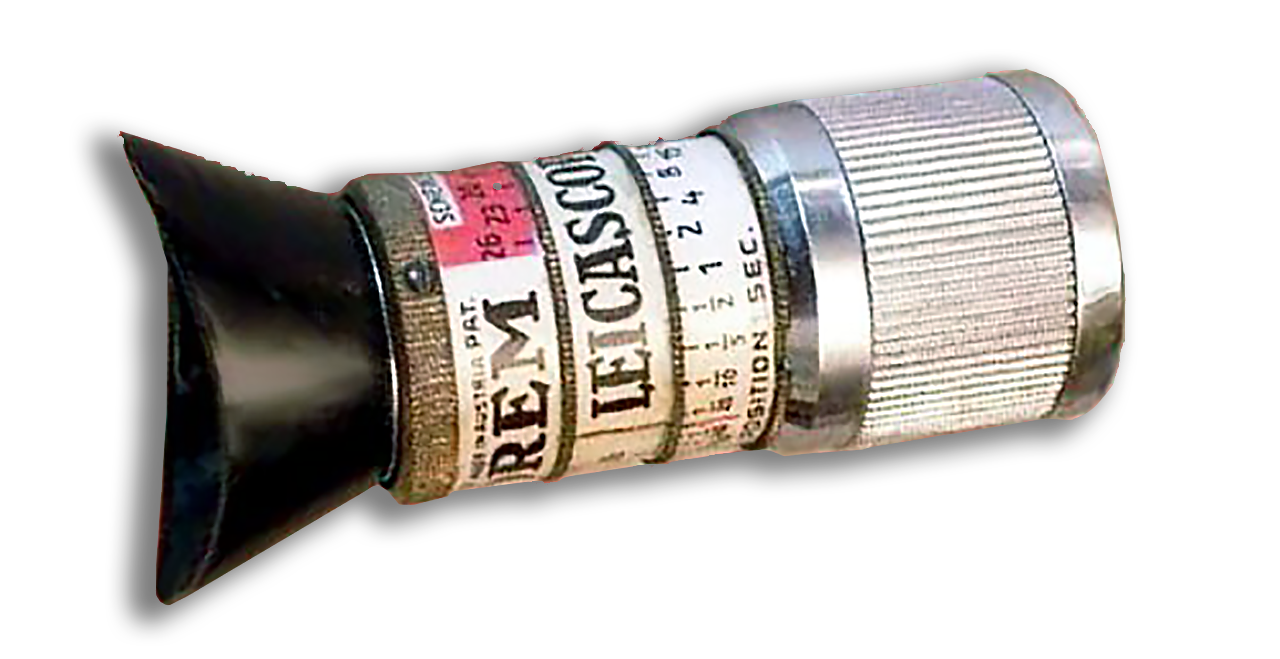
Like all exposure meters, the Leicascop Extinction Meter of 1932 was designed to provide a more accurate guide to setting the correct exposure for a scene or subject than making a wild or educated guess. While it may have had some modest success in achieving that goal, it was eclipsed in short order by two exposure meters that debuted in the very same year, the Weston and the Gossen, both of which were photo-electric meters that used selenium cells to generate a small current proportional to the ambient light level to calculate the proper exposure.
The Leicascop, was marketed worldwide by Leitz and manufactured by Drem of Austria. Today the Leicascop is a charming collectible that’s still perfectly usable, if not the last word in exposure accuracy and consistency.
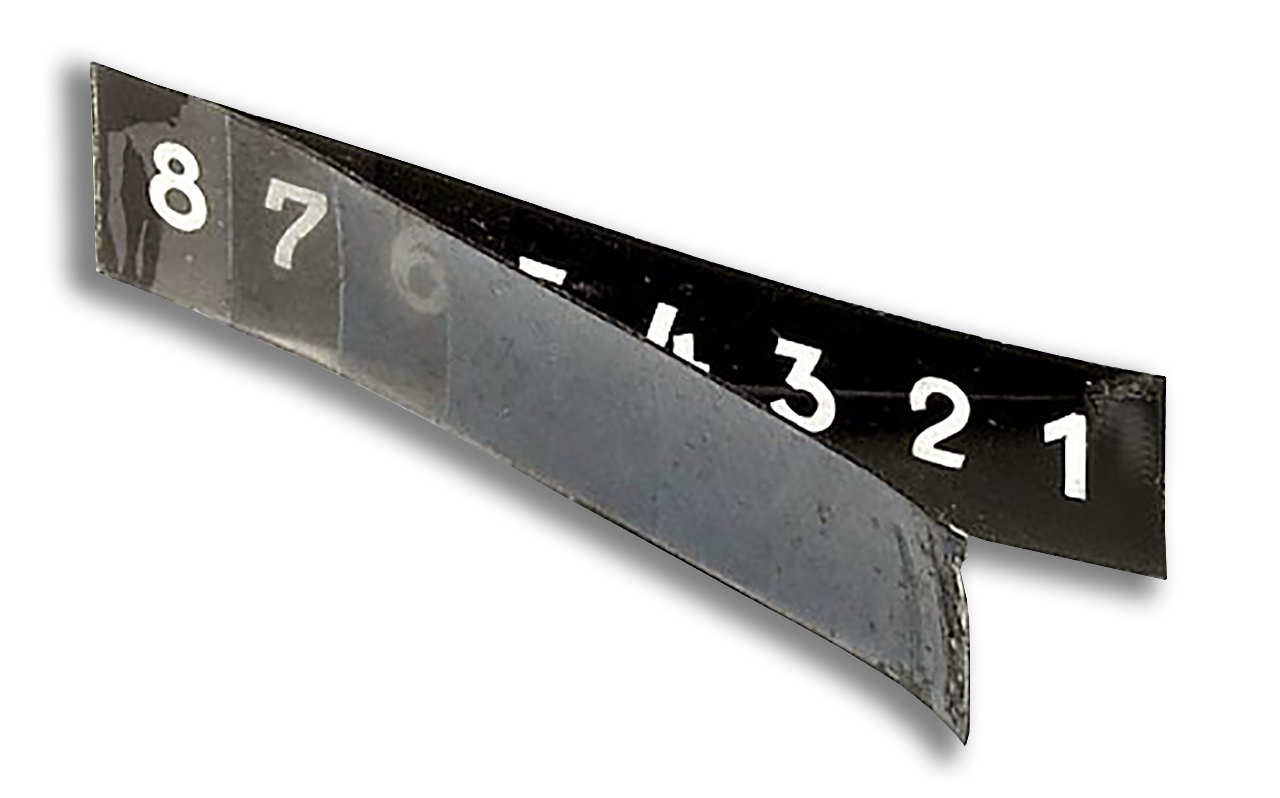
The photo above shows the measuring strip of an optical light meter, such as the one installed in the Braun Paxette. Actinometers, which could be operated like hand-held light meters, were also based on such a film strip. While the lower film has numbers or letters with the same density, the film above has different degrees of gray for each number. This means that the numbers are more or less visible (or not at all), depending on the light. The value that can just be recognized is then the “measured value”.
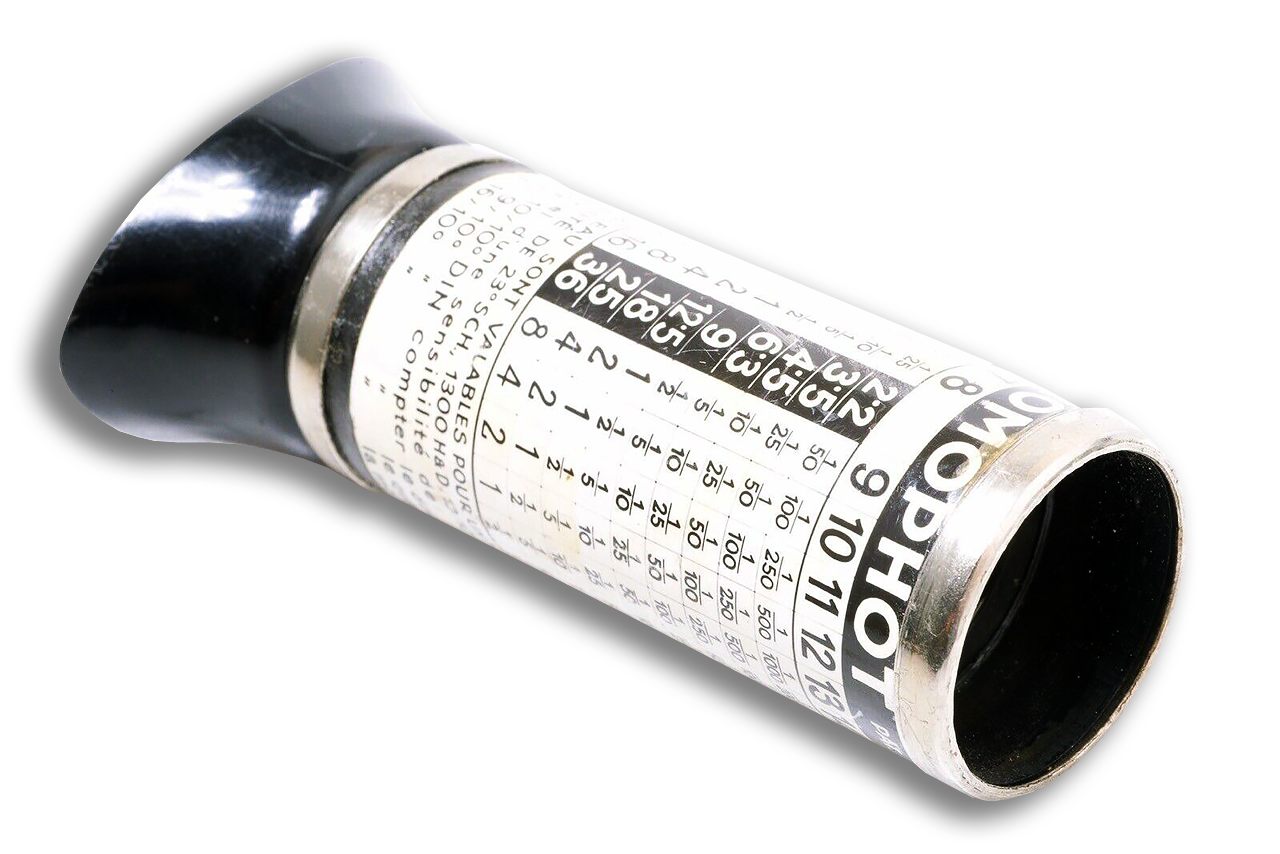
The Chromophot was one of the first comparison meters. Its reference surface is provided by phosphorescent material. Field of view shows areas of light from the subject and reference material; where the two match a number is shown, used for setting the exposure.
six more images of extinction & comparison meters
(all information taken from https://photobutmore.de)
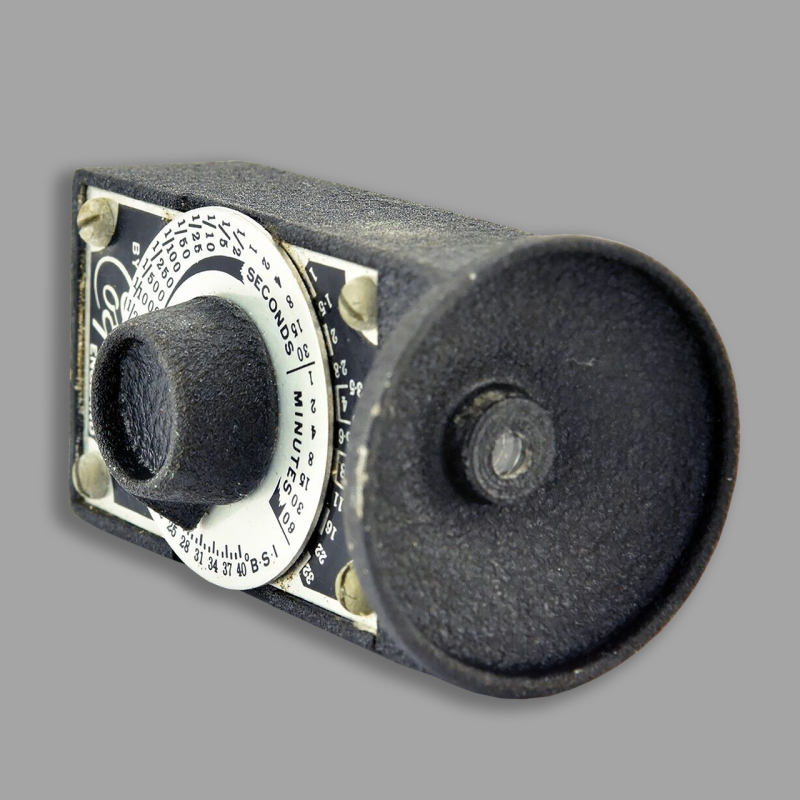
Heavy optical Exposure meter in a solid cast housing with a black crackle finish from Kenneth G. Corfield Ltd., Merridale, England (1951). The operation of this optical exposure meter is comparable to standard hand-held exposure meters. It used a pattern of black circular dots, divided into two halves of unequal brightness to measure the light level. The knob was rotated until the dots in the darker half of the image disappeared, and the exposure time read from a scale. This technique allowed accurate readings under extremely low light levels.
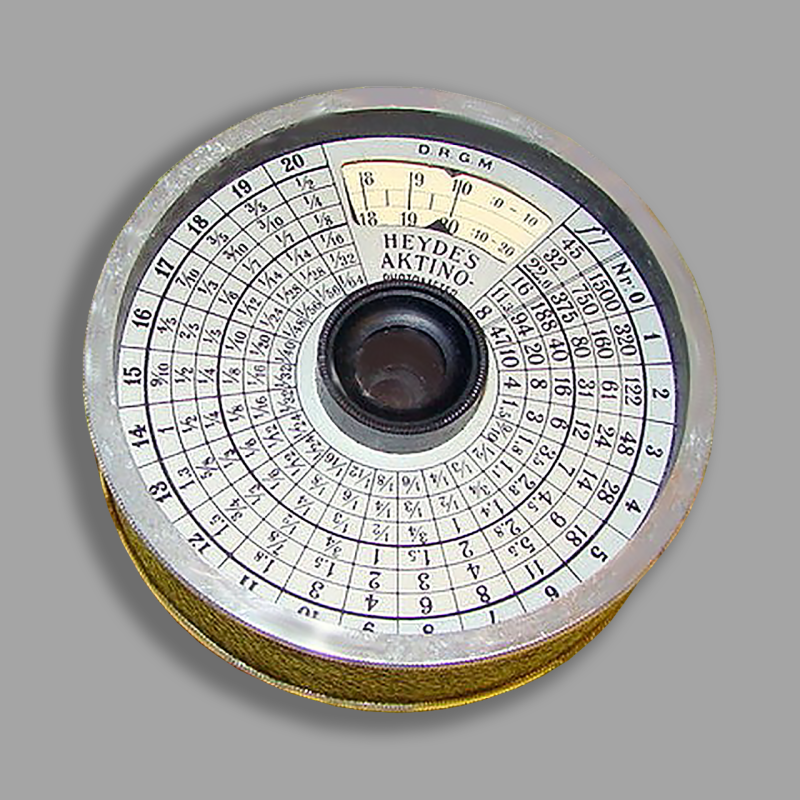
Heyde’s Actino Photometer from the Dresden manufacturer Gustav Heyde KG was the first optical light meter manufactured in Germany. The packaging box therefore announced the contents as “The Photographer’s Eye”. First introduced in 1904, it was probably one of the best-known of its kind because of its comparatively low price. Shortly afterwards, two versions of Heyde’s actino photometer were added. The sales prices were not low for the time, but cheap compared to chemical light meters (Model 1 16 RM, Model II 10 RM and Model III 18 RM).
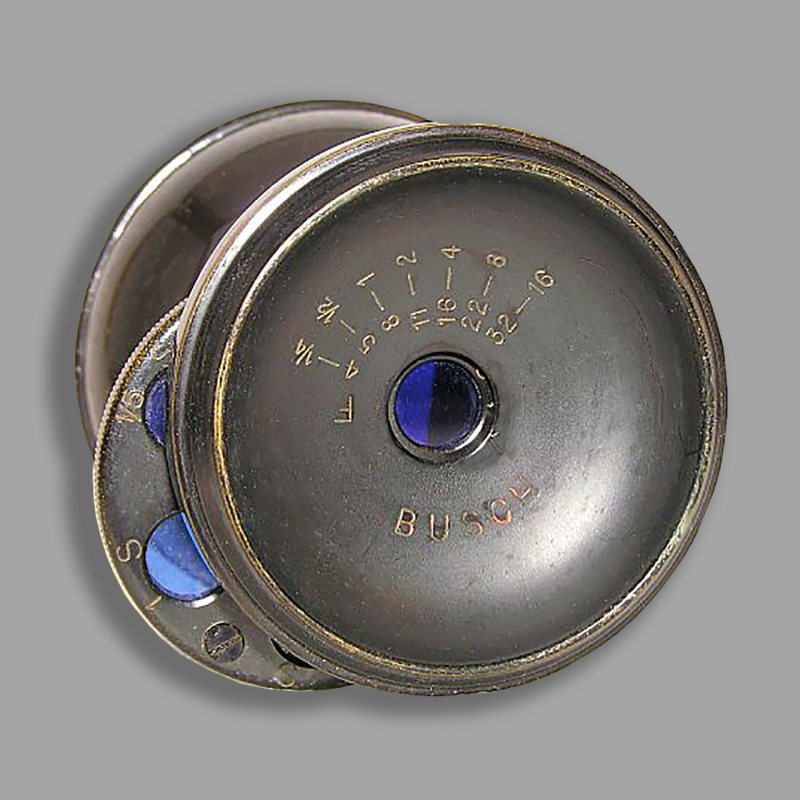
One of the first optical exposure meters was manufactured in 1903 by the “Rathenower Optische Industrieanstalt, formerly Emil Busch AG” and cost 7.50 RM including a leather case.
The device, order name “Exposit”, acts like a viewfinder (iconometer) into which 6 differently tinted blue lenses are swiveled. The slices are marked with exposure times, which are set in relation to apertures between F 4 to 32 using the scale attached next to the view. The exposure time can be read next to the active color disc.
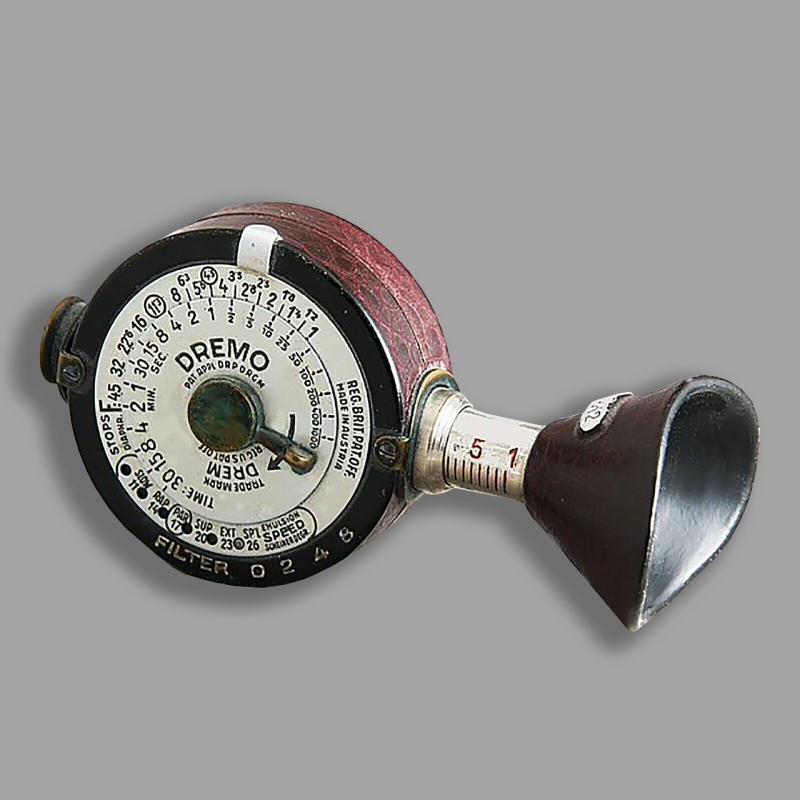
The Dremo is an optical light meter from Dr. E. Mayer (DREM), Vienna from around 1930. The unusual design gives the impression of a cinemameter for film cameras, but the values can only be used for photographic recordings. The view of the brown-orange measuring window is focused using the extendable tube of the viewfinder eyepiece.
To measure light, the measuring window must first be opened before the scale and the clock-like pointer on the other side are moved using the rotary wheel.
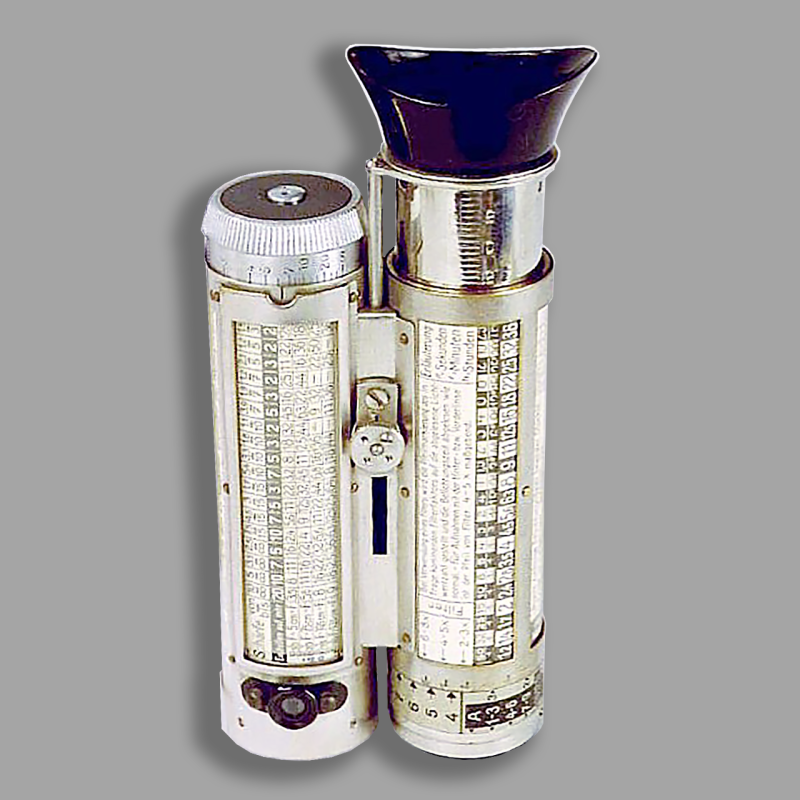
Bertram in Munich was, along with Gossen and Metrawatt, the largest manufacturer of light meters in Germany. The BEWI exposure meters were among the best-known devices of this type until the end of the 1970s. Most Bewi-meters are listed in group 4 electrical exposure meters. In addition to the BEWI-Senior and BEWI-Junior models, a mini version was available “BEWI-PICCOLO (RM 3.90), a BEWI-Leica (RM 18.90) and a WILLO Cinemeter (RM 22). The Tele-Bewi, for exposure and distance measurement with telephoto focal lengths was offered for RM 27.50.
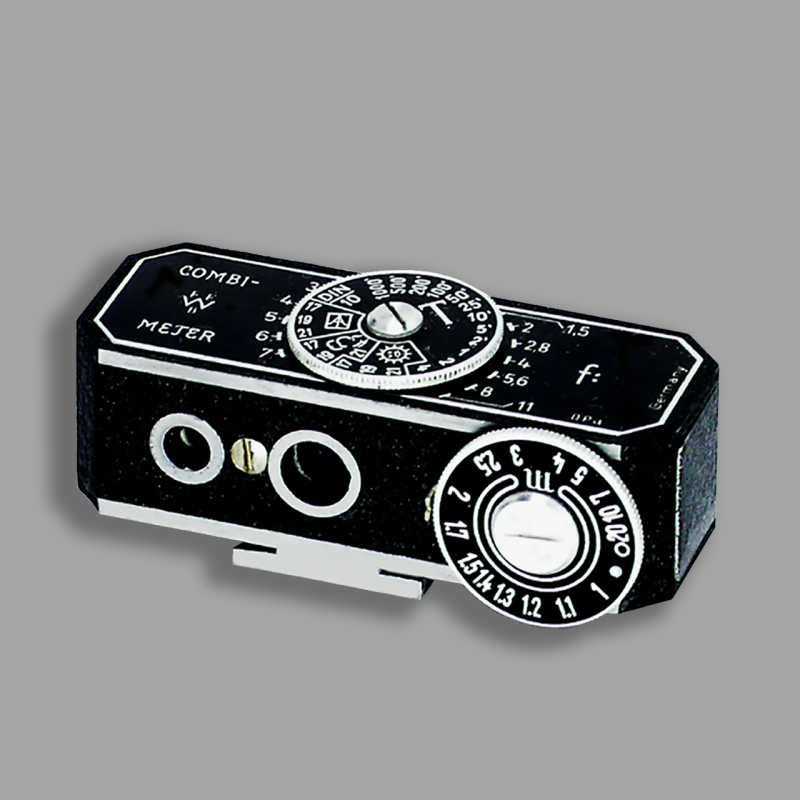
The combimeter: an unusual accessory that could be purchased in the early 1950s. FFW Berlin (FOGRO KG, Berlin) was the manufacturer of an attachable rangefinder, combined with an optical light meter for the hot shoe of most cameras of those years. This device can be used to determine the distance between 1 m and infinity as well as exposure values from 1/1000 s to four seconds. For this purpose, a display is integrated. In 1954/55 it cost 18 DM with a letter case. There was also a light version with a chrome-plated top plate with case for 21.50 DM.
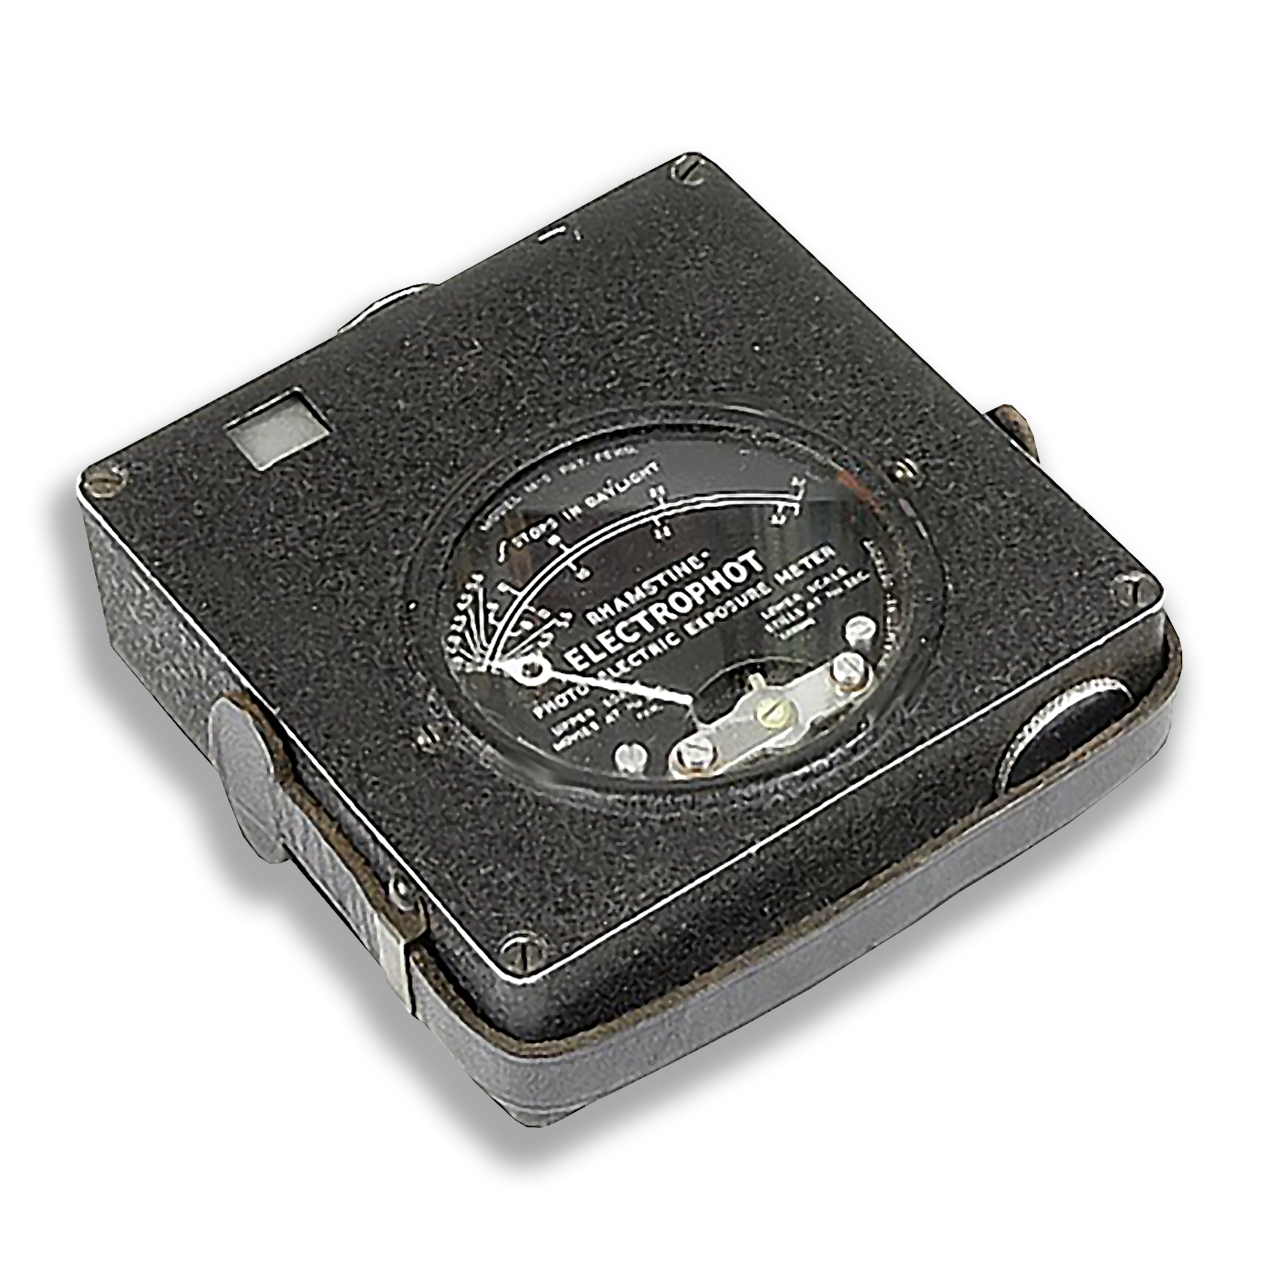
John Thomas Rhamstine is one of the pioneers of electrical light meters. Even before Gossen, Metrawatt or Weston, his radio equipment manufacturer brought the first electric photo exposure meter onto the market in 1931. The DH model was the first photoelectric light meter in 1932, before the Weston 617. However, the measurement method required a battery, although selenium was also used as a light-sensitive cell.
It wasn’t until the M-S model (shown above) that he brought out a battery-free selenium light meter in 1933. This third Rhamstine model did without battery support, but still used the housing of the previous DH-A version. The space provided for the batteries remains empty. The M-S now used a measuring instrument that – like the models from Gossen, Weston and others that were brought onto the market around the same time – could work with the electricity generated by the selenium cell. Only the successor models MS-A/MS-B received a smaller, rectangular housing without a battery compartment. The name “ELECTROPHOT” can always be found on the dial.
Group 4
Photoelectric selenium exposure meters
Photoelectric exposure measuring using selenium was popular from the early 1930s onwards; first used in exposure meters but increasingly found built into cameras and coupled to the shutter and diaphragm settings.
Reknown early manufacturers were Gossen and Weston as well as Müller & Ziegler and Metrawatt. Other suppliers quickly followed, Bertram, General Electric (GE) and Zeiss as larger manufacturers and just as many smaller manufacturers.
All selenium based devices actually “measure” light by converting it into electricity using a photoelement. The current in turn drives an indicator needle to a more or less large deflection via a moving coil element. This measurement value can be read on a scale. Depending on the display and operating concept, the value is also converted into aperture number and/or exposure time, which can then be read.
Selenium was almost exclusively used as a photoelement to generate electricity. That means that this type of light meter does not require batteries! However, the measuring cells (selenium cells) are often no longer usable.
Selenium (Se) is a chemical element whose properties are similar to sulfur. In nature it rarely occurs in elemental form or as a pure ore compound. It was discovered in 1817. It is usually produced during the processing of metal ores and is used for glass production, for color stabilization and for photocells. It was also previously used for rectifiers in electrical and radio engineering as an alternative to vacuum rectifier tubes. It is also worth mentioning that selenium is a mineral and is important as a trace element for human nutrition (e.g. thyroid function, immune system). However, it is not a dietary supplement and is toxic if overdosed.
Readout on Photoelectric meters
The light level is generally shown by a needle moving over a scale, a calculator is then used to combine the reading with the film speed to give the result of shutter speed and aperture. Some common arrangements were:
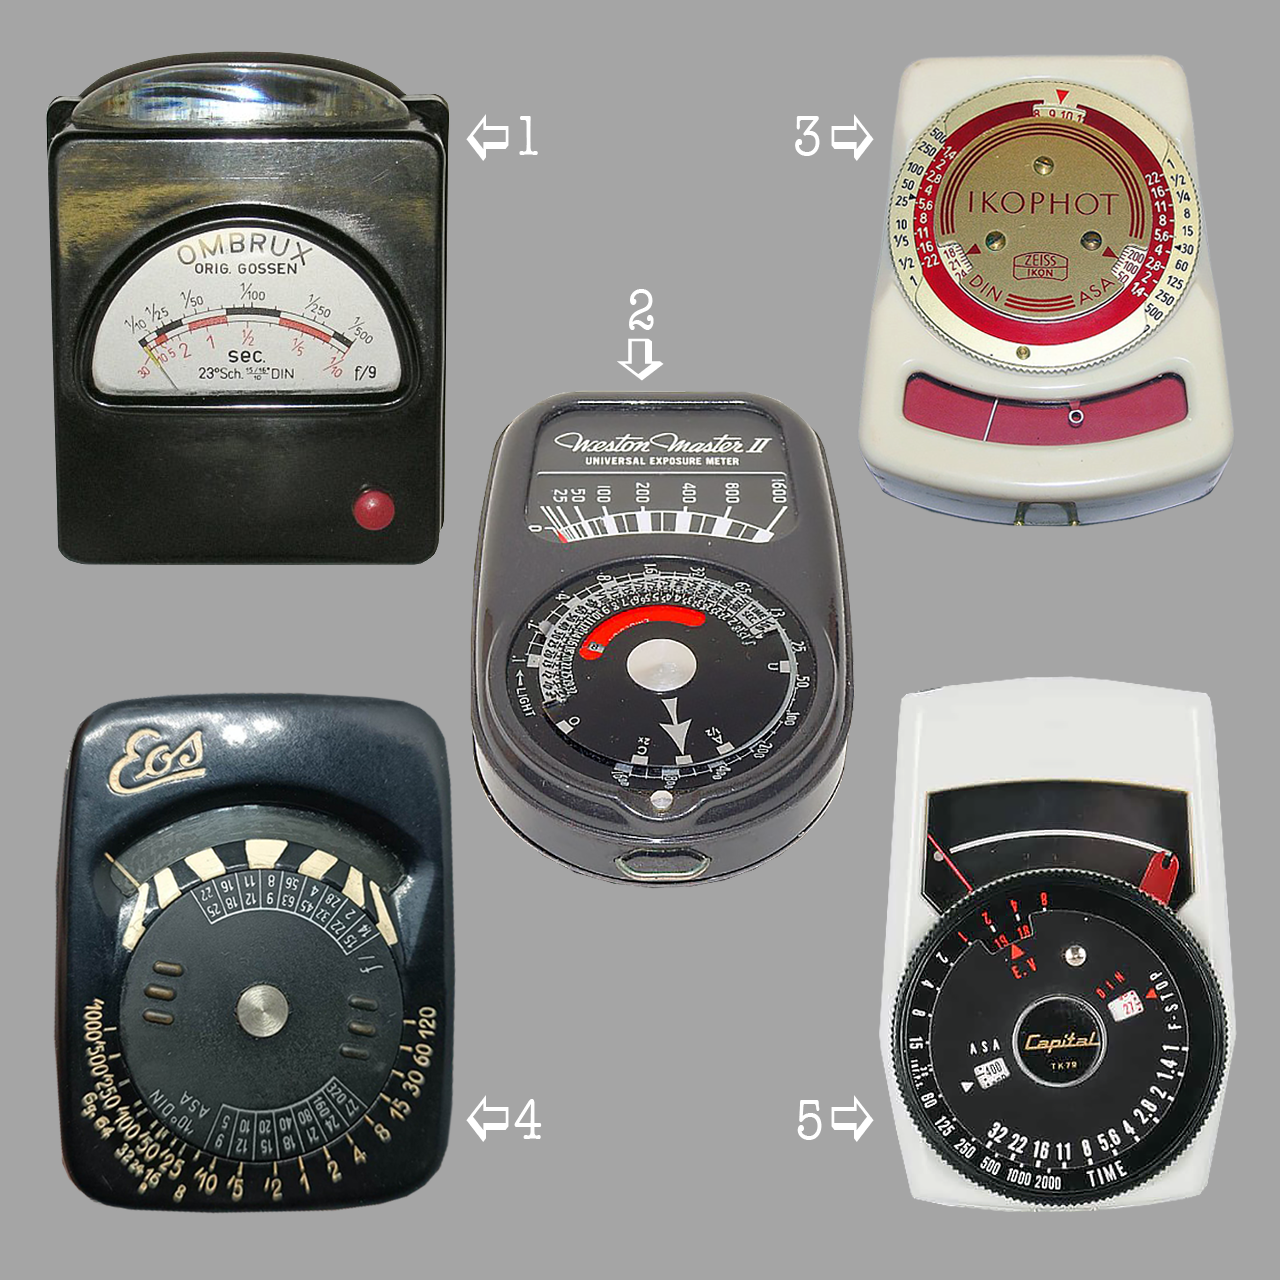
1) Direct reading. The simplest arrangement is for the needle to move over a scale of shutter speeds and indicate directly which value to use. This would be correct for one film speed and aperture, for other values a set of printed tables would be used. Rather than shutter speeds the aperture could be indicated by the needle. The Blendux and Ombrux meters are of this type.
2) Light numbers. With this type the needle moves across a range of arbitrary numbers, the number indicated is manually transferred to the calculator. On some examples the film speed can be pre-set on the calculator, in which case setting the light number on the calculator, will indicate the shutter speed and aperture pairs. The popular Weston Master range is of this type. On others the light number was set against the film speed.
3) Match needle. A moveable pointer is lined up with the meter needle, in moving the pointer the calculator dials are moved and show the shutter speed and aperture pairs.
4) Align value. A value (perhaps the film speed, shutter speed or aperture) on the calculator is moved to align with the meter needle. The calculator will then show the correct shutter speed and aperture pairs. Coloured bands or channels were often drawn between the calculator and the scale over which the needle moves. This solved dimensional differences and, since the channels could have different widths, the problem of the needle not moving a uniform amount for a uniform change in light level.
5) Align needle. The needle is brought to a fixed point usually by introducing a variable resistance or altering the light reaching the cell. In moving the needle the calculation dials are moved. Used on the Zeiss Helios and many cameras with built-in meters.
Depending on the configuration of the meter the result may simply be a single shutter speed and aperture pair, more useful is when the complete range of pairings is shown allowing the photographer to choose the most suitable. Also helpful is when the film speed can be pre-set on the meter rather than having to set it for each reading. Ideally movement of the needle across the scale will be uniform for uniform changes in light level. This was not always achieved and many meters show bunching of values at the high and low end of the scale.
HOW IT WORKS (more or less)
In the photoelectric exposure meters as described here, selenium acts as a barrier layer element in a similar way to the semiconductor components (transistors and diodes) used in electronics as recently as the 1950s. When exposed to light, the selenium applied to a metal plate sends a current of electrons through a vapor-deposited, extremely thin layer of precious metal (gold or silver), which causes a current surge in the downstream measuring instrument.
Technically, this arrangement represents a junction photocell in which the electrons released from the light penetrate a boundary layer between 2 conductors of unipolar conductivity. There is a blocking effect in the direction of the metal selenium plate, while the opposite direction is conductive.
The selenium plate acts comparatively like a rectifier in general electronics. The incident light causes a flow of electrons, which are converted into electric current with the same amount of energy.
A disadvantage of selenium cells was that they “die” over the years. As a result, their power-generating effect diminishes or ceases. Paradoxically, this decomposition process is accelerated by exposure to light. The cause was considered to be the damaging effects of UV-containing light.
However, this is not the only reason for poor performance. Selenium cells were sealed by a layer of varnish. If this seal was inadequate or if it is damaged by mechanical influences, the selenium oxidizes over time and the cell loses its power-generating ability. Repair is impossible and not recommended – selenium is toxic when it comes into contact with skin!
A standard aperture scale
Although the practical requirement for an exposure meter has always been clear – it should determine the appropriate exposure time for a selected aperture (or vice versa) – there have been different methods of converting this into a scale display.
This is how light value scales, rotary scales, tracking scales, channel scales and directly readable light meters with just one aperture and exposure value were created.
With regard to the scale values, the standard aperture scale (1 – 1.4 – 2 – 2.8 – 4 – 5.6 – 8 – 11 – 16 – 22 – 36 – 45) prevailed over its predecessors. For the Leica, with its sometimes different aperture and exposure values, most manufacturers also offered models with values according to the old German scale (1.5 – 2.2 – 3.2 – 4.5 – 6.3 – 9 – 12.5 – 18 – 25 – 32).
The first commercial use of selenium exposure meters was not until 1931 with the Rhamstine Electrophot in England. The later, eternal competitors Gossen and Weston as well as Müller & Ziegler and Metrawatt followed almost at the same time.
Well-known companies such as General Electric (GE) and Zeiss, smaller manufacturers such as Bertram and new providers such as Dorn, Kiesewetter and Weigand offered photographers a wide range of photoelectric light meters in the 1930s. Photoelectric meters increased in popularity throughout the 1930s.
But all of these methods were subjective. They required the photographer to make judgements and interpretations. What many people wanted was an objective method to measure light—something that would be repeatable and not affected by optical tricks or judgement or human eyesight.
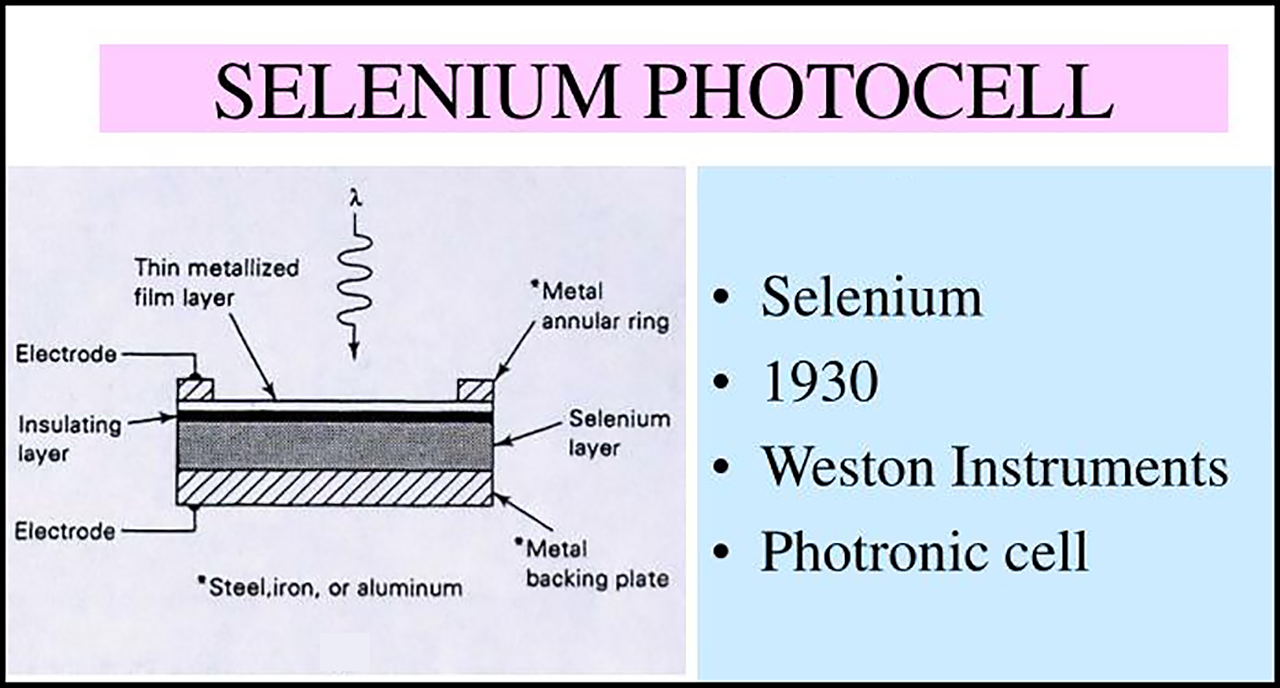
Schematic representation of the selenium photocell used in a Weston exposure meter from the 1930s.
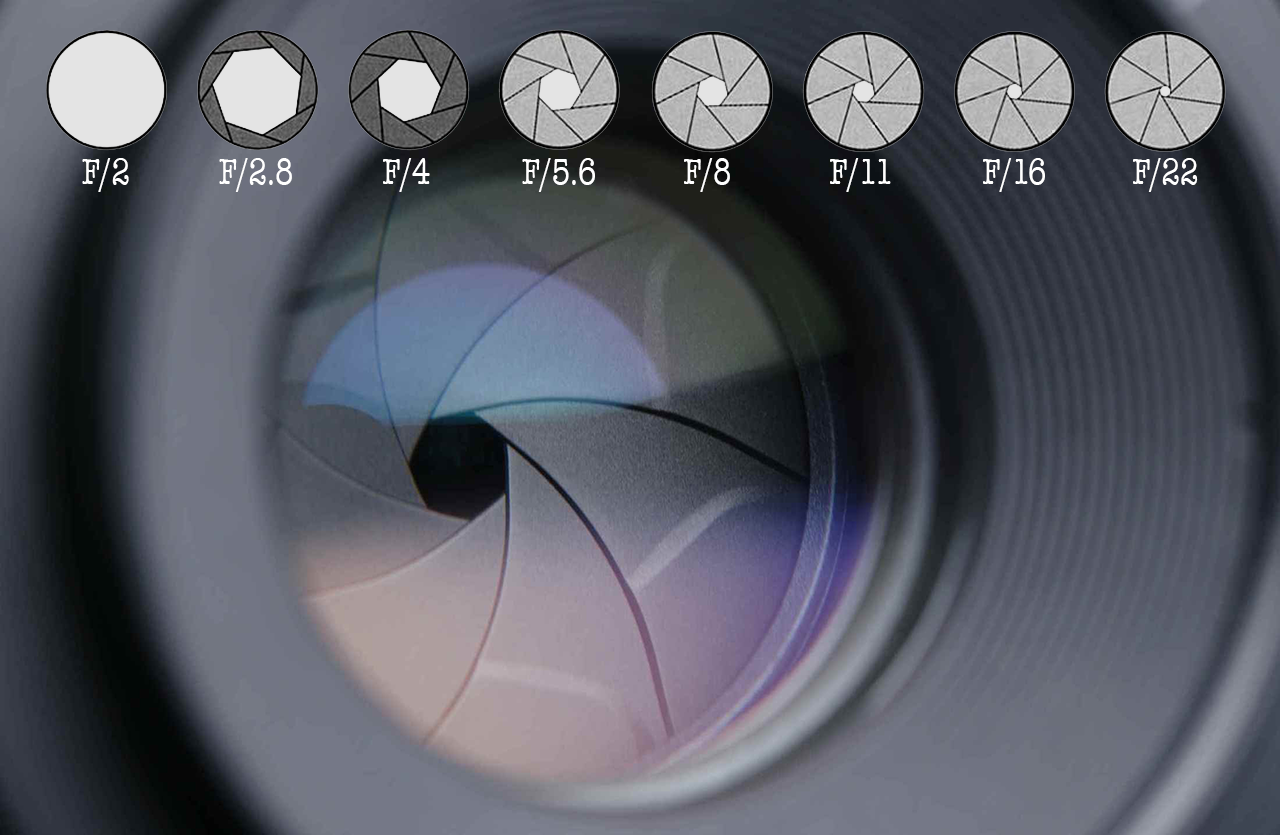
Above is an image of the operation of an iris diaphragm. The image shows the set of numbers that generally appear in photography. The complete conventional and calculated f-numbers, full-stop series is: 0.5 – 0.7 – 1.0 – 1.4 – 2 – 2.8 – 4 – 5.6 – 8 – 11 – 16 – 22 – 32 – 45 – 64 – 90 – 128 – 180 – 256.

Logos of the most well-known exposure meters suppliers. An example of an exposure meter from each manufacturer mentioned here is shown in the overview below. The 36 examples listed below are just a fraction of the many meters on the photobutmore.de website. My advice is go there if you speak the German language and want to know more about any exposure meter.
thirtysix images of photoelectric selenium exposure meters
(all information taken from https://photobutmore.de)
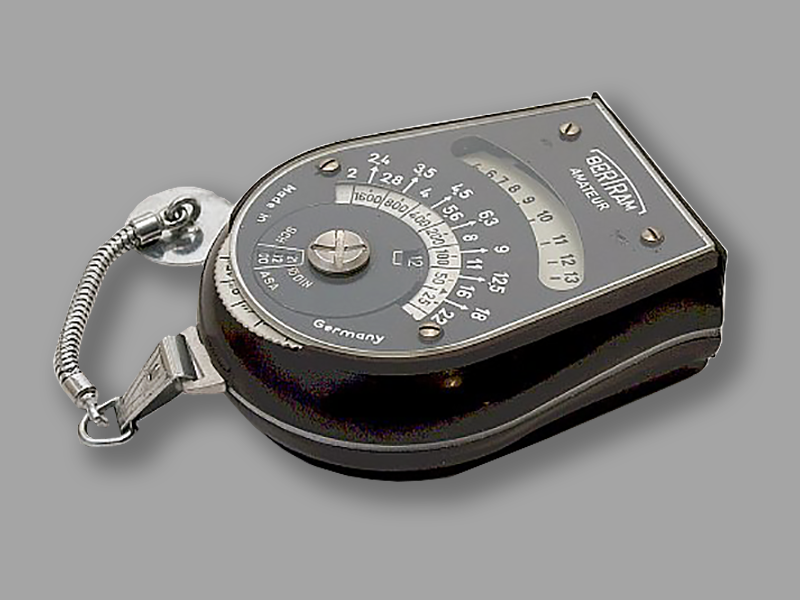
The Bertram Amateur in an elegant, lyre-shaped housing was the first of Bertram’s idiosyncratic new exposure creations in 1950. The thoroughly practical and at the same time very light and handy measuring device was to remain in the production program until 1958 in a whole range of different versions. Technically it remained virtually unchanged during these years.
What all “amateurs” have in common is the housing shape borrowed from a Lyra, an adjustment scale covered with a Plexi disk and the tightly closing front cover which ensures a longer lifespan for the selenium cell.
Version 2 shown here dates from around 1951 and has a black-brown Bakelite housing with a silver-colored embossing on the side. The caseback with the bayonet mount for the bracelet in the middle is matt black.It has an aluminium adjustment knob with a cross slot for the film speed.
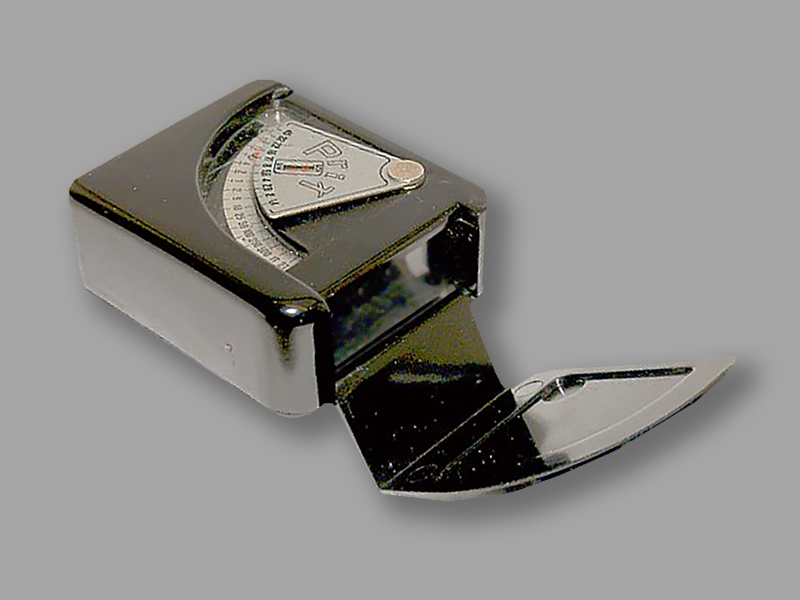
The small factory for electrical measuring instruments, Josef Dorn in Leipzig, produced the Dorn-Prix shortly (1939) after their first light meter, the “Dornlei” (1937). This black Bakelite Prix-version in a folding case was similar to the Sixtus von Gossen but has a completely different operating concept. In addition to the pointer scale with exposure values that runs diagonally across the entire housing, there is a rotatable triangular slider with engraved aperture numbers.
Before starting a measurement, a small red pointer is adjusted to an aperture number between 4 and 16 by selecting the film sensitivity. The pointer then only needs to be pushed to the corresponding shutter speed after the needle has moved in order to be able to read the desired time/aperture combination directly.
This Prix light meter was continued to be built after the war in only a slightly different form (without a flap) after the Dorn company moved to Neustadt/Weinstrasse.
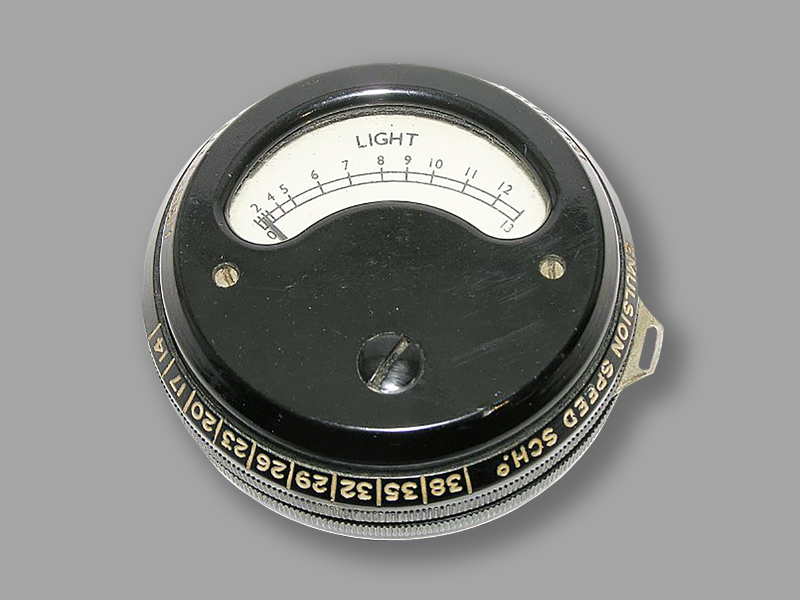
This black Bakelite box is the only light meter from the General Electric Company, London, from the first post-war years around 1947. Although G.E.C. (not to be confused with GE USA) was one of the major British consumer electrical companies, this meter was a one-off attempt. The shape was no longer contemporary even back then, as its design corresponded to the Electrophot, Metrophot, etc., which had been offered a decade earlier. At the front is window with a scale showing the amount of light. This scale reads from 0 – 13. A thin black needle points to the light level. In this window below the light scale are the words “GEC, Made in England”. The meter was distributed by Johnsons of Hendon.
It’s also not a joy to use; the device easily falls out of your hand when adjusting it. It is handled using four rings that can be used to adjust the exposure values between 1-13 from the light value scale display. Sensitivity 14-38°; Apertures 1-32; Exposure times 2 min.-1/2000 sec.
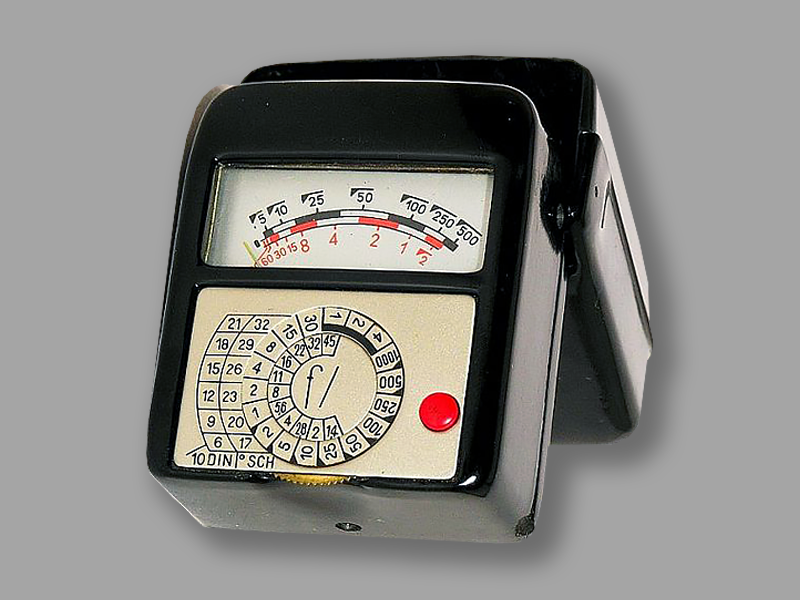
If you ignore the Lunasix, the Sixtus is, after the Sixtomat, the most successful and probably best-known electric light meter from Gossen, Erlangen. Like the Horvex from Nuremberg competitor Metrawatt, the Sixtus was Gossen’s “bread and butter device” until the 1950s. It was sold in several different versions. What remained in common between the earlier Ombrux and the Sixtus was the black Bakelite as the housing material and the red button for switching the measuring range. In one of the first Gossen advertising brochures, Ombrux and Sixtus were offered together. The Sixtus was also called “the Super Ombrux”. For comparison, here is a “Revolver Sixtus” in the normal version. As already described, the Sixtus was available in two versions – as a normal hand-held exposure meter in a leather case and with a protective and ready cap made of Bakelite. With this it was also referred to as an “exposure gun” in gutter advertising. Otherwise it corresponds to the version in the leather case as already described.
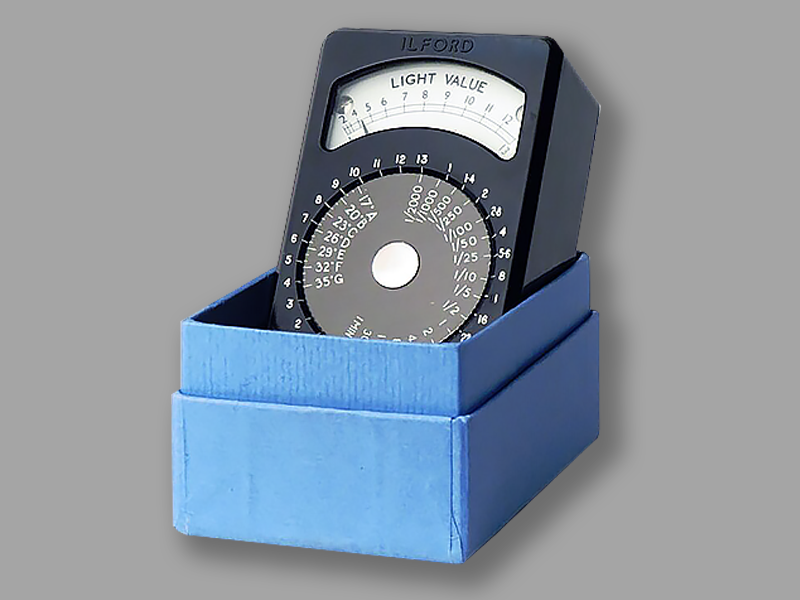
The picture above is of a 1949 Ilford Meter Model C. The Ilford Speed Group lettering A to G is now accompanied by an Ilford Scheiner logarithmic speed rating. The instruction booklet says “the latter, which have frequently been referred to as European Scheiner degrees, are approximately one unit higher throughout than the corresponding B.S.I. logarithmic exposure indices”.
This meter is single range, each Light Value on the scale under the meter window being twice the brightness of the previous numbered Value. The Light Value appropriate to the subject is read off from the meter needle indication and transferred to the central scales for calculating exposure.
At this time, HP3 film was only a speed rating of 125 ASA (Ilford Letter F, Scheiner 32) presumably to maintain sufficiently fine grain within small negatives. Plates, being larger and hence requiring less enlargement, were faster, being Ilford Letter G, Scheiner 35.
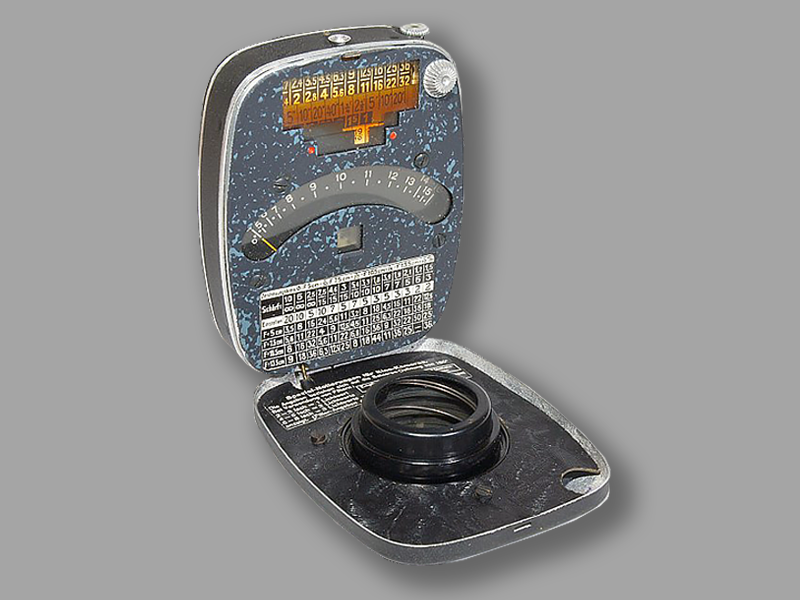
The post-war versions of the Electro Bewi were called “Electro Bewi Standard“. Apart from the Leica versions with a different scale, there are no differences in how they work. Compared to the two-stage aperture of the pre-war version Electro Bewi Super, the post-war versions have a three-stage telescopic aperture in front of the selenium cell.
The film sensitivity can be set in DIN; the red dot markings on the right and left indicate that the exposure values can still be read one value below or above in the recesses of the movable aperture. The sensitivity is 10 to 22° DIN; The exposure times can be adjusted from 20 minutes to 1/1500s. The rubber scale also contains gear numbers for film cameras.
In low light conditions, values between 1 and 3 can also be read from the optical scale on this device and adjusted as before using the rubber band. Many cases now have a number engraved on the back, usually 4 digits. The first post-war sales price was 54 DM.
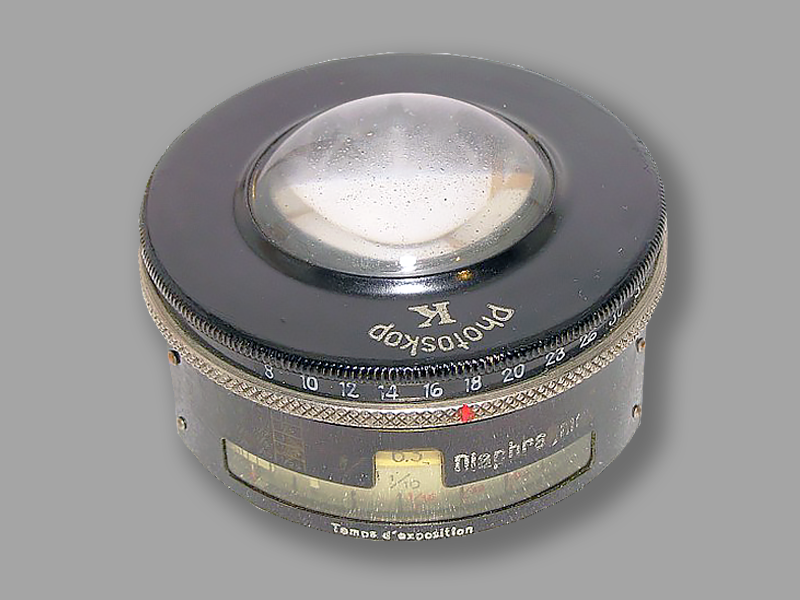
The Photoscope K from the Excelsior factory Rudolf Kiesewetter, Leipzig, was one of the first electric light meters in 1933, alongside the devices from Gossen, Müller & Ziegler and Weston. The massive 255 g measuring device in the shape of a can is constructed completely differently than later devices; it roughly corresponds to the Electrophot from Müller & Ziegler or the first Metrophot from Metrawatt. Depending on whether the aperture or exposure time should be preset, either the upper rotating ring with the lens-shaped measuring cell cover is first turned to the sensitivity value between 4/10 to 19/10° DIN or 8 to 30° DIN. The time scale is already preset. With the bare rotating ring, (German) aperture values between 1.5 and 48 can also be set in the viewing window beforehand. The time/aperture combination can then be adjusted to higher or lower values by turning both rings at the same time. After the needle deflection in the side viewing window, the corresponding exposure times between 100 and 1/1000 sec. can then be read.
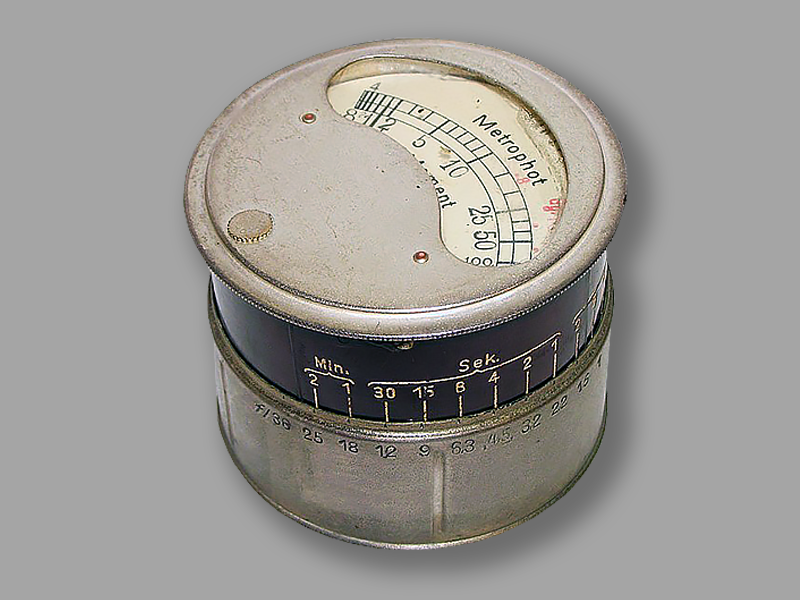
The Metrophot was the first photoelectric light meter from Metrawatt AG, Nuremberg in 1934. Metrawatt existed as Dr. Siegfried Guggenheimer AG, factory for electrical measuring instruments since 1906. In later years, Metrawatt also produced the Leicameter light meters for Leitz. At the beginning of the 1990s, Metrawatt and Erlangen-based GOSSEN AG merged.
The Metrophot Moment BM8 – in later versions “Metraphot” – was largely identical in construction and function to the Electrophot from Müller & Ziegler, also based in Nuremberg. However, the Metrophot’s scale is geared more towards photographic purposes and shows exposure values in seconds. These can also be used directly with a 23° spotlight and aperture of 4.5. Over the course of construction, a few slightly different models with different measurement sensitivities were offered. From the Moment BM two versions were offered: the BM 8: retail price RM 28 and the BM 16: retail price RM 33.
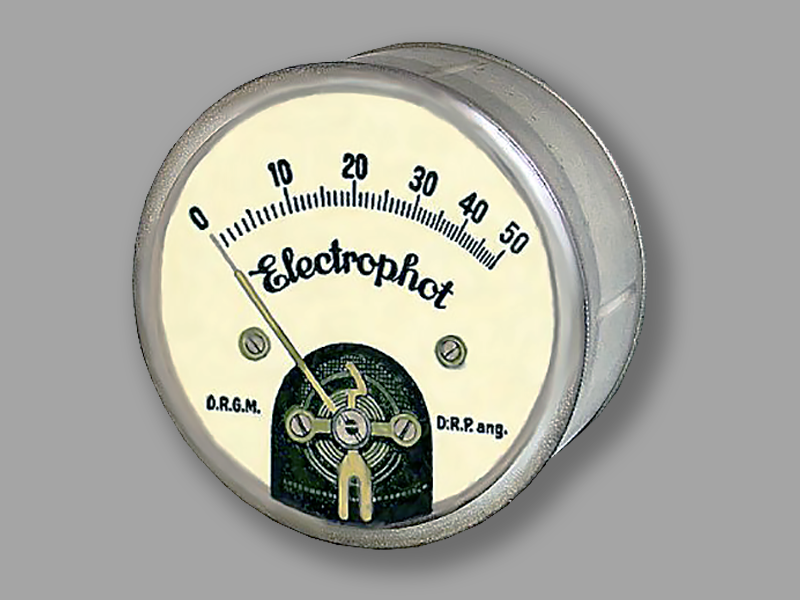
The Electrophot was one of the three first photoelectric light meters at virtually the same time as the Gossen Photolux and the Weston in 1933. The manufacturer was Müller & Ziegler, Nuremberg, which, according to literature references, was supposedly merged into “Metrawatt AG” in the same year (which later manufactured the Leica light meters). However, as I now know, this information does not appear to be correct. Apparently Electrophot and Metrophot were developed independently of each other. However, the structural similarities are striking.
The measuring instrument was constructed like a standard electrical current measuring device (ammeter) in the form of a tin can. During the measurement, the scale showed a “light pointer number”, which must be set to the corresponding film sensitivity number (16-27° light) by turning the scale cap. For aperture numbers from 6.3 to 36, corresponding exposure times between 2 minutes and 1500 seconds can be set.
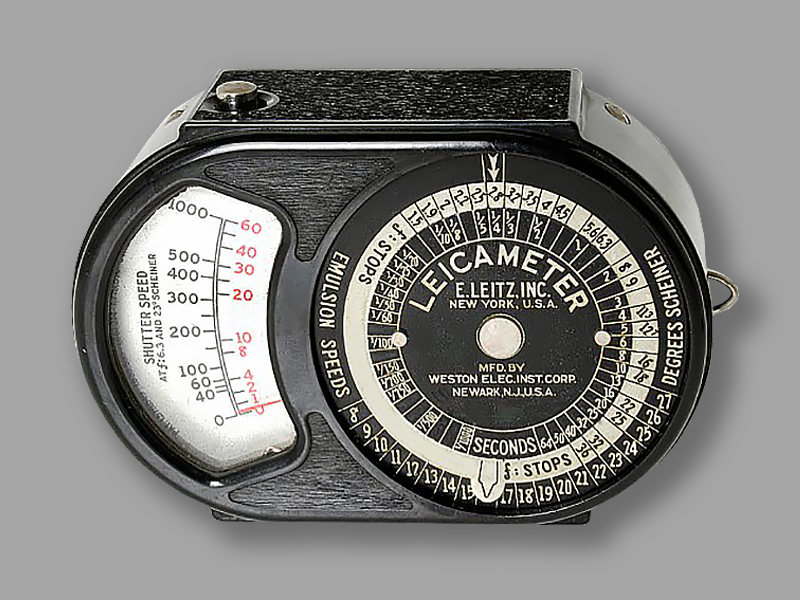
Weston Electric Instr. Co, Newark, USA, founded around 1890 by Edward Weston, was, along with Gossen in Erlangen, the world’s leading light meter manufacturer. The company in the USA ended its activity in the 1970s. British Sangamo acquired distribution rights for Weston light meters back in the 1930s and also cooperated with Ilford.
Weston developed the first selenium light meter in 1933, around the same time as the Gossen Photolux. In the following years, a large number of exposure meters came from Weston. The model 617 was offered as the second Weston light meter version from 1934. The normal version appeared in a long/rounded shape. In practice, this quickly proved to be unhandy. That’s why the 650 model was added shortly afterwards. However, both types were offered in parallel for a while. Almost at the same time, this Leicameter was offered in a more manageable housing under type number 617-2. So a clear distinction exists between the normal and Leica version of the 617.
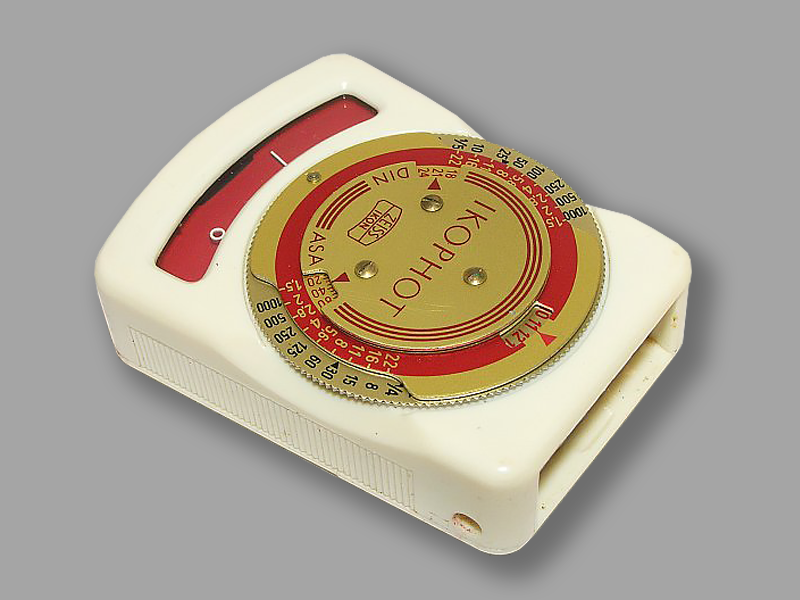
In 1953, ZEISS IKON AG, Stuttgart, introduced the Ikophot 1329 in a new case design. The ivory-colored Bakelite housing with the gold/red scales in an elegant leather case was intended to emphasize the exclusivity of this light meter. The quite high retail price of 69 DM, also included a gold buttonhole chain.
Apparently they noticed that two different series of light values (measured values and light values) were causing confusion. Instead, the Ikophot Rapid Version 1 (the catalog type number remained 1329 C) now received a tracking pointer and the appropriate suffix “Rapid” for faster operation. The tracking pointer naturally required a new operating scale. Film speeds and light values are within the range of the Rapid. This first version still received two shutter speed scales, each with the old and the new linear values. The sensitivity increased by one level. Technically speaking, not much has changed compared to the previous model. The selling price remained unchanged at 69 DM. Diffuser and gold chain also remained unchanged.
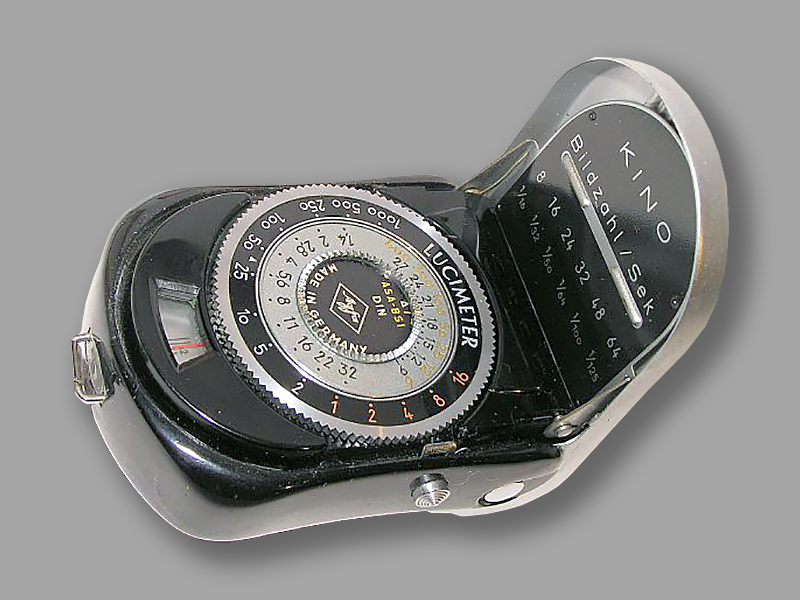
It would be strange if Agfa didn’t also offer light meters. However, it took until 1950 for AGFA to develop its first photo exposure meter. The first Lucimeter was presented at Photokina 1950.
Just a few months after the original version, a modified Lucimeter Version 2 was offered – in a new housing made of black Bakelite with an elegant metal spring lid. Advantage: the selenium cell is covered when the exposure meter is closed.
The operation was taken over from the original model, and the knurled wheel with scale initially remained unchanged. The measuring needle is coupled to the knurled wheel and must be turned between two marking lines on the scale. There is also an x2 marking, which is used in low light conditions. In this case (similar to the earlier Zeiss Helios) the exposure time must be doubled.
Values: Sensitivity 9-27° DIN / 6-400 ASA-BSI; f/1.4-32; Exposure times 16-1/1000 sec.; Cinema value table in the cover.
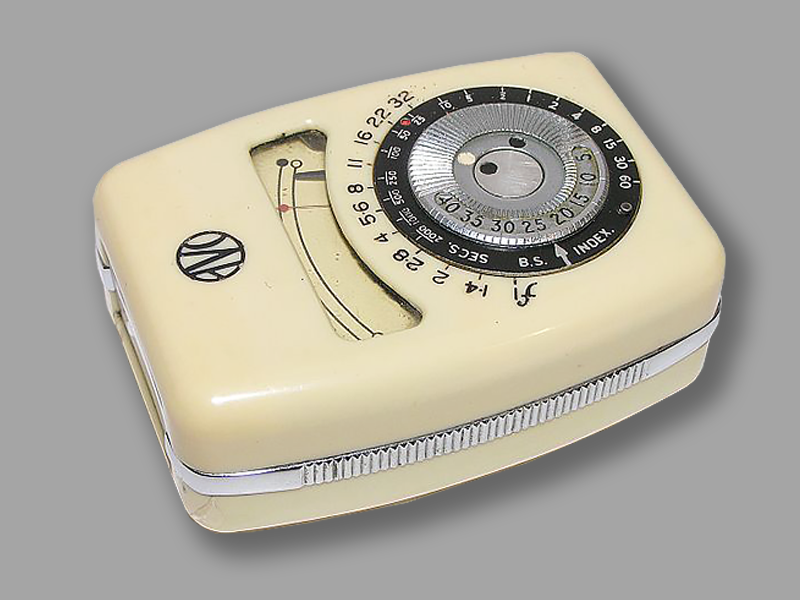
The Automatic Coil Winder & Electrical Equipment Co. Ltd., London was started in 1923, and was known as the ‘Automatic Coil Winder and Electrical Equipment Co.’ located at Douglas Street, London SW1” The company pioneered the electric light meter in Great Britain. The name abbreviation AVO stands for the production range of electrical devices (Amps, Volts and Ohms). AVO was the leading manufacturer of measuring instruments of this type in Great Britain.
This last device in a series of exposure meters, was in a heavy beige Bakelite case the AVO Exposure Meter Model 1 shown here from 1951. It was released in collaboration with Ilford and already had a tracking pointer. The sensitivity can be preset for two scale ranges (white/black) or occurs automatically at the respective end of the scale. Another housing version can also be found in black.
Sensitivity 5 – 40 B.S.I.; f/1.4-32; Exposure times 60-1/2000 sec.
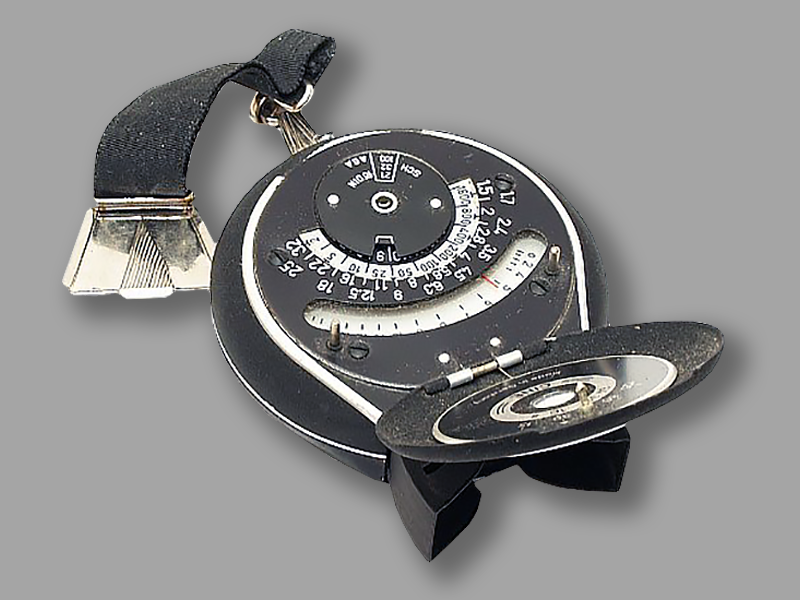
In 1950/51 Bertram introduced the formally idiosyncratic “watch series” Chrolon, Chronos and Chrostar. All three light meters are technically and largely identical in terms of their measurement data. The operation is also almost identical.
With the matching bracelet, the chrom…exposure meters can be worn on the wrist like a watch. The bracelet can be attached to the back of the device. The hinged lid mechanism also helps to emphasize the watch relationship. This Chrolon probably came onto the market a little later than its sister model Chronos. The round matt black metal casing is identical. When idle, the scales are covered by a spring lid and the measuring window is covered by two flaps. By pressing a button, the hinged lid opens and at the same time reveals the measuring window. The light value displayed on a wide white scale is transferred to the section of the adjustment scale using a knurled wheel.
However, this series was obviously not particularly successful – it was discontinued around 1952.
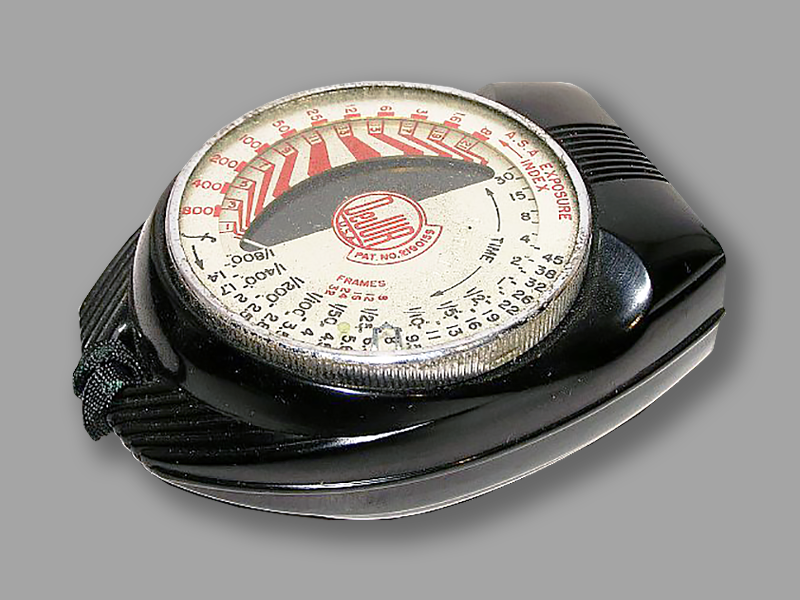
The DeJUR Critic Model 50 is a heavy handheld light meter in a streamlined Bakelite housing from De JUR AMSCO Co., New York, from 1945. The retail price at the time was $18.75 plus a case $1.75. The DeJUR Critic Model 50 was also delivered as a CINE model for film cameras. The design corresponds to the model described, only the scales and handling are adapted to the slightly different requirements of film cameras.
The value between 1 and 21 displayed by the measuring needle is compared with the film sensitivity using the chrome wheel on the left half of the scale. The right part of the scale then provides information about the exposure values.
A nice added benefit is the arrow marking etched into the cover glass. This can be preset to an individual value using the glass pane.
Sensitivity 8-800 ASA; Apertures 1.4-45 (mainly international); Exposure times 30-1/800 sec.; Cine values.
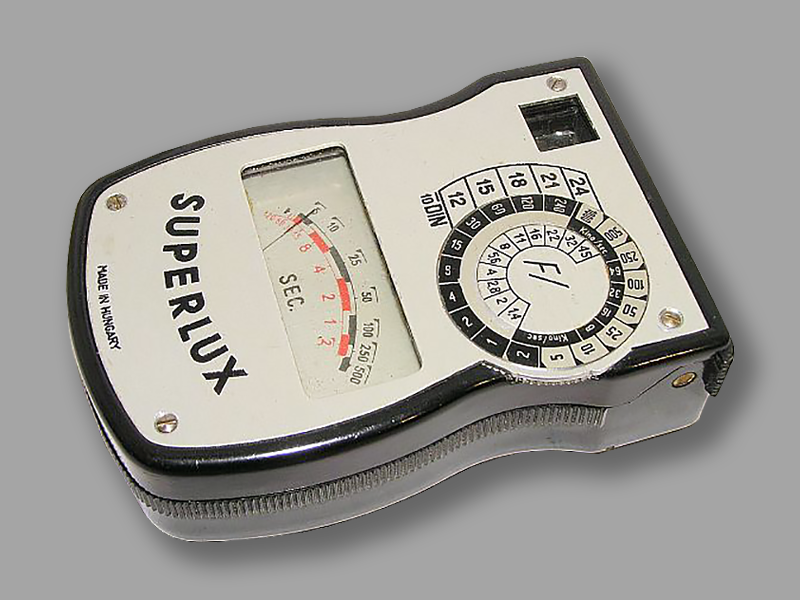
The Edla Superlux is a quite unusual exposure meter with a reflex viewfinder (á la Metrastar) from the Hungarian manufacturer Dr. Riszdorfer. “Edla” is also stated on the underside of the instrument. Podlogar states that it was built around 1938, but the device may be a little more recent. An almost identical device can also be found as the Kodalux. Compared to the Superlux, the Kodalux’s setting scale is a little more extensive and colorful.
The front part with the mirror viewfinder can be folded down. Without the front part, the red measuring range scale applies. The device can also be used as a light meter with the front part folded down; a conversion table into lux values is embossed on the back. The housing shape is roughly the same as the Actino and is therefore easy to use. To do this, only the shutter speed displayed by the measuring instrument is set to the DIN value and the appropriate aperture can be read directly.
Sensitivity 12-24° DIN; Apertures 1.4-45; Shutter speeds 240-1/1000 s.
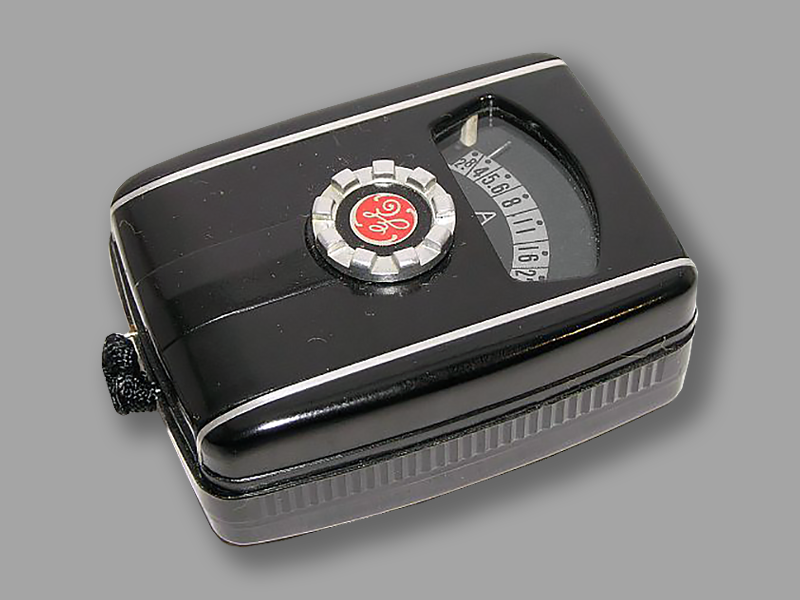
The Mascot PR-30 – there are two other versions PR-3 and PR-35 – is one of the simplest devices of this type. It probably dates from the early 1950s when it was manufactured by General Electric USA. Handling, however, takes some getting used to.
At first you only see one row of apertures on the scale. However, this can be switched in four stages from A to C using the knob ring in the middle of the device. The explanation for this can be found in a table for different exposure times and film sensitivities embossed on the Bakelite housing.
The embossing table is based on the film speed and the planned shutter speed. Only four values are given in each case.
At the intersection you take the letter A, B, C or D and set it on the front scale. The aperture can then be read according to the needle deflection.
Sensitivity 10-100 ASA; Apertures 1-22 (varies depending on the scale); Exposure times 1/25 to 1/200 sec.
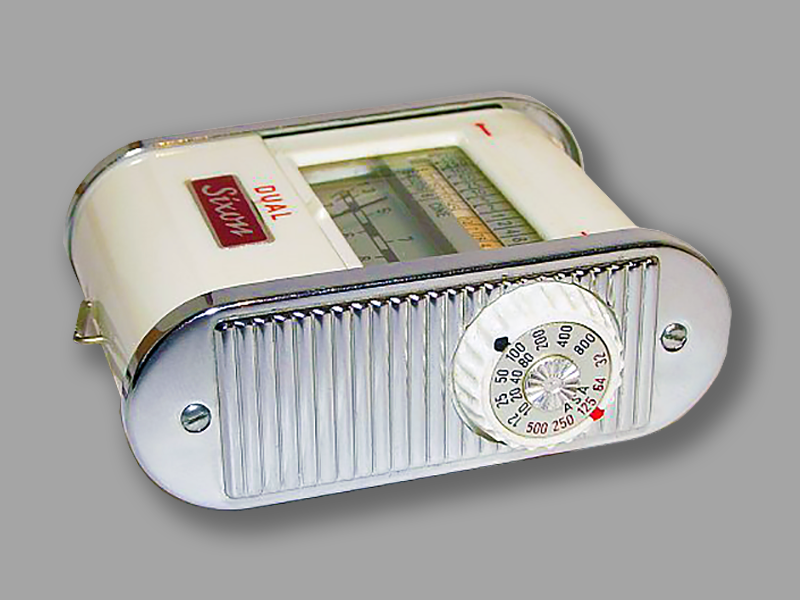
Gossen offered a special export version of the second Sixon with this Sixon Dual. This Sixon Dual only has one setting option for ASA sensitivity values. Instead of the conversion table on the back of the normal version, the Dual has a glued-in aluminum plate with aperture values that are 1/3 higher or lower for films whose sensitivity deviates from the standard scale. These values are indicated in the inner row or in red on the side adjustment wheel.
The proven light value method is used to determine the exposure values. The value between 1-12 shown by the indicator needle on a scale is transferred to a window on the reading scale using a wheel on the side. The appropriate exposure values can then be read on the scale designed like a table. When measuring objects, the roller blind is pushed down; when measuring light, it remains in front of the measuring window up to the red marking lines.
Sensitivity 10-800 ASA; apertures 1.4-45; Exposure times 8-1/500 sec.; Cine values.
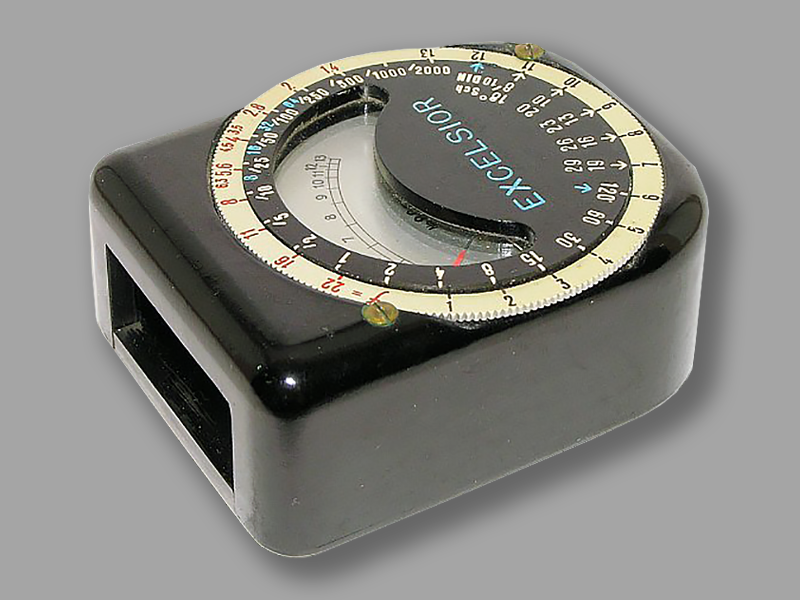
The Excelsior was a completely newly designed light meter based on Photoskop and Picoscop from the Excelsior factory Rudolf Kiesewetter, Leipzig, 1938. Unlike the rustic Photoscope, this new development corresponded to the now common design of hand-held light meters. The selling price was (Photo Porst catalog 1939) 19.80 RM including case, for the Leica version 22.80 RM.
The indicator needle gives a light value between 1 and 13. This is turned to the light sensitivity value using the knurled wheel. The appropriate exposure value can then be read from the red aperture scale and the opposite value on the time scale.
The expansion of the sensitivity to 16 or 31° shiner seems idiosyncratic. There are two blue arrows on the inner scale for this purpose. The one on the left points to 120 and marks 31°, the one on the right (below DIN) corresponds to 16°.
Apertures 1.4 – 22; Exposure values 120-1/2000 s; Cine numbers 8-64.
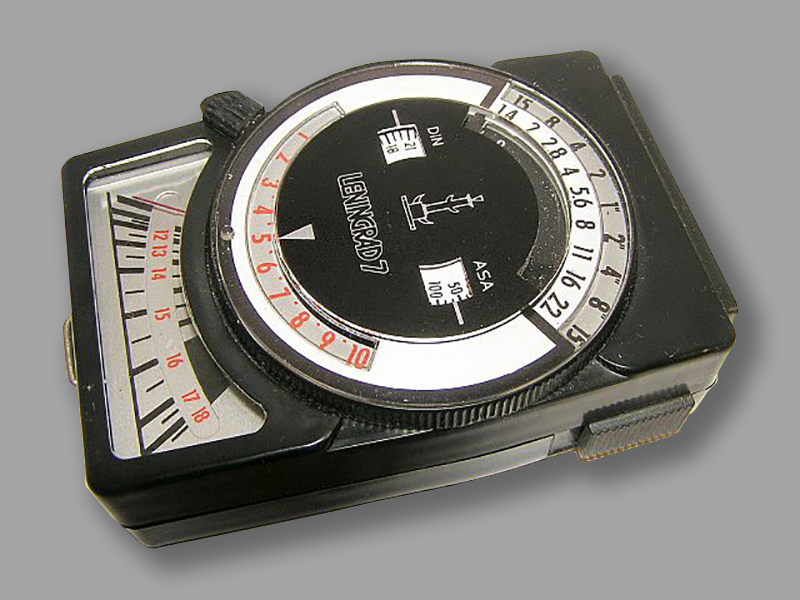
The successor for the Leningrad 4 light meter, the Leningrad 7, was only introduced in 1979. The housing became a little more angular, but little changed in terms of functionality. From the labeling it can be concluded that the meter in the version shown here was only intended for export.
The only thing that is noticeable is the sliding button next to the scale. This has several functions. It serves as a switch for a third measuring range and also sets up a third scale. At the same time, the flap in front of the selenium cell is opened and the measuring cell is pushed forward.
The measuring ranges 2+3 are still switched with an internal flap in front of the selenium cell. This in turn is located further inside the housing, which probably results in a smaller measuring angle and protection from side light in measuring ranges 2+3.
Sensitivity 6-33° DIN / 3-1600 ASA; f/1.4-22; Shutter speeds 30-1/2000 sec.; Cine values.
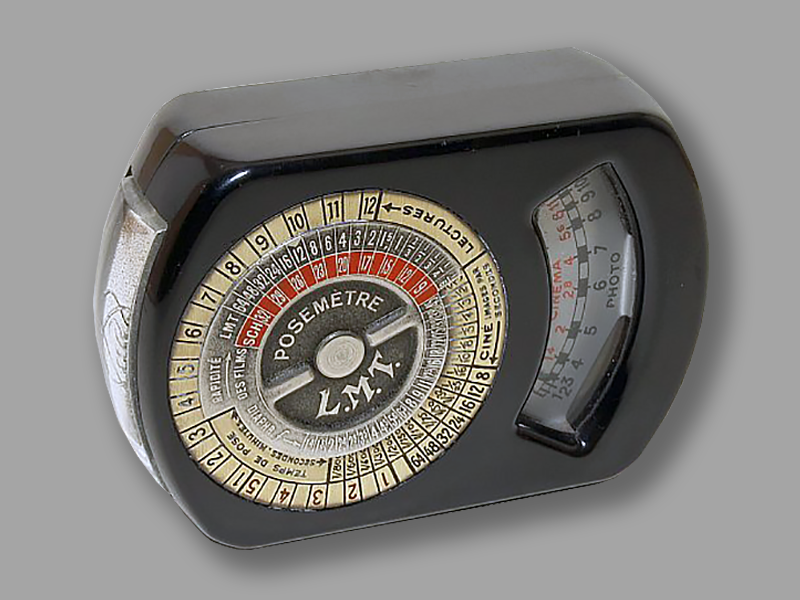
The LMT Posemétre 3.003A was an early selenium light meter manufactured by L.M.T. Le Material Telephonique, Paris, essentially the French counterpart to General Electric in the USA or Siemens in Germany.
This Posemétre in a black Bakelite case was made around 1937/38. It only has one measuring range. In addition to the usual (German) Scheiner scale, this light meter also uses its own LMT scale for film speed, which roughly corresponds to the later ASA values.
The measuring pointer shows light values between 1-12 on the black “photo” standard scale, which are brought into relation to the film speed using the calculator. Exposure values can then be read on the lower half of the scale on the calculator disc. On the red scale, the meter pointer shows aperture values for film cameras.
Sensitivity 9-32° shiner; Aperture 1.4-45; Exposure times 64 min. – 1/800 s; Cine values 8-64
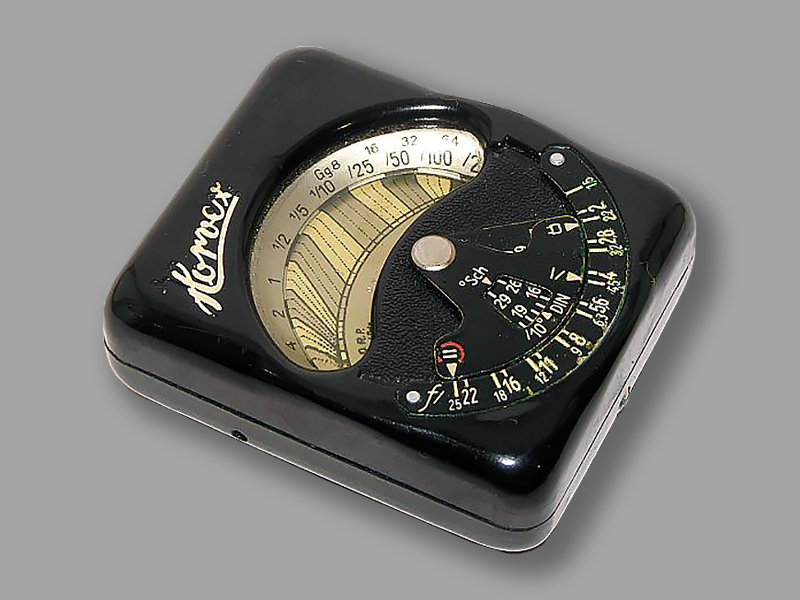
As the successor to the Tempophot, the Metrawatt Horvex was, so to speak, the “bread and butter light meter” of Metrawatt AG, Nuremberg. The “original” Horvex was built from 1938 to around 1942 and for a few years after the end of the war. In 1939 the Horvex cost 37.50 RM.
The scale and operating method were adopted from the Tempophot, but the device became significantly more manageable. Probably as a reminiscence of previous devices, the selenium cell installed inside still pointed downwards. However, a more practical operation was possible using a folding mirror. The measuring range is switched using the mirror flap. When the flap is closed, the scale arrow on the far left below the red border applies; when the flap is open, the arrow in the middle applies. On the far right there is another marking for the measurement with an amplifier element.
Film sensitivity 7-22° DIN / 19-32° shiner; Apertures 2 to 22 and 1.5 to 25; Exposure times 240 – 1/3000 s.
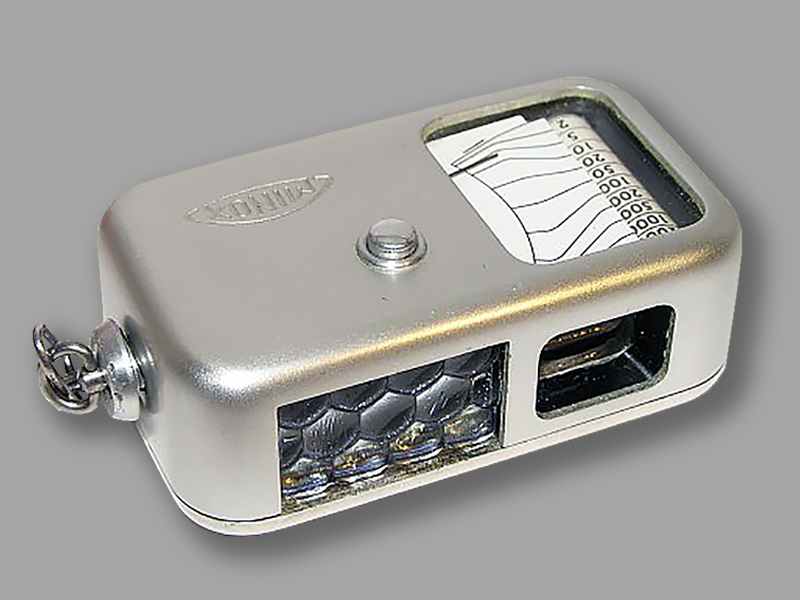
A light meter was also available for the classic Minox miniature camera in the mid-1950s, before the camera from the Minox B model onwards was delivered with a built-in light meter. This part, the Mino Six, designed in the Minox style, was manufactured by Gossen, Erlangen.
The exposure meter is only labeled “Minox” and also has a built-in telescope viewfinder to better target the subject to be measured with the small Minox image format. To take the measurement, the button on the housing must then be pressed; the needle is locked at the displayed value after it is released.
For the 11, 14, 17 and 20 DIN films available from Minox at the time, there was a shutter speed roller that was set with the typical Minox thumb wheel. The display value applies to aperture 4. Using the table on the back, the shutter speeds can also be read for other apertures.
Values: Sensitivity 11-20 DIN / 10-80 ASA; Apertures 2 – 8; Shutter speeds 20 – 1/5000 s.
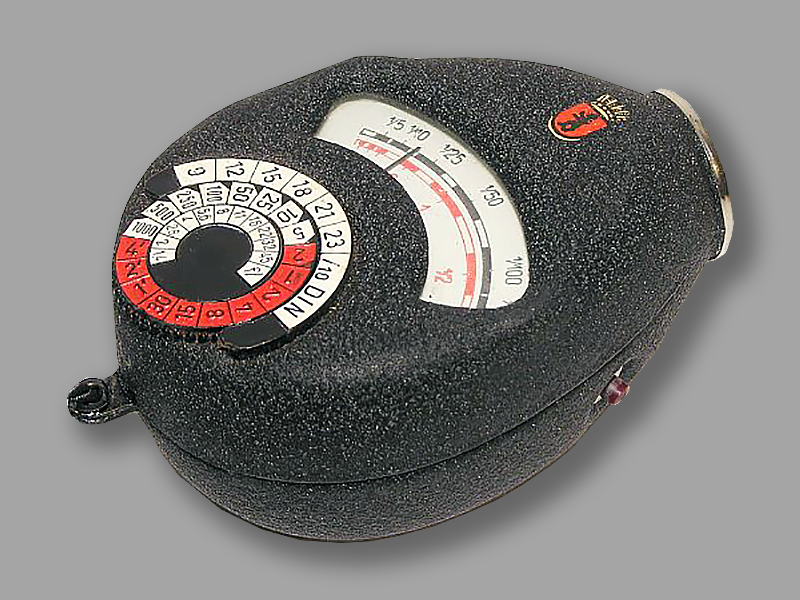
A rare light meter with an unusual design was created for a short time around 1954 at the East Berlin Apparatefabrik Philips GmbH i.V. The company was then called Philips Schall GmbH in Berlin North-West and was a Dutch property under state administration in the GDR. The light meter is also known as the “Berlin Bear”, this name comes from the Berlin city coat of arms stuck on as a decal.
The exposure meter has two measuring ranges; after pressing the side button, the lower (red) scale values apply. The two versions do not differ in their values, but they do differ in weight. In addition to its weight of 200 g (version 2 = 120 g), the first version can also be recognized externally by its coarse textured paint, yellowish scales and metal switching buttons.
The measuring mechanism of version 2 was apparently more sensitive.
Sensitivity 9-23° DIN; Apertures 1.4 – 45; Exposure times 4 min. – 1/1000 s.
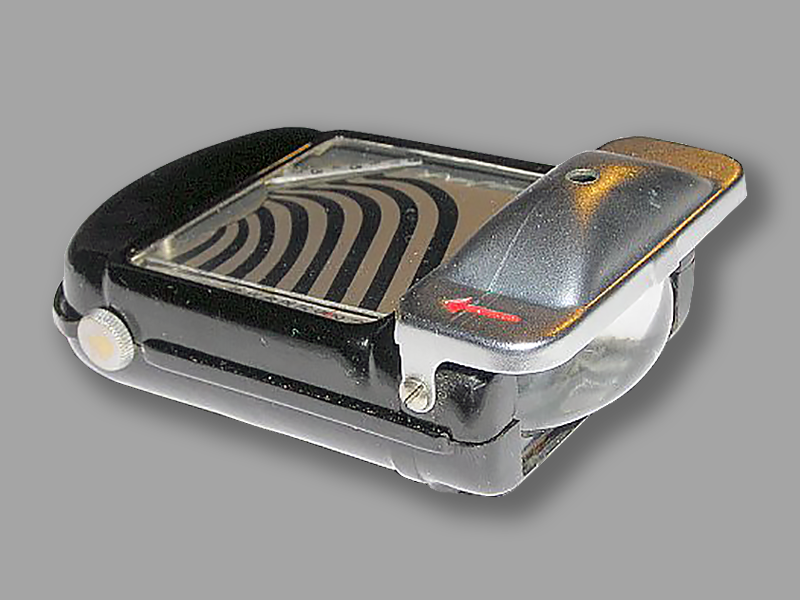
The Dutch manufacturer Prinsen, Kranenburg, has been producing electrical light meters in an unusual design since around 1935. Prinsen was taken over by Fana Metaal, Hilgersberg (Holland) around 1938, and light meters continued to be produced until the early 1950s.
The measuring pointer of this Prinsen consists of a light aluminum foil with printed aperture values. Using the large channel scale, the respective time/aperture combination can be read directly. The exposure time scale is adjusted using the rotary knob on the side according to the film sensitivity. The film speed is displayed in a window on the back. Also on the back is a conversion scale for the film sensitivity DIN/Scheiner/H & D and cinema values. There are also sockets for a plug-in amplifier element. A slightly different version with the rotary knob and the display for the film sensitivity on the front was later available in a red Bakelite housing. Sensitivity 1-25/10° DIN; Apertures: f/1.4-16; Exposure times 1 min – 1/1600 s or 16 min – 1/800 s.
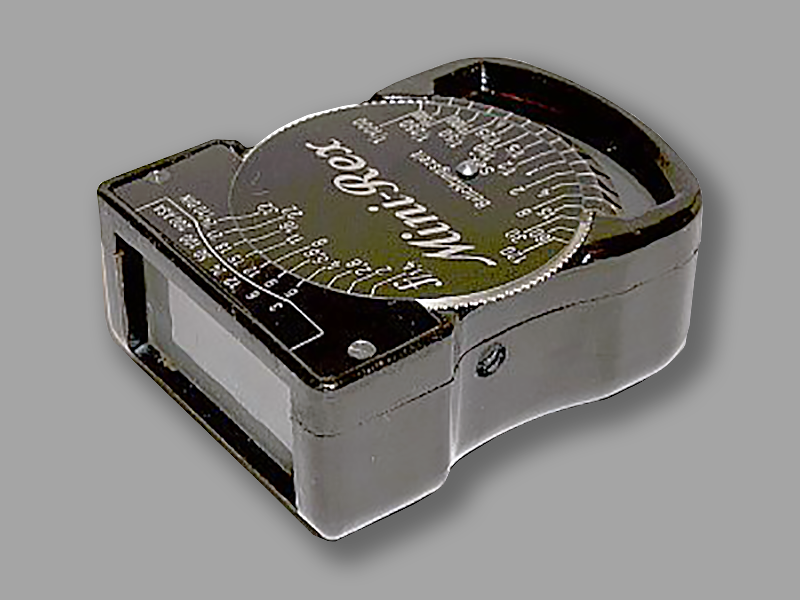
In addition to Dorn, Gossen, Kiesewetter, Kindermann, Metrawatt and Zeiss, Rex Messinstrumentenbau GmbH, which was still based in Munich at the time, was one of the pioneers among the manufacturers of electric light meters in Germany.
The original Rex version was introduced in October 1937 and shortly afterwards the small Novo-Rex, both priced at 38 RM. The Mini-Rex followed in 1939, the housing design of which was to become a model for many other measuring devices of this type.
In contrast to the design of the early electric light meters with the selenium cell on the underside of the housing, the measuring cell on the front of the housing made work much easier. Even better than the Rex and Novo-Rex, the Mini-Rex’s large knurled wheel makes it easy to use with one hand. The Rex’s slide rule scale has been converted into a round scale; after setting the working aperture to film sensitivity, the exposure time can be read directly from the pointer deflection.
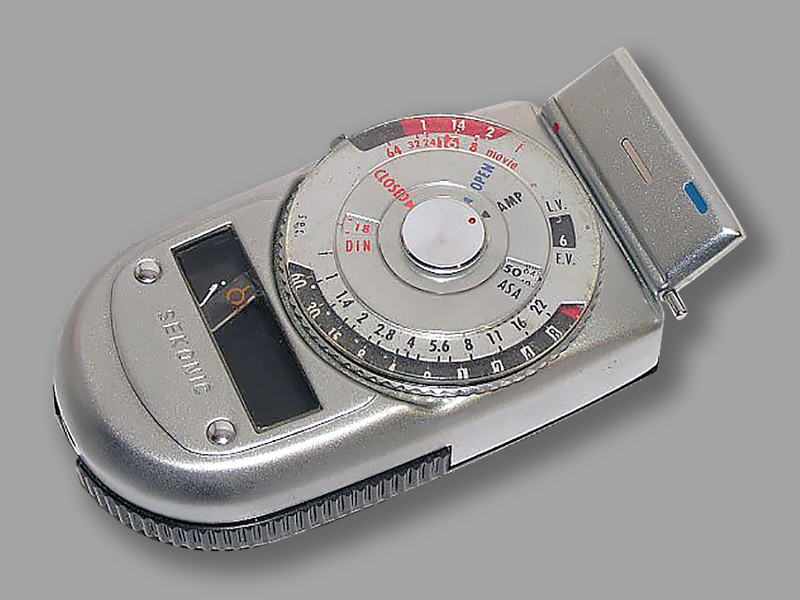
If one refers to Gossen as the manufacturer of light meters (and other measuring devices) in Germany, the same applies to Sekonic in Japan. Sekonic also produced light meters for trading companies and other photographic equipment manufacturers, most sold them under their own names.
This selenium exposure meter, the Auto-Leader model 38, comes from Sekonic Electric Co. Ltd, Tokyo, from around 1960. Sekonic was very busy creating new models. Some differed only slightly in performance, features and even the housing. However, the Auto-Leader with a permanently installed, fold-out amplifier element is a completely independent model. The housing is matt silver, the base with the amplifier is made of black Bakelite. The tracking pointer is operated with the knurled wheel. The permanently attached front flap does not serve as a diffuser but rather as a sensitivity switch. The setting scale therefore has a total of three setting markings. The amplifier element is folded out on a bracket on the floor.
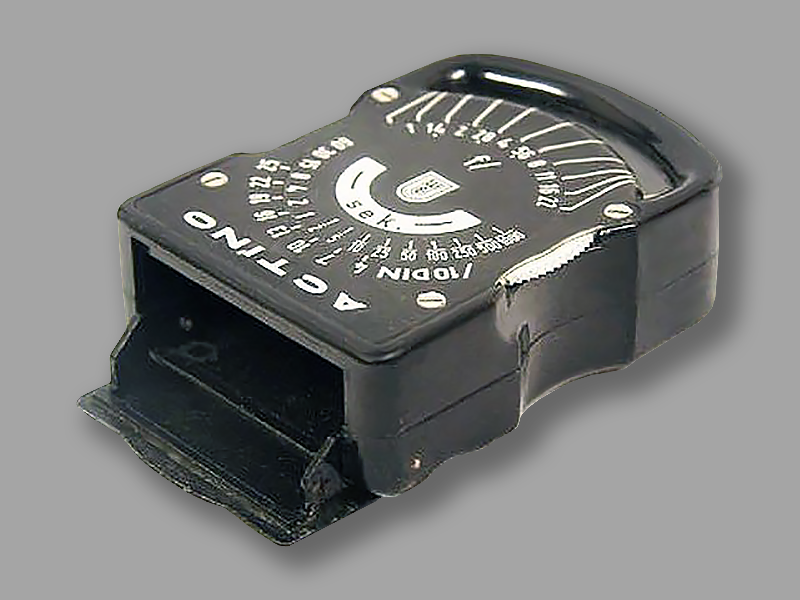
The successor model of the Ur-actino, which was also sold as a Balda temeter in a somewhat redesigned version, was the Actino-B. This was offered by the small family business Weigand & husband, Erlangen for the first time in 1939.
This model was again available in two versions. In this model B, after the exposure time (upper scale), the aperture could be read directly on the lower part of the scale. With model A, the aperture on the upper scale had to be specified. The values of both types were identical.
After the end of the war, K.H. Weigand, measurement technology, Erlangen, continued the company alone and offered the actino again from 1948 at the price of DM 39. Shortly afterwards, this model was replaced by the Super Actino. The elegant device in the black bakelite housing probably also served as a template to the Zeiss Ikophot.
Values: Sensitivity 4-25/10 DIN; Apertures 1-22; Exposure times 60-1/1000 seconds.
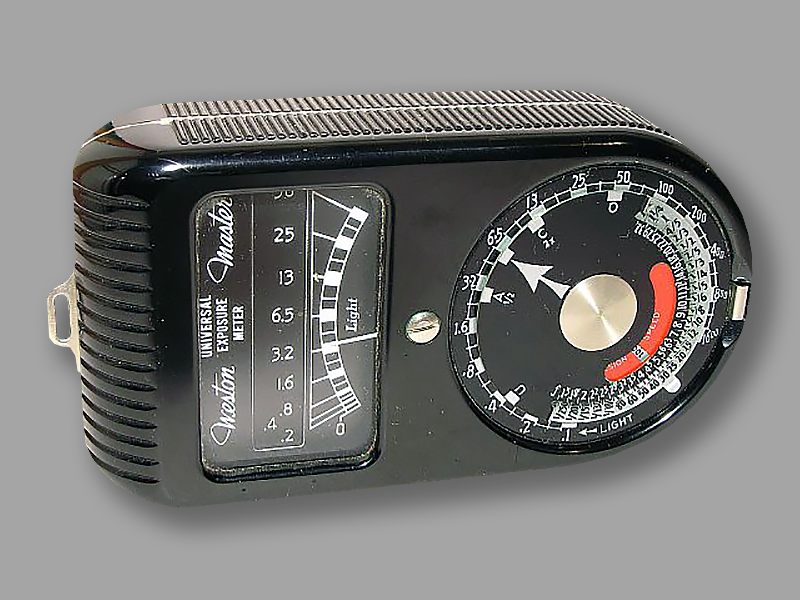
The Weston Master Model 715 is the very first exposure meter model of this series from 1938 the Weston Electrical Instrument Co. in Newark, USA. It is even greater and heavier than the successful successor models. Together with the model 720 offered two years later in the same housing, the Master 715 is occasionally referred to as the “war version”.
Master 1 justified the Weston-typical construction with the foldable area switch above the measuring window on the back. The two scales have light values from 25-1600 or 0.2-50. The numerous sensitivity and aperture values are typical of US exposure meters. Once the basic setting for the film used is, the transfer of the displayed light value to the scale and the following reading of the exposure values is easy. The computing scale has 5 different motif and measurement-dependent adjustment markings for the transfer of light.
Sensitivity 0.3 – 800 Weston; Blends 1.5-32; Exposure times 100-1/1200 s.
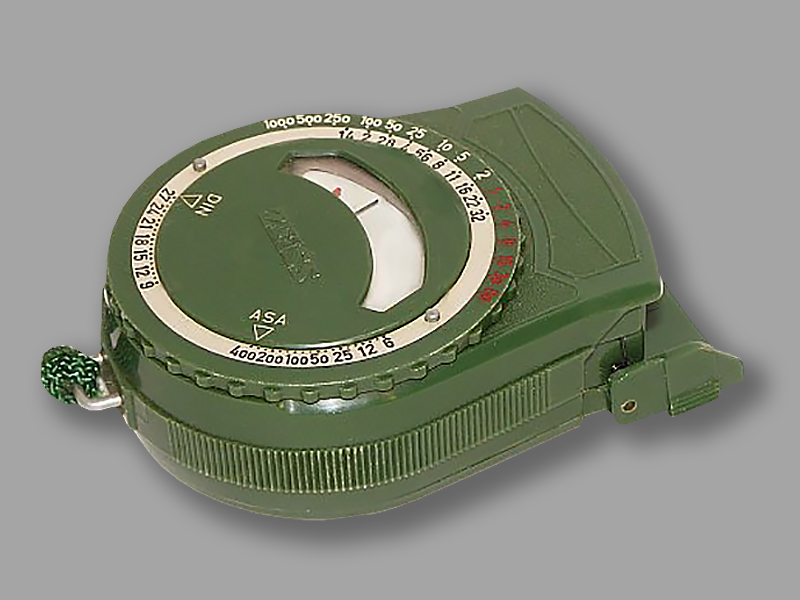
This exposure meter was built in the Carl Zeiss Jena production facility in Weimar. The Werralux/Weimarlux exposure meter was created later (around 1955). This green version of the Zeiss-Jena exposure meter from the 1950s is apparently somewhat younger than the black version. There are no significant differences between them, but the housing is made of green plastic, matching the Werra 35mm camera, the production of which began in 1954. The DIN specification is now in degrees and no longer in /10 values. The scale rings were also dispensed with.
The rather large device in the green bakelite housing was designed for one -handed operation with the semi-handed pointer and large knurled wheel. With its chunky shape, however, it is not as good in the hand as other devices of these years. Practical is the front coverage flap for protecting the selenim cell.
Sensitivity 9-27 ° DIN / 6-400 ASA; Blends 1.4-32; Exposure times 60-1/1000 seconds; Cine values on the back.
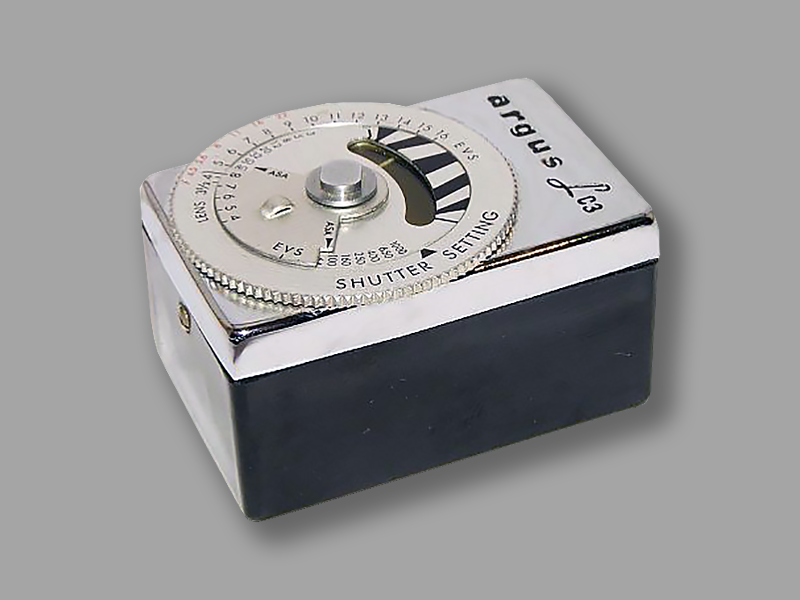
Argus Cameras, Ann Arbor, USA, supplied clip-on exposure meters as accessories for its “Bricks”. However, these were produced in Japan towards the end of the 1950s, probably by Sekonic.
Only the dial on this pretty device is reminiscent of the German model for all these parts, the Metraphot. Otherwise, the Argus LC-3 is an independent creation.
Similar to Polaroid, Argus had introduced its own light value series for its cameras. The aperture numbers also do not correspond to the usual norm. That’s why this exposure meter also provides different setting values than usual.
This is a special version for the “Golden Shield”. The case is slightly larger than the normal version and has a chrome-plated cover plate to match the Golden Shield outfit.
Sensitivity 2.5-1250 ASA on two scales with different graduations; Aperture 3 1/2-16 (Argus special series); Shutter setting 4-8.
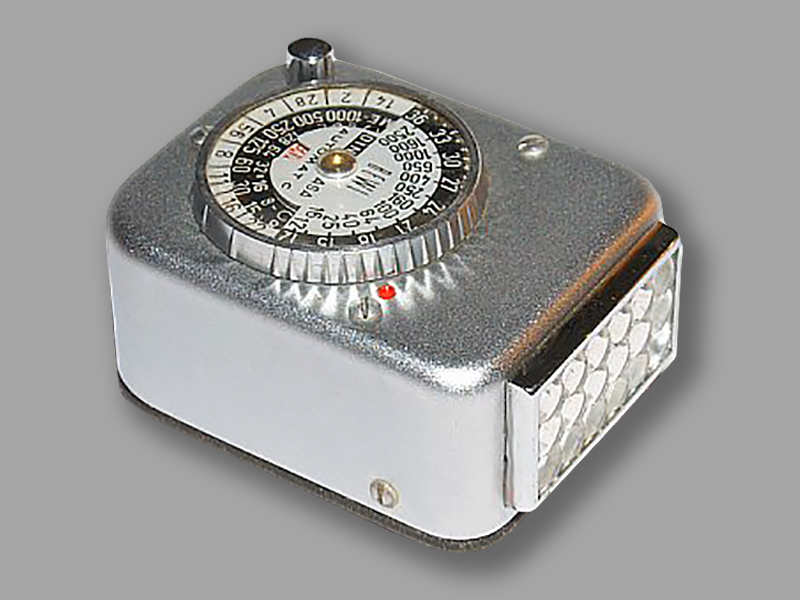
With this clip-on Bewi Automat, Bertram has once again created an extraordinary light meter. An exposure meter that delivered current exposure values without any wheel-turning was previously only available from them as a hand-held exposure meter. This clip-on version of the Bewi Automat is hardly larger than the Metrawatt 2 or 3, but determines the exposure values at the push of a button.
This mini clip-on exposure meter is generally known as the Bewi Automat C (A and B were handheld meters). There are two versions. This second version of the clip-on Bewi Automat, which now also has the “C” in the nameplate, can be recognized at first glance by the scale, which is printed in black and white. Production time is around 1962.
Operation: turn the film speed to the red housing marking using the large knurled wheel. The exposure meter then displays the light value and exposure time at the aperture values on the scale. Apertures 1.4 – 22; Exposure times 30 – 1/1000 sec.
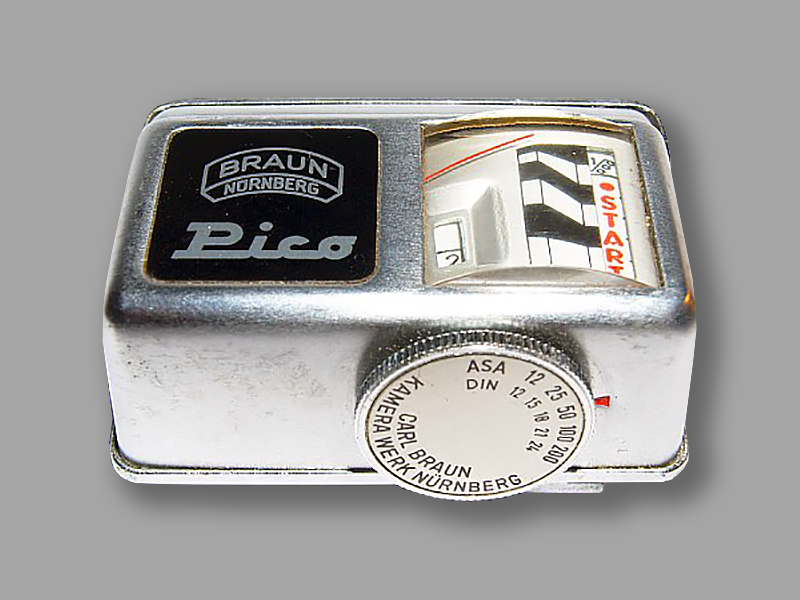
It is quite noticeable that it says “Carl Braun Kamerawerk, Nuremberg” on this massive clip-on exposure meter. However, it is unlikely that it was produced there. The similarity to Gossens Sixti is too clear. The Sixti, first offered by Gossen in 1954 as a response to Metraphot’s attachable exposure meter, was also manufactured for Kodak as Kodalux. Accordingly, the Braun Pico can be dated to the same period, around 1955.
A few deviations from the Sixti can be found in addition to the flashy nameplate. The diffuser disc for light measurement is hinged like a harness and a rather unusual shape was chosen for setting and reading the values. There is a red “START” mark on the scale for the basic setting of the film speed.
The attachment shoe can be screwed in three positions so that the device can be adapted to most viewfinder cameras. It can also be completely unscrewed and attached to a leather strap using a hook that slides out to the side. Apertures 2 – 16; Exposure times 60 – 1/1000 sec.
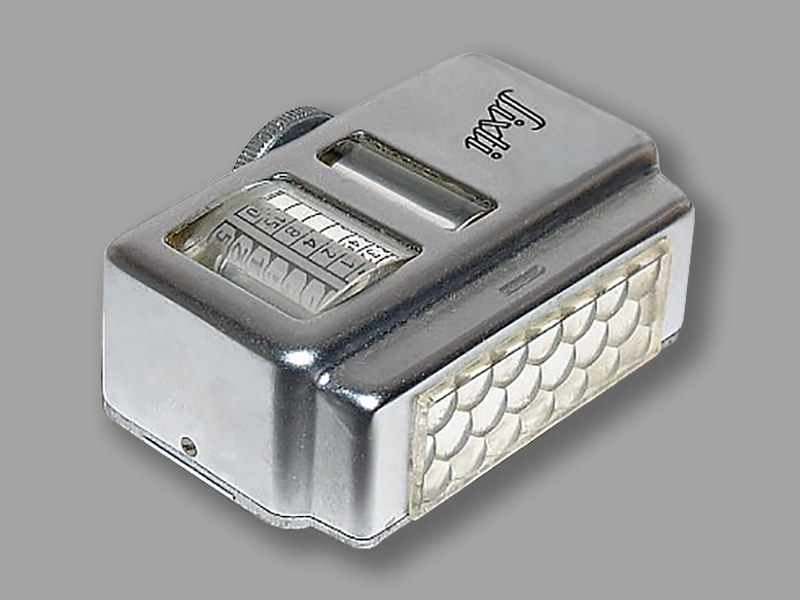
In 1954, the Sixti Version 1 was Gossen’s answer to the successful clip-on exposure meter from its competitor Metraphot. In addition to the light meter that Gossen sold under this name (retail price 69 DM), the device was also produced for other camera manufacturers, including Braun (Pico) and Kodak (Kodalux). This first version can be recognized by the engraved and black “Sixti” lettering. There was an attachable diffuser cap for light measurement.
The Sixti has two measuring ranges – black and red. The operation is simple – use the rotary wheel on the back to align the black or red tracking mark with the pointer deflection. In the window next to it, the aperture (red or black) that matches the tracking mark can then be read on a two-part shutter speed scale. The attachment shoe can be moved laterally so that the device can be adapted to most viewfinder cameras. However, an additional intermediate piece was often required. Apertures 1.4 – 45; Exposure time 30 – 1/500 s.
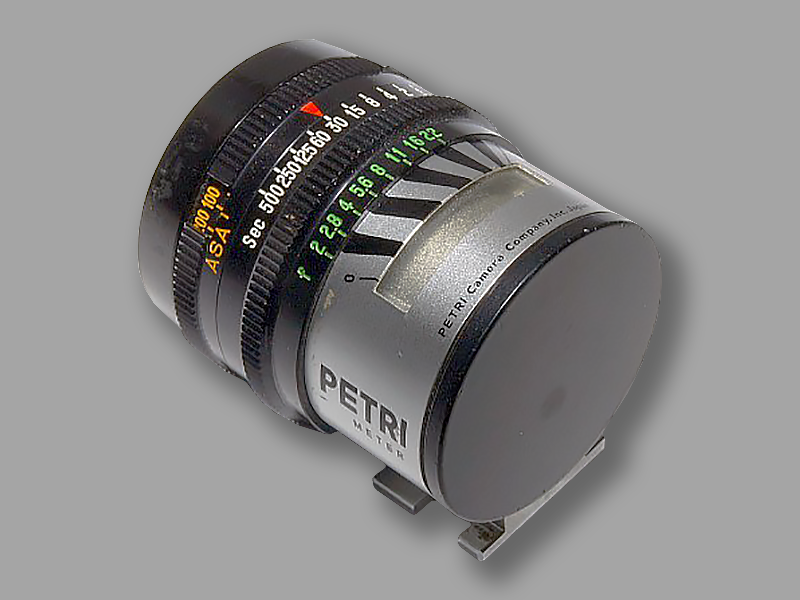
Kuribayashi Camera Industry, Inc. Japan, better known as Petri Camera Co, was the manufacturer of this clip-on exposure meter without further type designation, which at a superficial glance looks more like a viewfinder.
There are two versions; the older version with only one ASA film sensitivity scale and a newer version with two sensitivity scales DIN and ASA. This version only has one exposure time series with linear values. The housings of both versions are the same.
Built like a small lens, the meter with a channel scale is operated with a single ring that provides direct reading of time and aperture. An aperture value (green scale) is turned to the pointer deflection, and the exposure time compared to the film sensitivity window can be read on the white scale opposite.
Sensitivity 10-800 ASA old (ASA version) or 11-30 DIN / 10-800 ASA new (DIN version); aperture values 2-22; Shutter speeds 1-1/500 s.
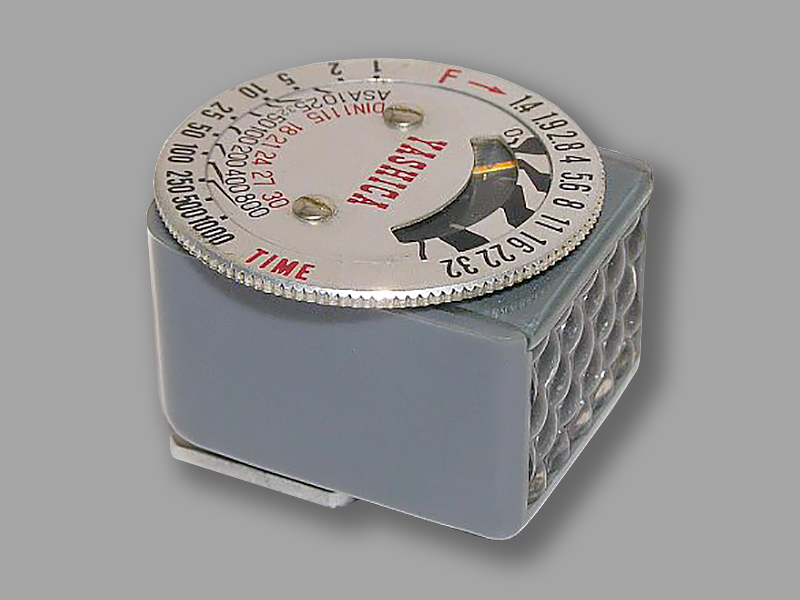
The Yashima Seiki Company was founded in Nagano, Japan in 1949. Initially components for watches were manufactured, photo parts followed later. The first camera came onto the market in 1953.
From around the mid-1950s, more and more Japanese-made light meters were offered. But if you look closely, many of them differ only slightly. Many are just replicas of German products.
This clip-on exposure meter with the Yashica identification is actually another Far Eastern plagiarism. It corresponds to the Lafayette, whose model was the Metraphot 2. The Yashica just has a more subtle adjustment scale than the Lafayette.
Construction time was probably towards the end of the 50s/early 60s. There’s not much to write here about the features and operation, the picture probably speaks for itselves.
Sensitivity 11-30° DIN / 10-800 ASA; Aperture: f/1.4-32; Exposure times 1-1/1000 s.
A button cell, watch battery, or coin battery is a small single-cell battery shaped as a squat cylinder typically 5 to 25 mm (0.197 to 0.984 in) in diameter and 1 to 6 mm (0.039 to 0.236 in) high — resembling a button. Stainless steel usually forms the bottom body and positive terminal of the cell; insulated from it, the metallic top cap forms the negative terminal.
Button cells are used to power small portable electronics devices such as wrist watches and pocket calculators. Wider variants are usually called coin cells. Devices using button cells are usually designed around a cell giving a long service life, typically well over a year in continuous use in a wristwatch.
Mercuric oxide button cells were formerly common, but are no longer available due to the toxicity and environmental effects of mercury. Button cells are dangerous for small children, as when swallowed they can cause severe internal burns and significant injury or death. Duracell has attempted to mitigate this by adding a bitter coating to their batteries.
Group 5
Battery-powered photoelectric light meters
Here you will find – apart from a few early special versions – light meters that have been available since the 1960s, which do not draw their power for the measuring mechanism from a selenium cell but through battery operation. The battery power is used to operate a light-sensitive electronic component, which usually displays differences in brightness via a bridge circuit on a pointer measuring mechanism or (later) digitally.
The functionality of the battery-powered exposure meters basically corresponds to the photoelectric exposure meters with selenium cells from Group 4. However, the scope of measurement and thus the light sensitivity is expanded by additional electronics. Semiconductor components such as CdS cells, phototransistors and photodiodes or light-sensitive resistors replace the classic selenium measuring cell.
Sophisticated downstream electronics, measuring bridges and integrated components expand the possible applications considerably, but also make the devices more complicated and definitely require a power supply with batteries or accumulators.
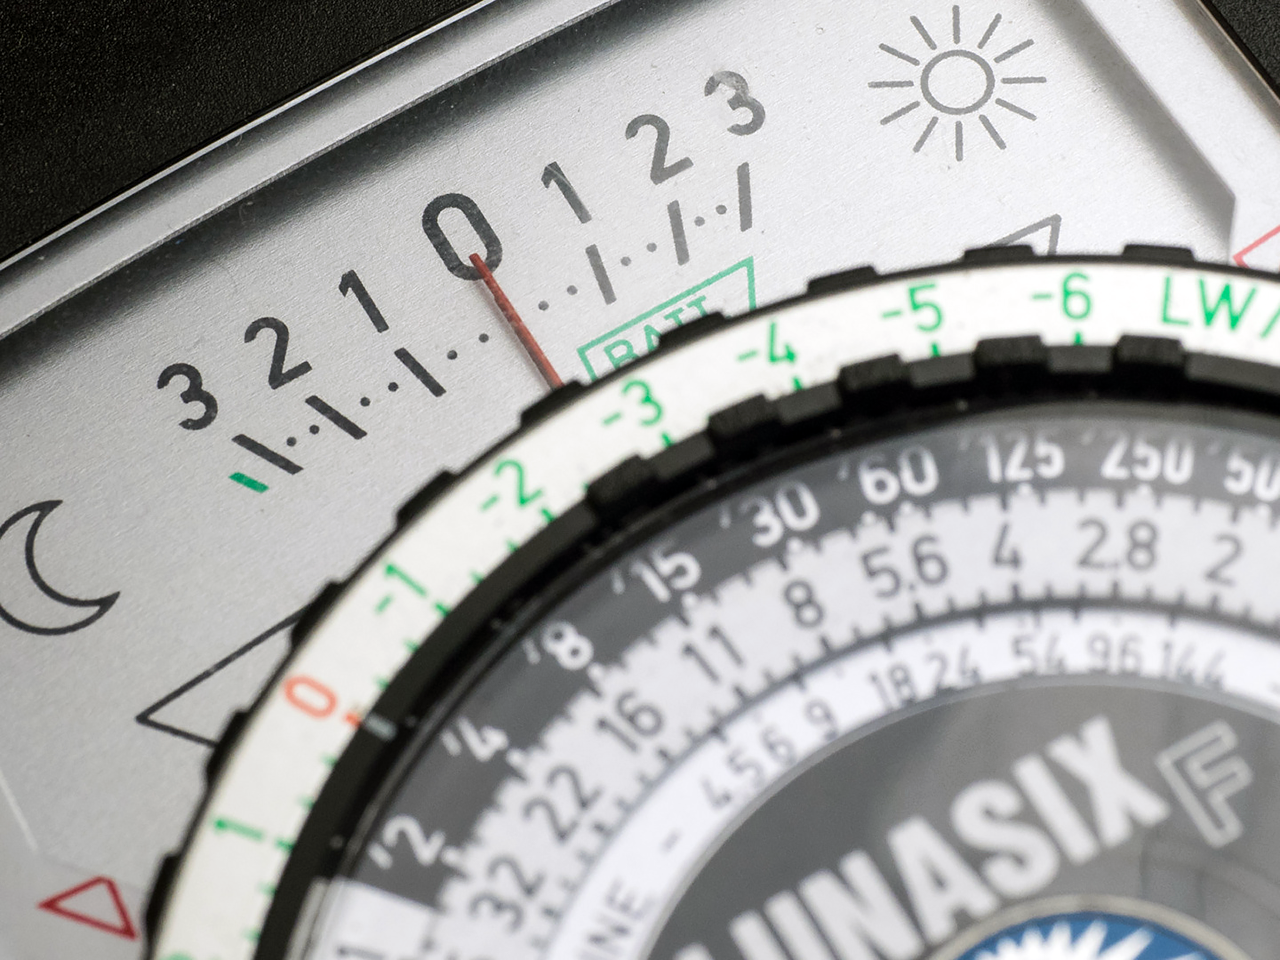
Selenium and silicon light meters use sensors that are photovoltaic: they generate a voltage proportional to light exposure. Selenium sensors generate enough voltage for direct connection to a meter; they need no battery to operate and this made them very convenient in completely mechanical cameras.
Selenium sensors however cannot measure low light accurately (ordinary lightbulbs can take them close to their limits) and are altogether unable to measure very low light, such as candlelight, moonlight, starlight etc. Silicon sensors need an amplification circuit and require a power source such as batteries to operate.
CdS light meters use a photoresistor sensor whose electrical resistance changes proportionately to light exposure. These also require a battery to operate. Most modern light meters use silicon or CdS sensors. They indicate the exposure either with a needle galvanometer or on an LCD screen.
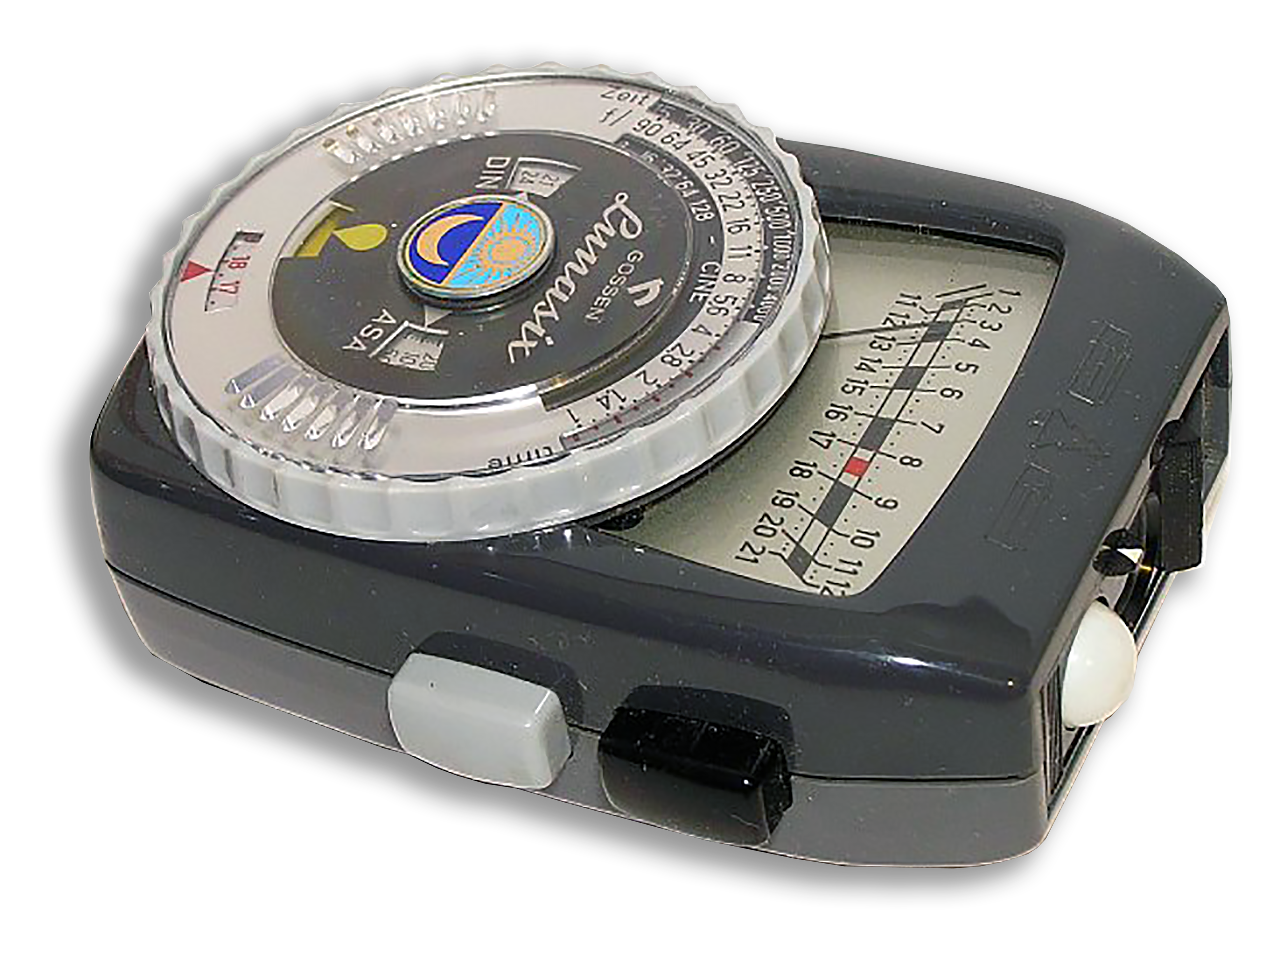
With the Lunasix, Gossen, Erlangen, managed to consolidate its existing position as the world market leader in light measuring devices in 1960. The Lunasix is the largest, but also the last significant innovation in light meters. By using electronic components in conjunction with a battery power supply, the first marketable hand-held exposure meter with a cadmium cell (CdS) was developed.
With the Lunasix, Gossen was years ahead of its competition. From the beginning, the Lunasix had two measuring ranges, which in the first model were selected with two push buttons on the side. In the first model, the light value scale does not switch at the same time; the selected area is displayed with a mark on the scale. The black button applies to light values 1-12, the gray button for 11-21. The needle display is locked when the button is released so that the displayed value can be transferred to the setting scale in the window with the yellow drop. The exposure values can then be read directly from the upper half of the scale.
This first Lunasix requires one battery, later versions require two. The measurement range of the Lunasix was stunning right from the start – 8 hours to 1/4000 sec. Although hardly anyone needed that in practice, these values contributed to the Lunasix becoming the benchmark for all future light meters and also a status symbol.
Measuring values: Sensitivity 9-42° DIN / 6-12,000 ASA; apertures 1 to 90; Exposure times 8 hours to 1/4000 sec.; CINE values 8-128. The Color Finder comparison chart is housed in the lid of the leather case. Various measuring attachments can be inserted in front of the measuring window with a bayonet lock, making the light meter a universal device.
CdS: the new standard
Battery-powered measuring devices are usually constructed with electronic components. The first of this kind – apart from special applications such as the SEI photometer as described in the extinction meter or similar devices that work with comparison light – was the Lunasix from Gossen.
Photo-resistors, phototransistors or similar serve as indicators for the subject lighting to be measured. Digital displays gradually found their way into this area of application and replaced the shock-sensitive analog moving-coil instruments. Today’s devices mostly use digital circuits to determine and display the measurement results. However, since I am ending my site before the digital era, current digital measuring devices will not be found here.
For many years, German light meter manufacturers were considered world leaders. Nevertheless, the introduction of the first CdS light meter Lunasix from Gossen was a surprise. The Lunasix suddenly became the “standard of things” for light meters; Many are sure – he still is today!
The competition and Far Eastern plagiarists needed some time to recover and catch up. It was not until the 1980s that the measuring element, the cadmium sulfide photoresistor (CdS), was replaced by a silicon photodiode (sbc = silicon blue cell) in the successor models.
Battery power
Another note about the batteries. With the introduction of these measuring devices in the 1960s, the mini-format mercury battery, also known as a button cell, was also newly created at the time. The battery known as PX625 with a voltage of 1.35 V was used.
However, this type of battery was banned in Europe in the 1990s because of its highly toxic substance.
However, successor types with a different chemical/physical structure were quickly found, such as the A625 (alkaline) for the PX625. Although their housing shape is the same, both the voltage (1.5 V) and the current characteristic are different. Sensitive measuring devices therefore sometimes show incorrect values.
This affects users who need absolutely correct measurement values in difficult situations, but the function of the measuring device is in principle not affected. Alternatives are now available for such purposes, such as zinc-air batteries. Because many battery manufacturers cook their own soup, there are a variety of naming variants – some of which are technically largely identical. Extensive comparison lists can be found on the Internet.
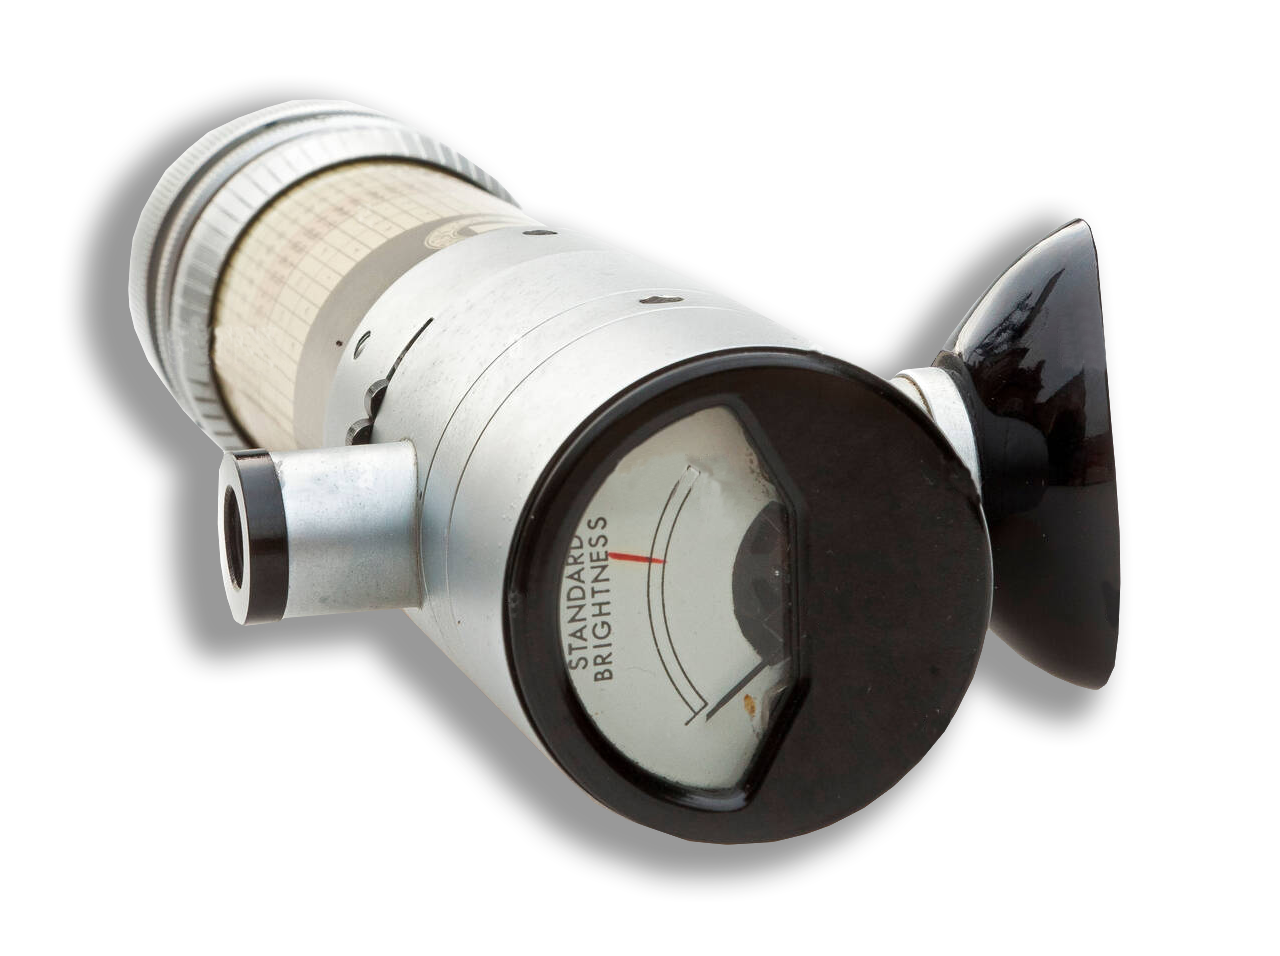
Vintage SEI (Salford Electrical Instruments) Exposure Photometer; a very early photographic exposure meter from c.1948.
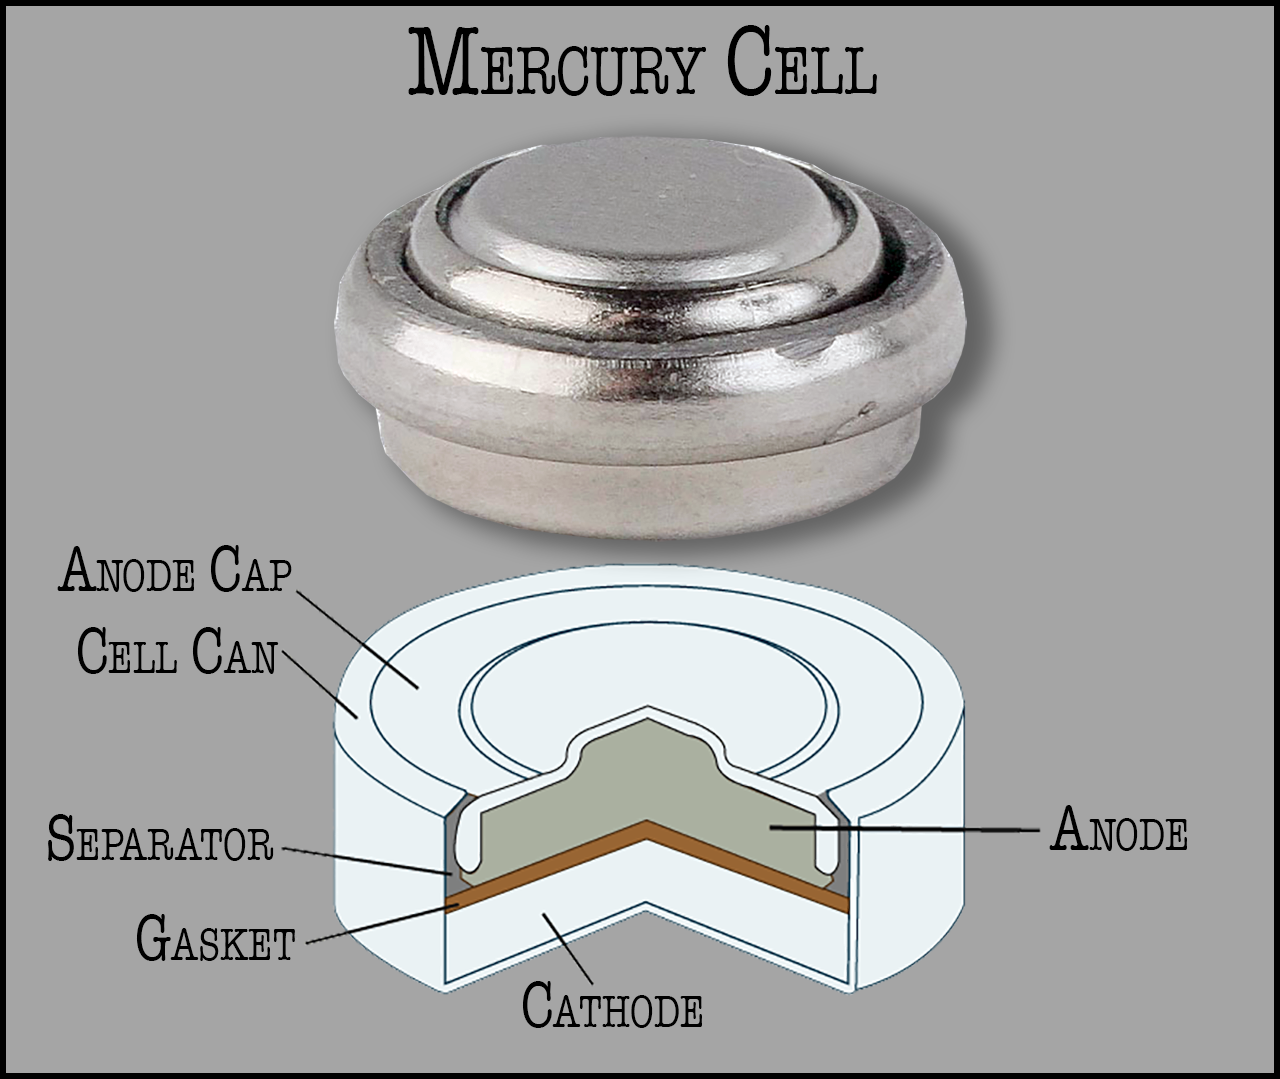
Schematic structure of a Mercury button cell.
six images of battery-powered exposure meters
(all information taken from https://photobutmore.de)
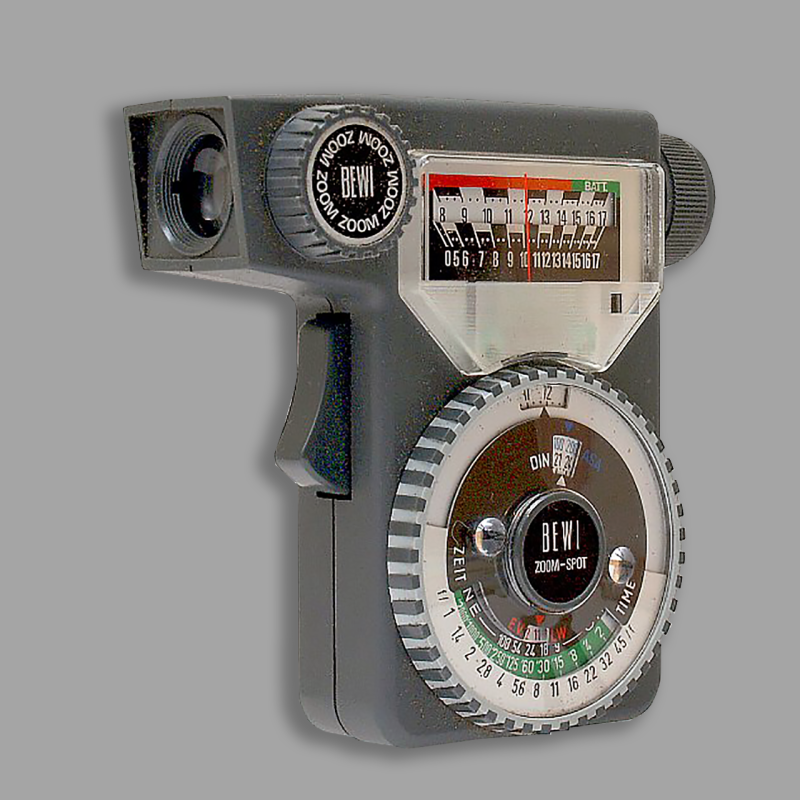
In the 1960s, the era of classic separate light meters ended. Almost all newly developed amateur cameras had integrated exposure systems. At the same time, cheap cameras without built-in light meters were also created. However, these often only had a fixed focus setting for casual photographers who didn’t know what to do with recording accessories anyway. The professional area was covered by Gossen with the Lunasix and some elaborate spot meters made in Japan.
Most light meter manufacturers gave up at that time. Gossen and Metrawatt joined forces and specialized in high-quality measuring computers. In 1968, the traditional manufacturer Bertram, Munich, made one last attempt to survive on the market with a high-quality (and high-priced) product with this complex measuring device. Although this Bewi zoom spot is quite powerful and could technically keep up with the Japanese spot meters from Pentax and Minolta, it was not destined to have a long life. Bertram finally gave up production at the end of 1982.
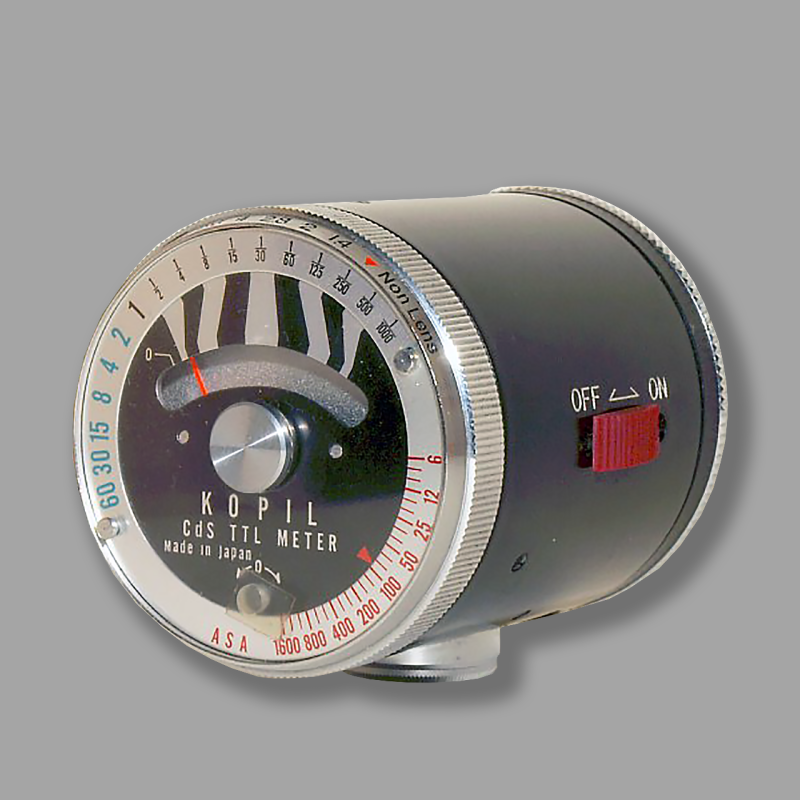
Here is an unusual CdS light meter made in Japan. This device, the Kopil CDS-TTL Meter, measures the exposure TTL, i.e. through the lens, but without a camera! To do this, a lens is attached to the front; Depending on the version, the connection is an Exakta bayonet or M42 screw thread, here the M42 version. The lens used determines the measuring angle of the TTL light meter! An identical version – but only with an Exakta/Topcon bayonet is also available as a Topcon Lens-Lite meter from Tokyo Kogaku. At the “Non Lens” marking, exposure values can also be determined without a lens – but this is less accurate!
As complicated as the whole thing may sound, the operation is simple. After presetting the film sensitivity, the exposure time is read off the channel scale. The aperture setting is already determined by the lens. Only when measuring without a lens does it need to be converted; aperture values are engraved on the knurled ring. The common button cell type 625 or a corresponding comparison type is used as the battery.
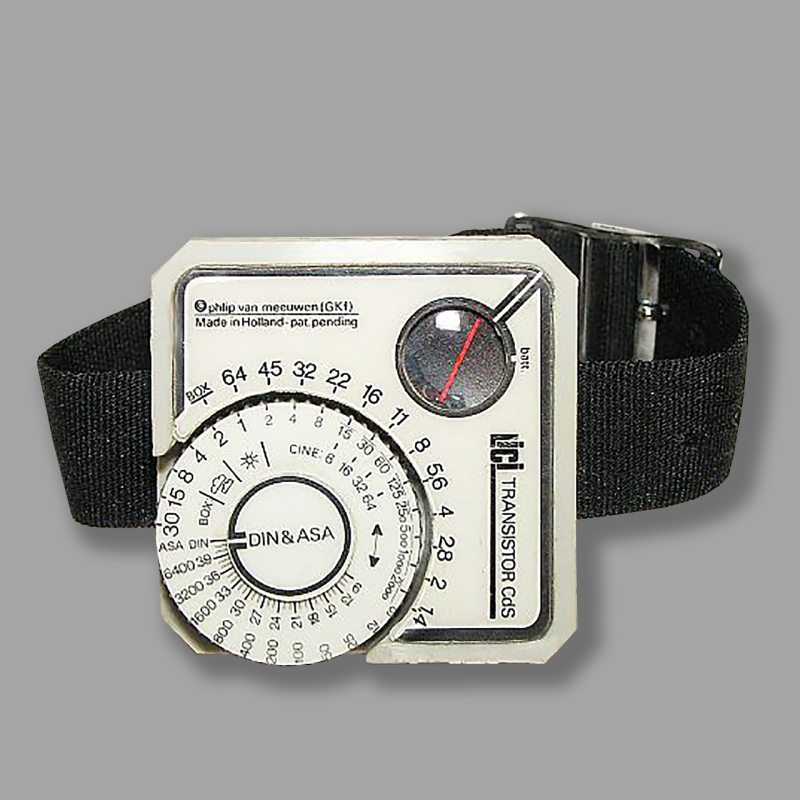
An unusual light meter, the Lici Transistor CdS, made in the Netherlands, comes from Phlip van Meeuwen (GFK). To my knowledge this is the only measuring device from this manufacturer.
The transistor CdS measuring device, which is only 4×4 cm small, can be worn on the wrist like a watch. The micro measuring cell is embedded in a corner of the housing so that the light meter does not have to be removed during the measurement. However, to change the battery (625), the base must be unscrewed.
Taking measurements with the small light meter is child’s play. The knurled knob is turned until the red pointer in the measuring window points to the black marking. The exposure values can then be read directly. The scope of measurement is enormous. Due to the design and the internal components, the light meter dates from around the late 70s.
Values: Sensitivity 9-42° DIN / 6-12,800 ASA; Apertures 1.4 – 64; Exposure times 30-1/2000 sec.; Cine values.
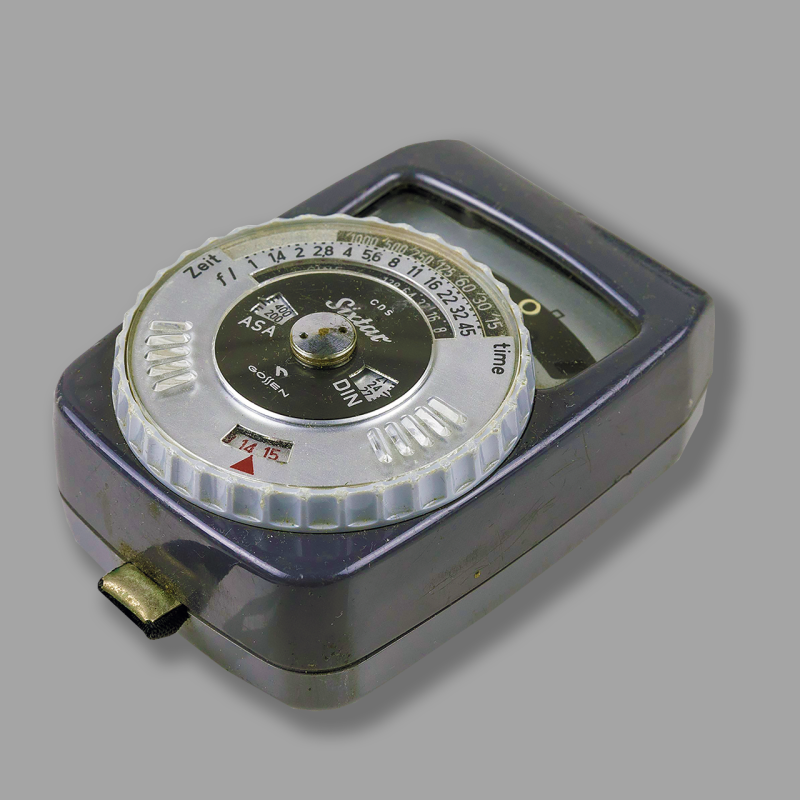
One meter absolutely must not be forgotten: the Sixtar, the little brother of the Lunasix. In addition to the Lunasix, the Sixtar was a new creation from Gossen in the mid-1960s with CdS measurement technology. For almost 20 years it was quite successful as the “little brother of the Lunasix”, especially among amateur photographers.
The Sixtar has hardly any fewer options than the Lunasix. It is slightly smaller, but also has 2 measuring ranges that can be switched with the toggle switch on the side.
Only the battery indicator test button is located somewhat inaccessibly on the underside of the case. However, it is operated in the tried and tested way with a tracking pointer. For the “normal” photographer, the Sixtar is clearly the handier device.
Values: Sensitivity 9-42° DIN / 6-12500 ASA; Apertures 1 – 45; Exposure times 2 hours – 1/2000 sec.; Light values -6 to 24; CINE gear numbers 8-128;
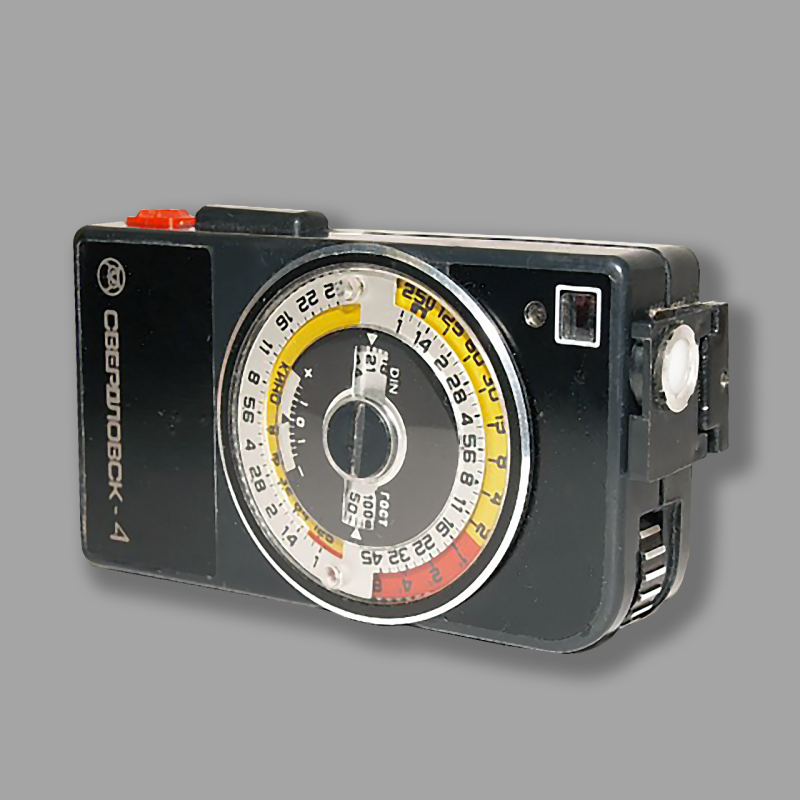
The CdS light meter most widely used in the countries of the former “Eastern Bloc”, was probably the Sverdlovsk-4. Unlike many other exposure devices of the time, it was not a replica of the Gossen Lunasix but rather a completely independent development. The device can be found in several variants and with different manufacturer logos, some of which are only for the USSR internal market with Cyrillic lettering, and others are marked as export versions.
The photo shows a Type II meter labeled in Cyrillic with the owl logo of UOMZ (Uralskiy Optiko-mekhanicheskiy Zavod), Sverdlovsk from the early 1980s. Devices intended for export have a different logo. The integrated mirror viewfinder turns the device into a spot meter (~20° measuring angle). The CdS measuring cell requires battery power, which in the example shown here is supplied by 3 AA batteries with 1.5V each. Aside from that, the other features of the powerful device are also quite impressive.
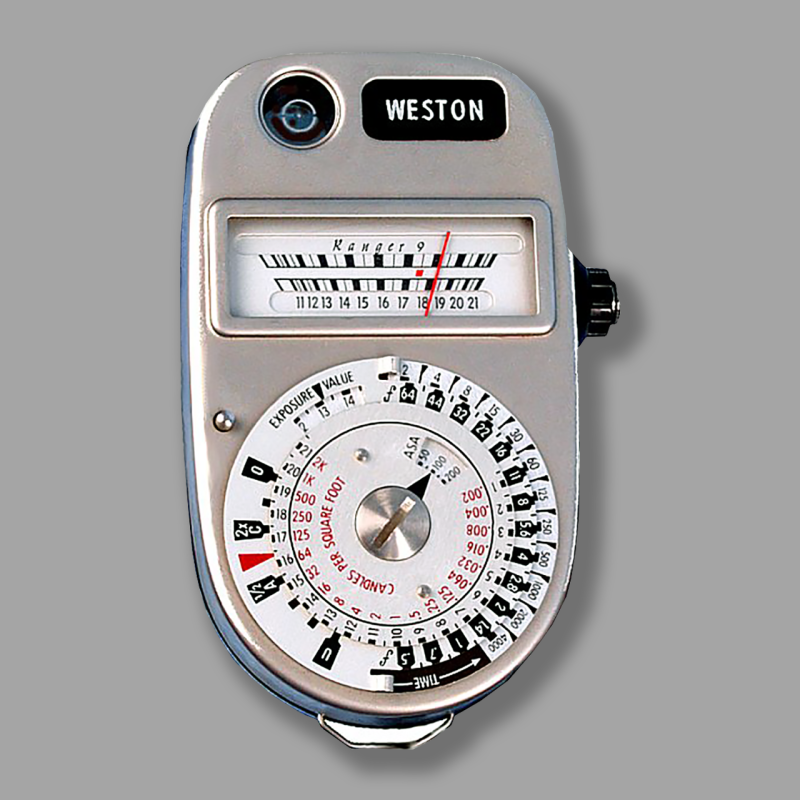
With this CdS exposure meter Weston Model 348 Ranger 9, the American exposure meter pioneer Weston Instruments from Newark USA introduced in 1966 a device with battery support. It was their first CdS model and also the last light meter from Newark. Later “Weston’s” came from England or Japan.
A crystal finder enables a precise selection of motifs. The on/off switch on the side also serves as a switch for 2 measuring ranges. The device requires one PX14 or two PX13 (with insulating disk) battery cells. The usual Weston correction factors (1/2 / 2x) or over / under can be set on the outer dial.
A different version was available with the exposure system (with special focusing screens) developed by the well-known photographer Ansel Adams.
Values: apertures 0.5-64; Exposure times 2h-1/4000 sec.; Light values 1-21.5; ; Cine values 8-64 (according to table); additional foot candle scale.
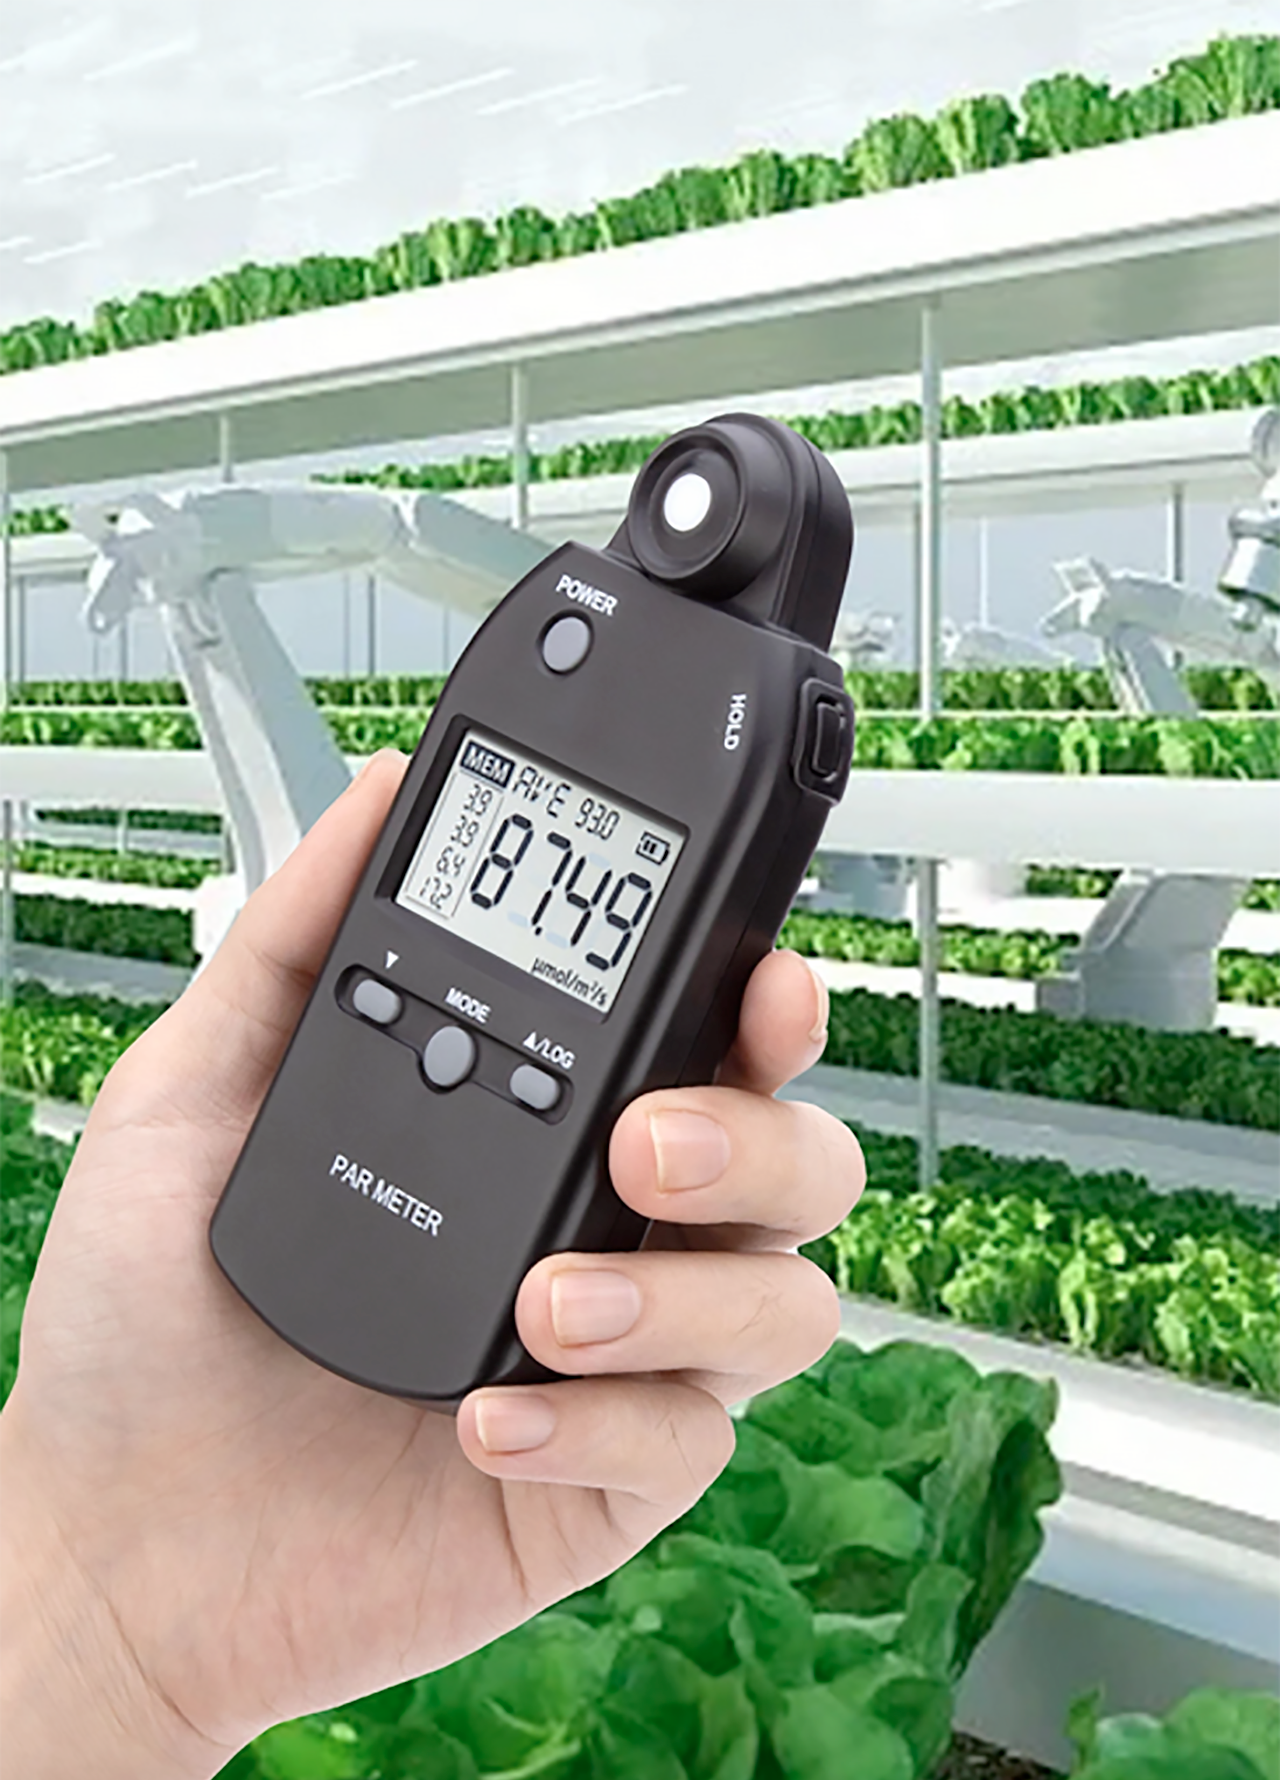
Lux-measuring in a greenhouse.
Group 6
Special purpose exposure meters
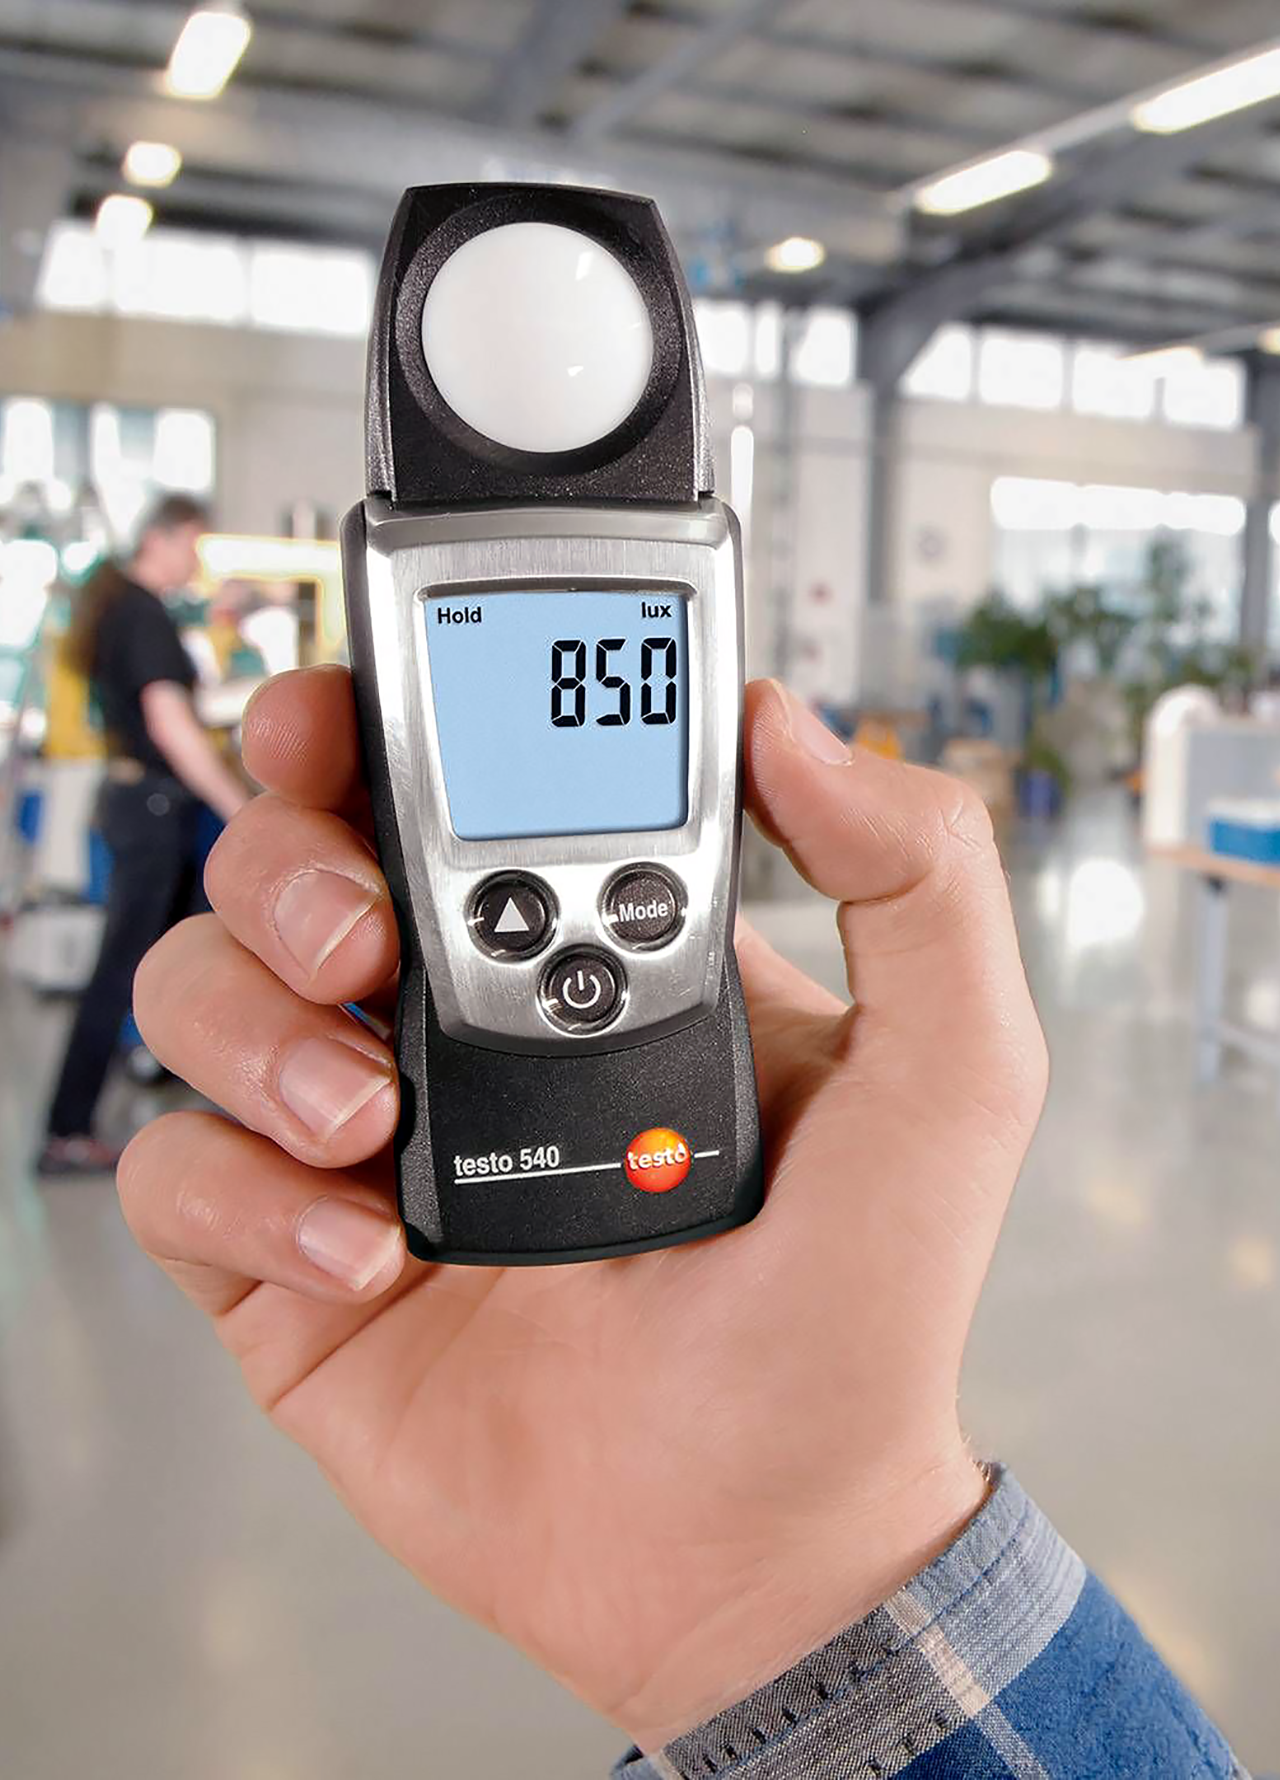
Measuring the illumination level in an interior.
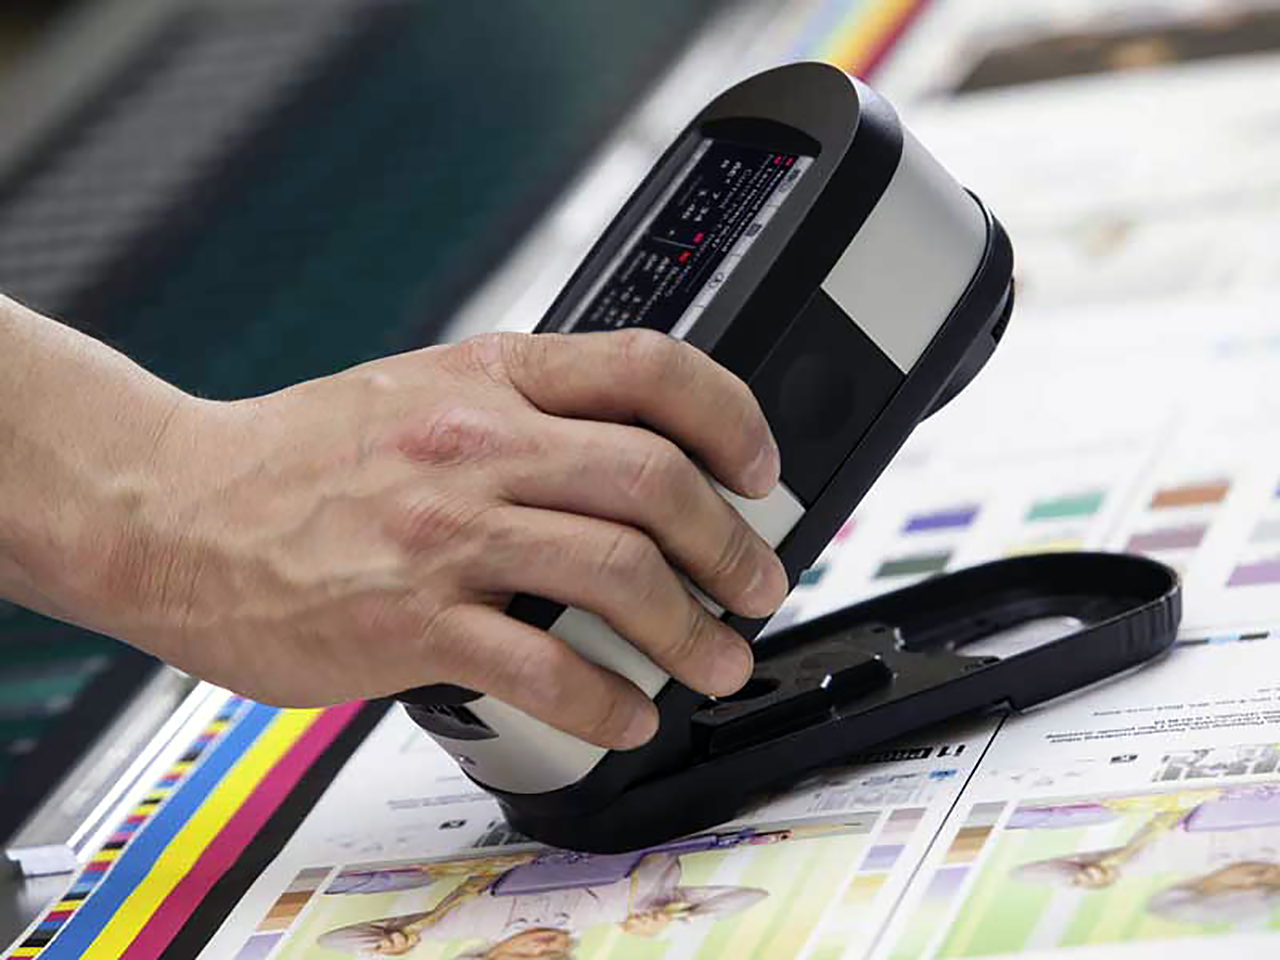
Hand of an engineer who measures the color and the density of printed matter in offset printing.
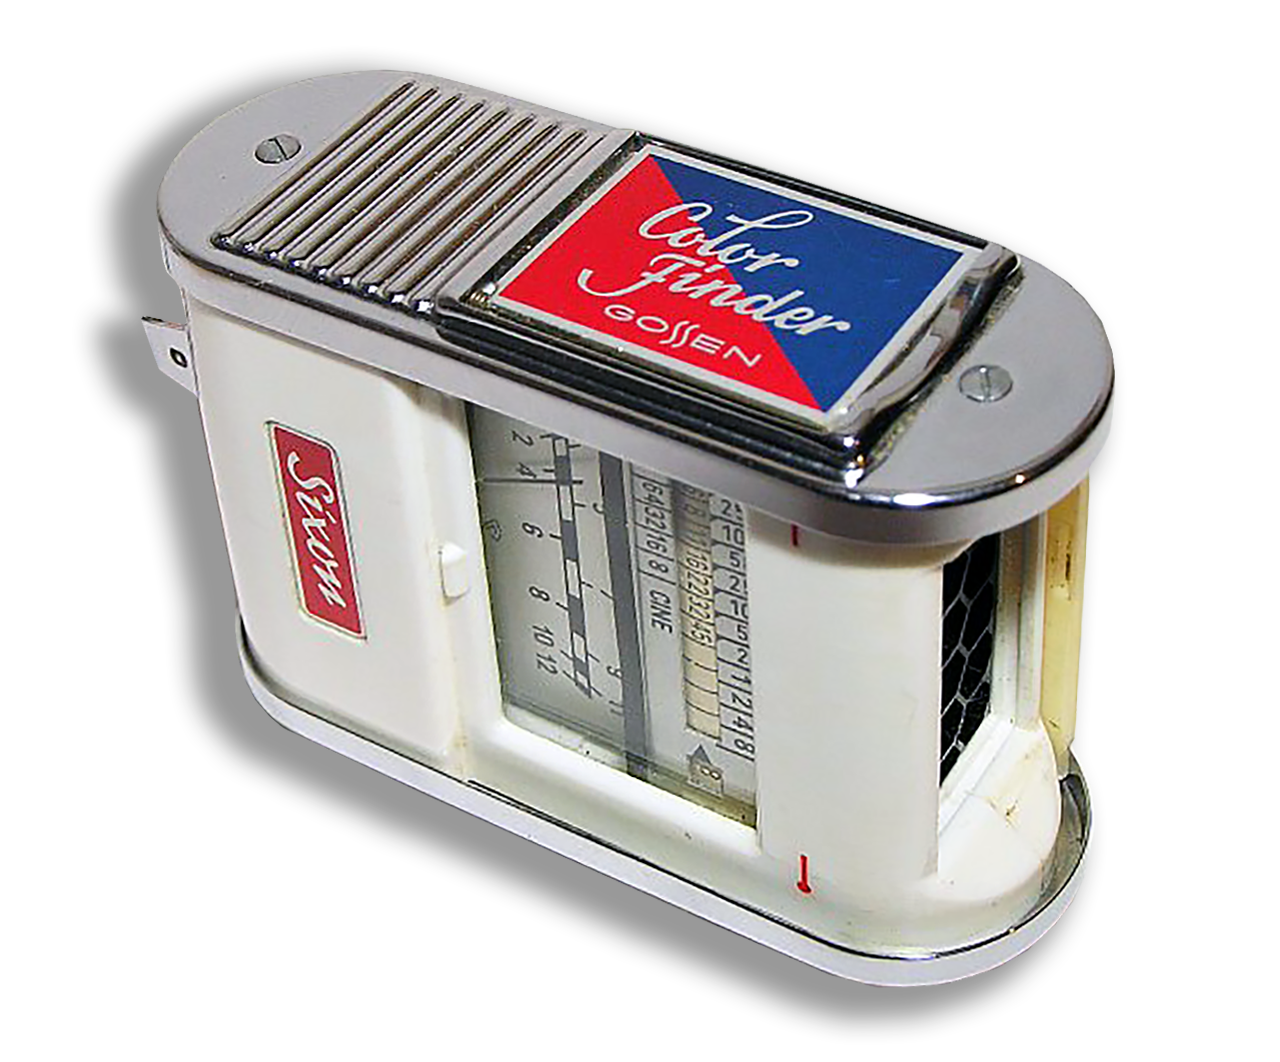
The most well-known and widespread color temperature meter is the Color Finder, which was built into various light meters by Gossen in the 1950s. In the version for the Sixon, Trisix and Sixtry, matching color correction filters are displayed in a table on the back. The Sixtomat got its name suffix “x3” from this expansion.
Color temperature measuring devices
All color films, but also digital cameras, are set to a specific color temperature. While this can now be varied with the white balance in digital cameras, with color films it was and is only possible to adapt to the color temperature prevailing during the recording using correction filters. Our eyes can distinguish the color of light (illumination) according to shades, but the brain converts the illuminated objects into the color we know. We see the red cherry as red in any light, even in the moonlight.
People with normal vision can recognize even the smallest color differences when they see them side by side in direct comparison. However, if everything is illuminated by one color, our eyes are no longer objective. The color film, on the other hand, sees the color as the light illuminates it. If the lighting deviates from the “normal value” (~ 5800° Kelvin), the photo will inevitably have a so-called color cast. While with color negative films it is still possible to compensate within certain limits during image production, light values that deviate from normal temperatures always lead to incorrect color reproduction with color reversal film without a compensation filter.
Color temperature
Most daylight films were set to a “normal” color temperature of around 5,800° Kelvin, while artificial light films were set to values around 2,400°K. If the color temperature is higher (e.g. in the snow, blue sky or on the beach) or lower (morning and evening sun, lamplight) when taking the picture, it must be compensated for with a correction filter if you do not want the prevailing color mood to influence the image result. The best known here are the so-called skylight filters, which compensate for higher levels of blue radiation around midday. If you are interested, you can find out more about filters on my filter page.
In addition to experience, there are also some tools to approximately determine the color temperature. The most famous is probably the color scale on the Gossen Sixtomat x3. However, only a color temperature measuring device can provide accurate values, which ideally even displays the appropriate filter straight away (e.g. LIFA, Rebikoff Vers. 2, Sixticolor). In principle, the device works like a light meter by measuring the blue and red light components and displaying the measurement result via a measuring bridge. The practical value is then determined using a scale or suitable tables. The range of color meters is nowhere near as extensive as light meters; Some of the better known ones can be found described in detail here; As usual, this chapter closes with a larger group of color temperature measuring devices with a briefer description.

White Balance Card, also known as PRE is the final white balance setting to choose from. This setting requires you to physically hold up a white card in front of your camera lens, then click the shutter button. Your camera will read the color on the card and lock in the color temperature that is found when light is reflected off the white card. Photographers can use colour temperature to create a mood in their photos. They can do this by adjusting the white balance settings on their camera.
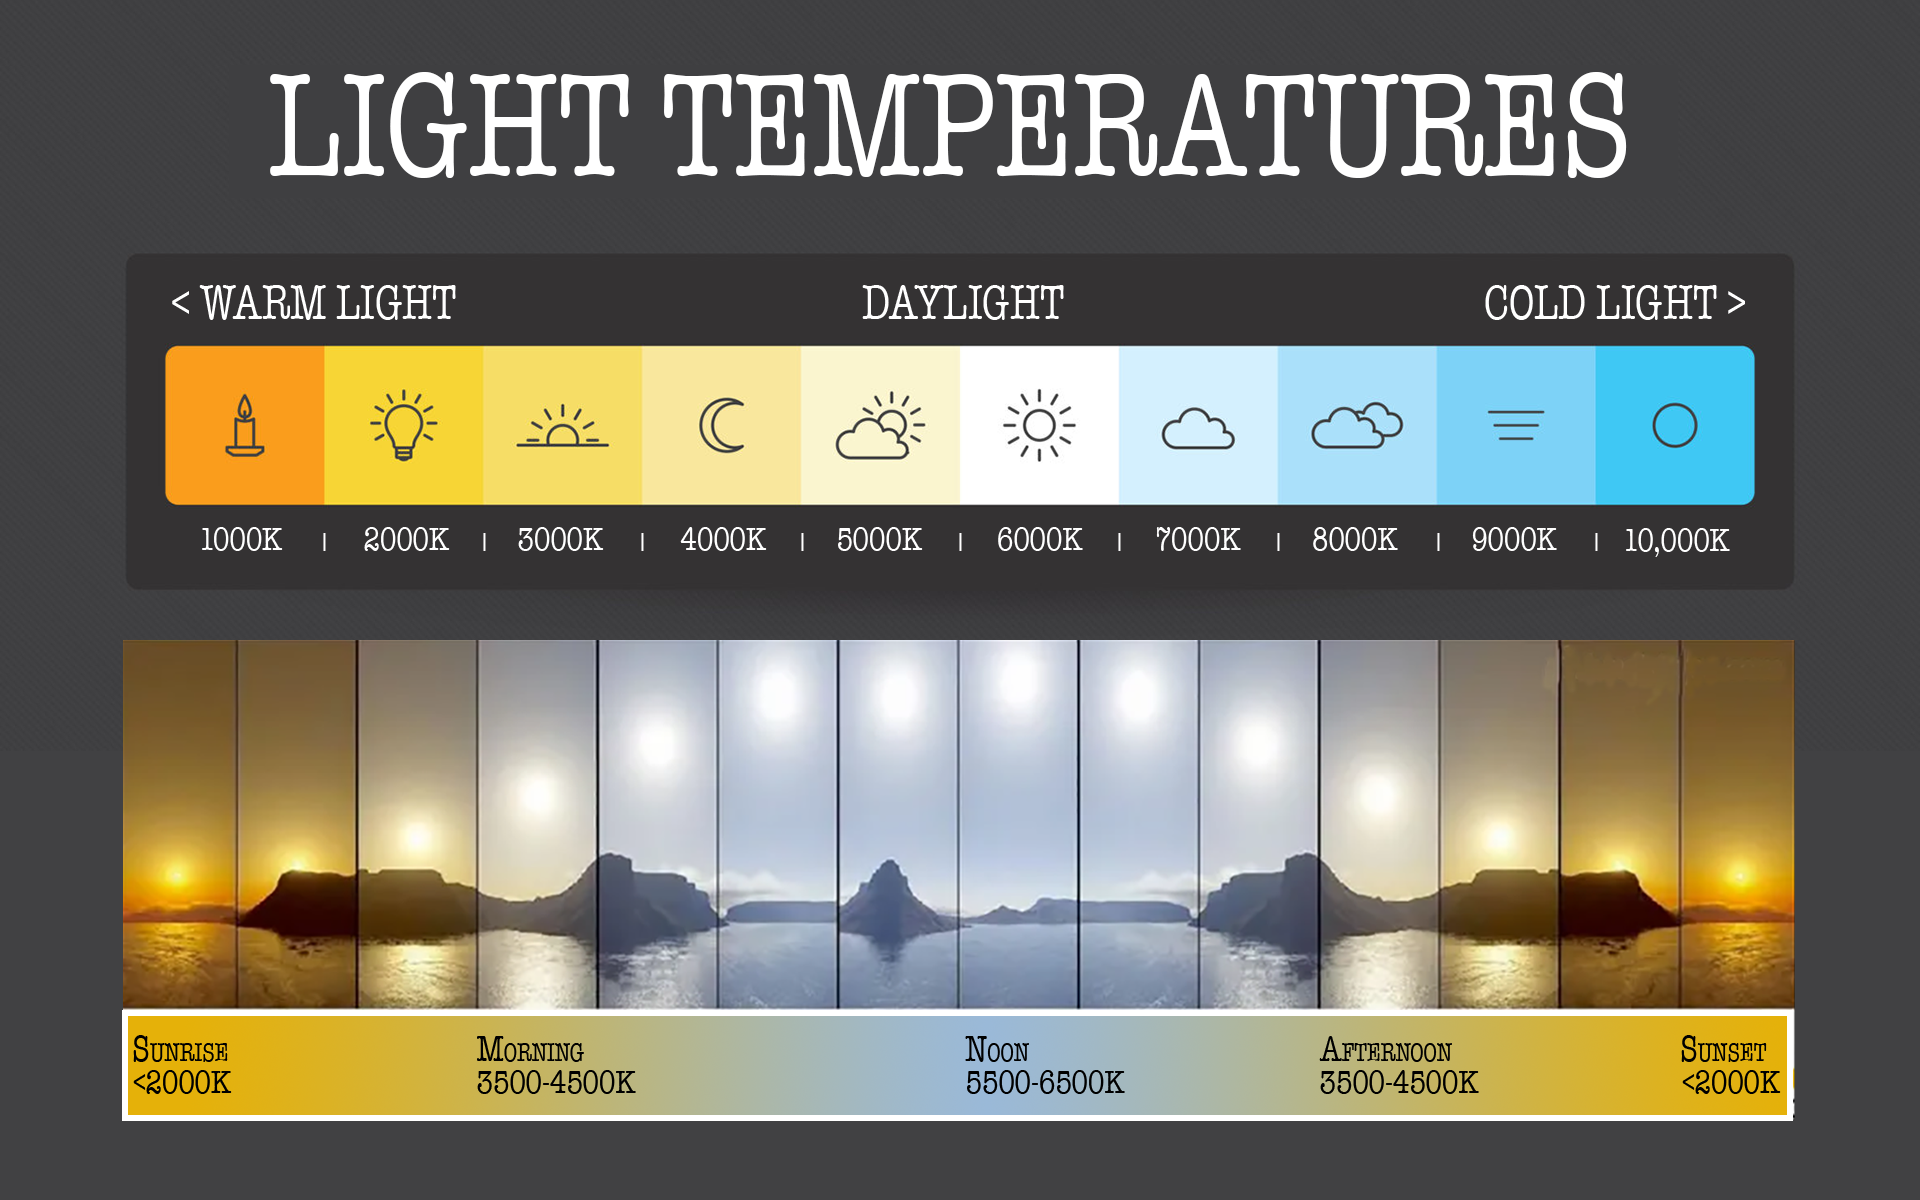
The natural light during different times of day can have a significant impact on the colour temperature of a photo. For example, during the golden hour (the hour after sunrise and the hour before sunset), the light is warmer and more yellow, creating a beautiful and inviting mood. In contrast, during midday, the light is cooler and bluer, creating a more clinical and sterile mood.
ten images of typical color-temperature measuring devices
(all information taken from https://photobutmore.de)
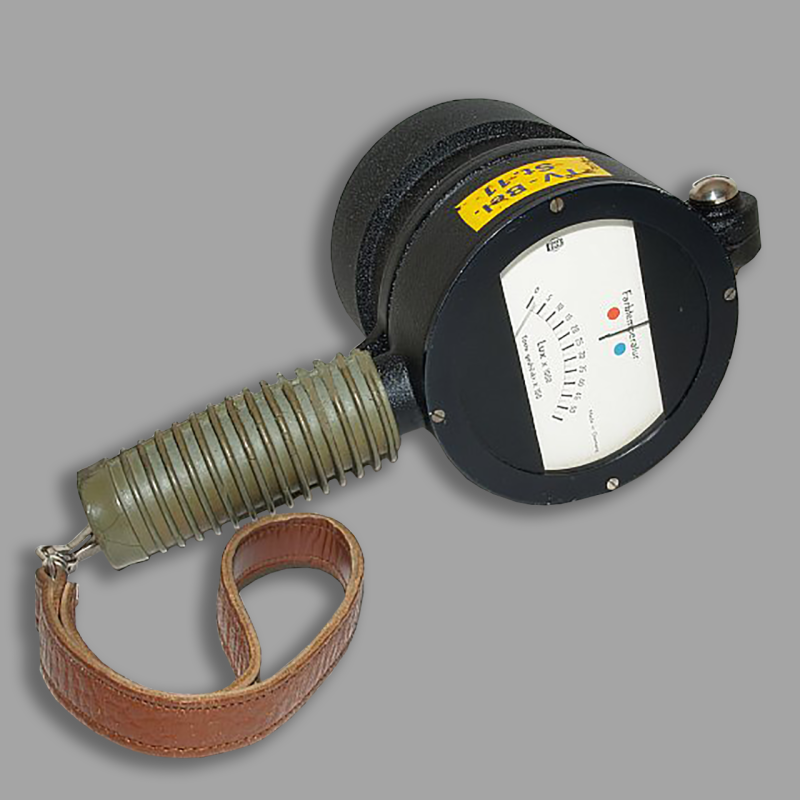
The Collux III from B. Deltschaft Berlin is an impressive color temperature meter from the 1960s. The extensive equipment with numerous gray and color filters and other accessories in a leather case weighing around 4 kg shows that this attractive measuring device for light measurements is not for everyday use but is primarily a professional device.
The concept of the Collux III is designed to measure light intensity for general lighting purposes. The display has two sensitivity ranges: up to 5000 lux and up to 50,000 lux. To use it as a color temperature measuring device, a filter attachment with a polarizing disk is folded in front of the measuring part with the large selenium cell. The color temperature measurement is then carried out using an adjustment ring on the filter attachment.
The needle is previously turned to the middle position. The color temperature can be estimated based on the needle deflection towards blue or red. With the display value in foot candles, the color temperature in °Kelvin is read from a table to determine the filter.
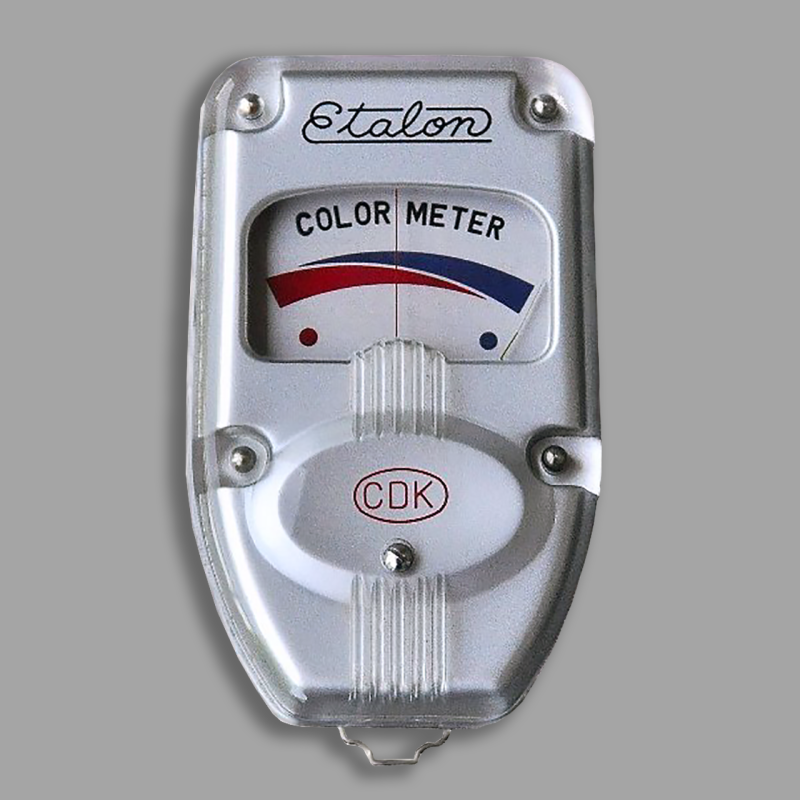
A recent color temperature meter from Chuo Electronic Co. Ltd., Tokyo. The company also operates as Central Electronic Co. (CDK). Etalon is its best-known trademark.
The extremely handy and easy-to-use measuring device Etalon CDK Colormeter is practically self-explanatory. The pointer is set to the middle position between red and blue using the small wheel on the side. The color temperature can then be read on a scale cutout on the back.
A suitable compensation filter must then be determined based on existing specialist knowledge or read from a table. The selenium measuring cell is – like the Sistinecolor – on the back of the device.
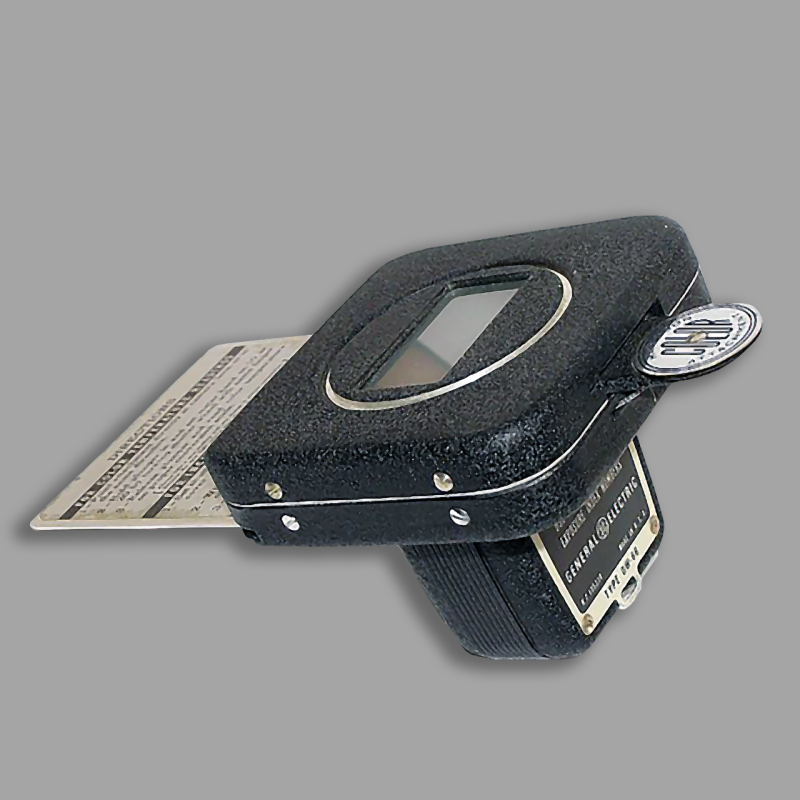
This Harrison Color Meter is probably one of the first, if not the first, of this type of measuring device. It is an attachment for the DW series light meters from General Electric, USA. This accessory makes it very clear how a color temperature meter works by alternately inserting the red and blue lens into the measuring path.
The procedure is simple – first the slider is pushed in completely using the Harrison wheel and held in place. Then the red disk is in the measuring cycle. The device aperture can then be adjusted using the rotary wheel next to the slide wheel so that the measuring device shows a deflection of 10 (or 20).
The slider is then released – this means that the blue disk is in the measuring path – and the changed needle deflection is read. This value is used to read the color temperature in °Kelvin from the extended metal table of the attachment.
The table also provides information about filter values (Wratten filter) for daylight, artificial light or flash.
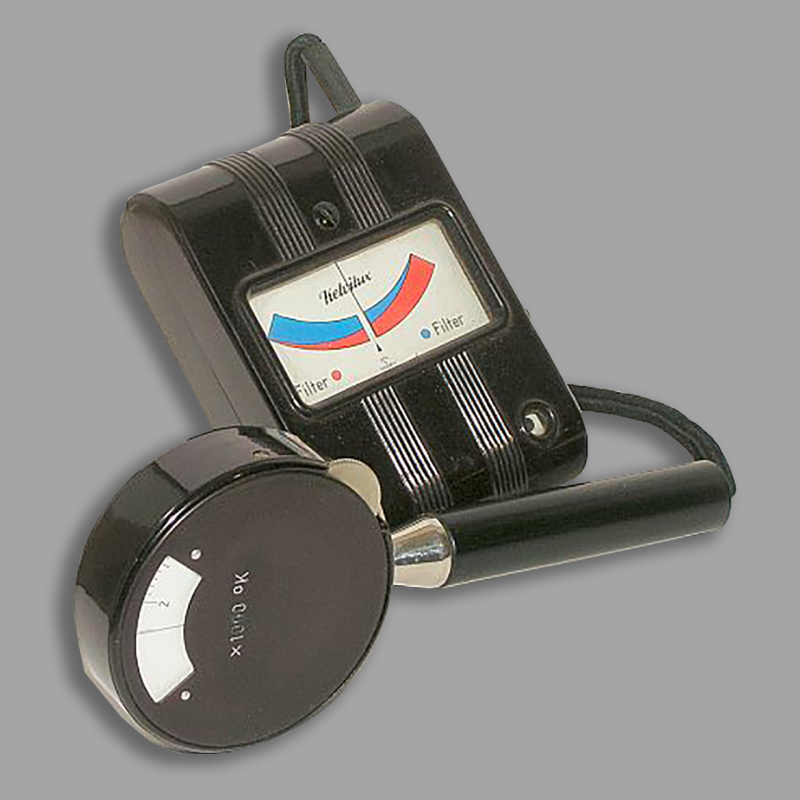
The KELVILUX color temperature meter was the first color temperature meter from Gossen, Erlangen, in 1952. It was still offered as a two-piece measuring instrument. The selenium cell is located in a magnifying glass-like handle, which also contains the scale and the knurled wheel for adjustment.
The display instrument and the on/off switch for two brightness ranges are housed in a “standard housing” that Gossen used for various measuring and testing devices offered at the time.
The measuring range is 2,000 – 10,000° Kelvin. The knurled wheel in the handle is turned until the measuring needle is in the center of the display instrument. The color temperature can then be read on the scale on the handle.
The device can also be used to select the appropriate correction filter. To do this, the color temperature of the film used is set on the scale using the knurled wheel and the filter is held in front of the screen. The right match has been found when the indicator needle settles at the center or in its immediate vicinity.
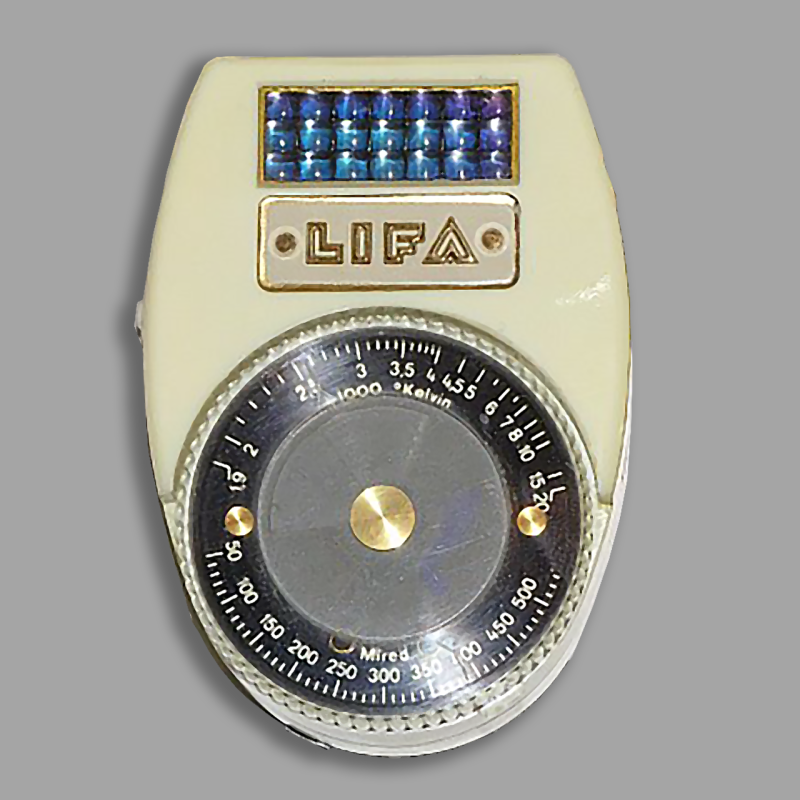
In 1956 – the same year as Gossen with the Sixticolor – LIFA, Augsburg, introduced its Lifa Colorlux color temperature meter with exposure meter. Like the Rebikoff device, the LIFA device also has the measuring cell under the rotating scale on the top of the device. The first LCL version has a built-in light meter in addition to the color temperature meter. For this purpose, the measuring cell is located under the honeycomb window. When measuring color temperature, the settings are made using the upper knurled wheel and when measuring exposure, using the front brass disc.
The first version of the LCL had a black dial, while the otherwise unchanged second version has a red dial. To initiate the measurement, the device is held with this dial against the light source. The knurled wheel is then turned until the pointer in the display window on the front is on the yellow mark. The measured color temperature can now be read in degrees Kelvin or in Mired on the upper half of the scale. The tiny window on the rear adjustment screen simultaneously shows (in the red or blue area) the Lifacolor filter that matches the measured light and its extension factor.
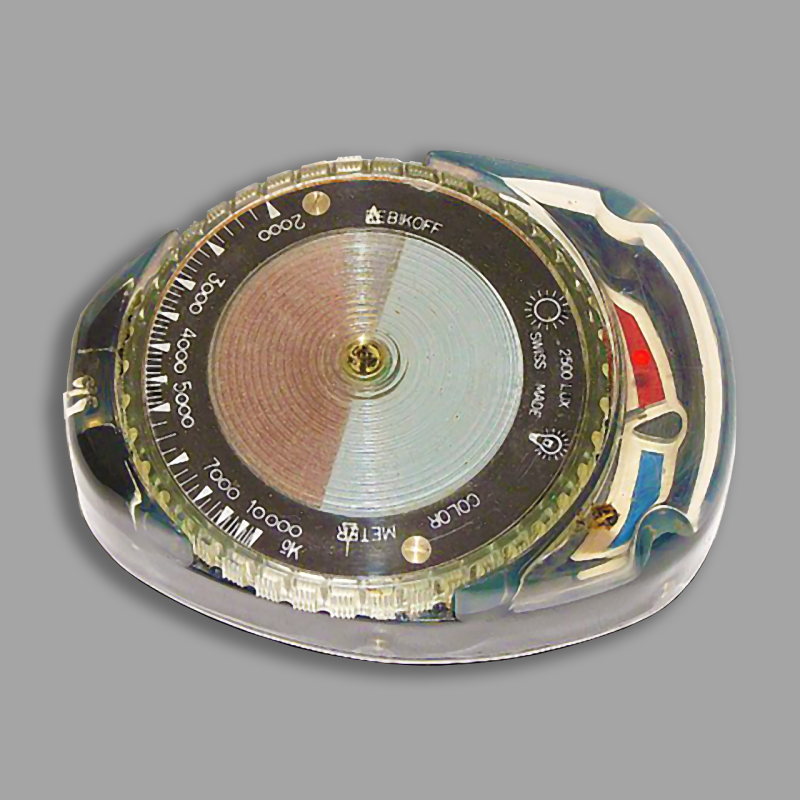
The Paris-born inventor, diver and photographer Dimitro Rebikoff developed in Switzerland around 1955, among other things (electronic flash unit), a special pocket-sized color temperature meter. The original Rebikoff color temperature meter was manufactured and distributed by WEKA A.G. in Wetzikon-Zurich. The handy device is made entirely of plexiglas. The measuring cell is located below the rotating scale on the top. If the device is held into the recording light, the pointer will point towards the blue mark in bluish light and towards the red mark in reddish light.
The upper white scale triangle is turned with the knurled wheel towards the sun or lamp, depending on the deflection or lighting, until the pointer deflection is at the middle mark. The pointer deflection on the display scale can be read from both the top and bottom of the device. E.g.: the device can also be held with the dial in the direction of the light source. The color temperature between 2000 and 10,000° Kelvin can then be read on the lower part of the scale. The appropriate color filter can be found in the instruction manual or in tables from filter or film manufacturers.
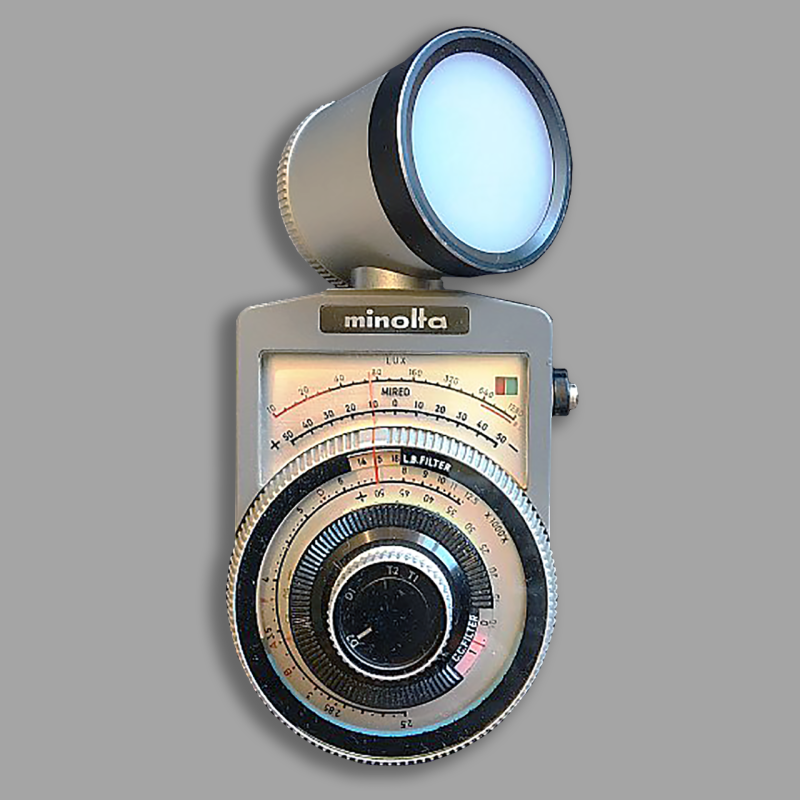
The Minolta Colormeter Version 1 is an analog device with four sensors covered with filter disks. There is a diffuser disc in front of it. The top sensor is for the lux measurement, the bottom sensor together with the right one is for red-green and the left, bottom and right sensors together for the blue-red measurement.
The device requires five RM 625 mercury batteries to operate. There are two buttons on the side. If you press the silver one, you trigger a measurement. If you press the red button on the opposite side at the same time, the battery measurement will be carried out. The silver button sits within a rotating lever that can be used to select the respective measuring method.
According to the manual, you first set the zero point. You should then select the light source using the small knurled wheel in the middle. The film type is then selected. First, the light intensity should be determined; at least 100 lux is required. Everything is very complicated but relatively precise.
This is a very abbreviated description of how the color measuring device works. You can find much more at the Photobutmore Site.
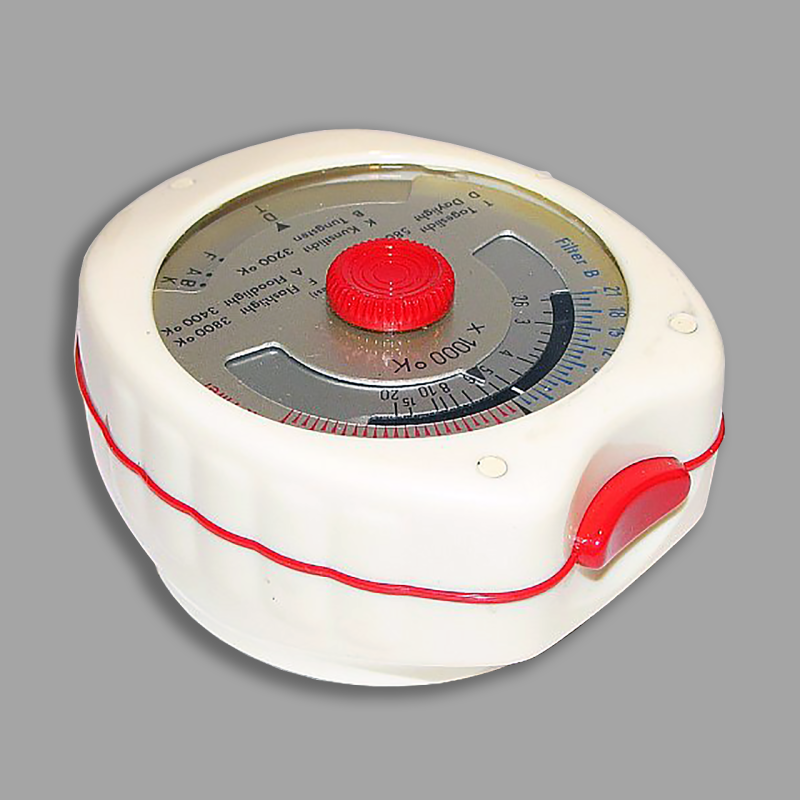
After the Rebikoff, the first color temperature meter, was offered in Switzerland as an easy-to-use hand-held device, Gossen followed suit with the Sixticolor in 1956. Unlike the Rebikoff, the Gossen device has a measuring side (front) and a reading side (back).
The device enables various measuring and display methods. Normally, before measuring, the film type is set to the lower triangle mark of the scale using the red scale knob. Alternatively, the upper mark can also be turned to the color temperature of the film if this is specified by the film manufacturer.
The filter value required for other color temperatures can then be determined on the upper scale in order to achieve “normal” color rendering, which corresponds to a light of 5800° Kelvin. The scale also indicates intermediate values for flash lighting or photo lamp lighting.
When the color temperature of the shooting light is measured, the needle shows not only the current color temperature but also the filter value for the respective film type (daylight or artificial light). The measuring range is 2,600 – 20,000° Kelvin.
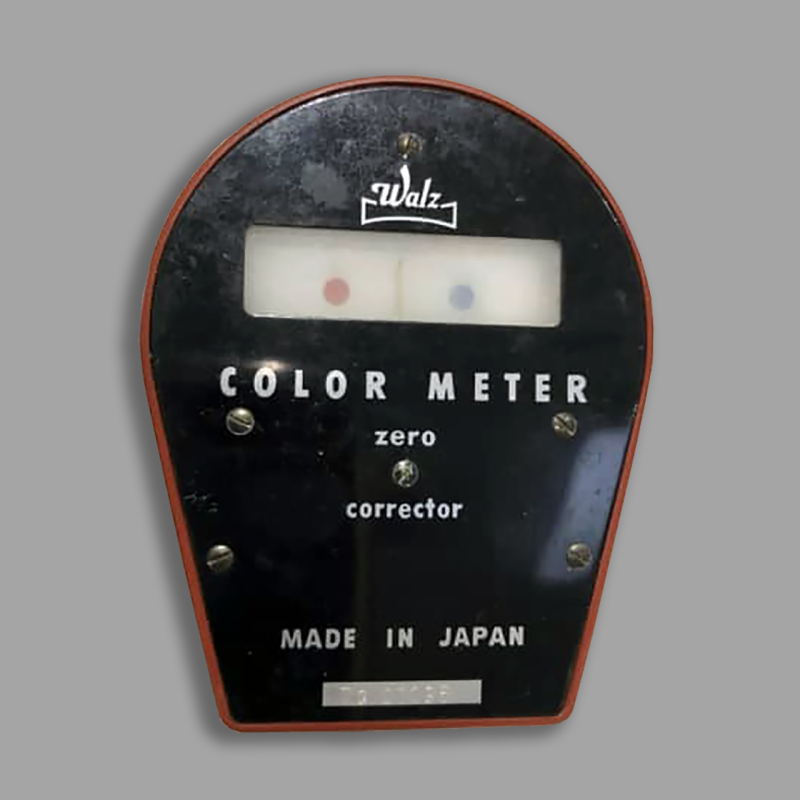
Walz – KK Walz Shokai – was a Japanese trademark based in Tokyo that sold photographic products from various Japanese manufacturers primarily in the USA. These also included a number of copies/replicas from European manufacturers such as Leitz, Metrawatt or Zeiss, which KK WALZ sold under its own name.
Walz was also a licensed OLYMPUS dealer for a time. The first products (Okada Waltax) are known under the name Walz from 1940 and were probably manufactured in our own production facility.
At times the sales company was called Nihon Shōkai, which offered rolling photo accessories (rangefinders, filters, etc.) even before 1945. The company name was changed to KK Walz around 1955/56.
Here is a vintage Walz Color Temperature Meter based on Selenium. This meter is made in Japan around 1958.
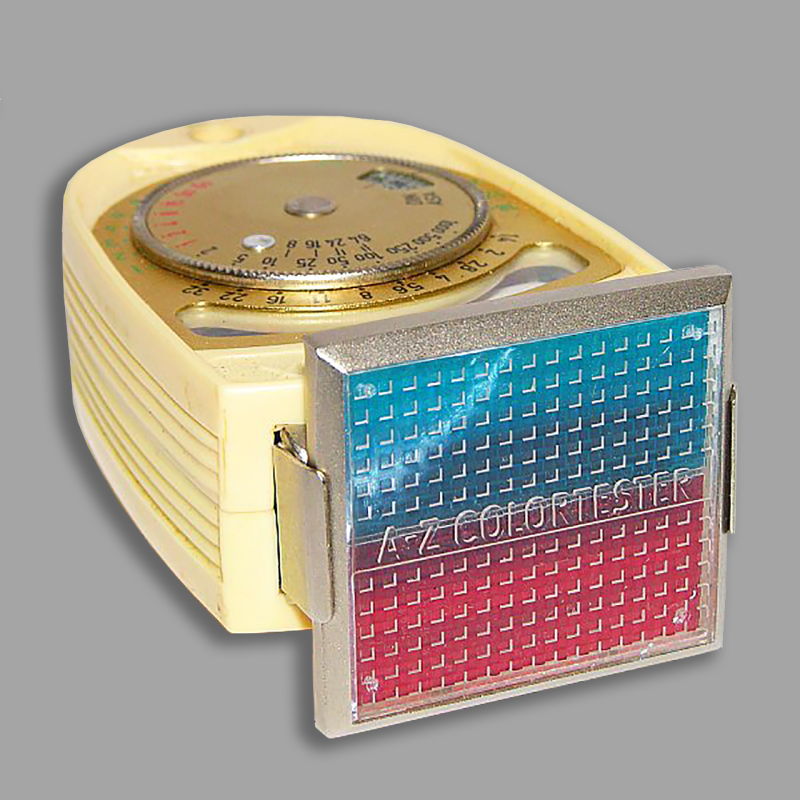
This A-Z Color-Tester/Werralux Colortester from 1956 was a simple, yet usable color measuring device in daylight. The measuring attachment was developed by the filter manufacturer Arnz, Jena and the VEB Feingerätewerk Weimar. The difference is that the Weimar attachment serves as an accessory to the Werralux/Weimarlux light meter, while the Arnz tester can be used with all light meters. The attachment is placed or held in front of the exposure meter instead of the diffuser disk.
The measuring process is as simple as it is reliable. First, the measuring unit with the blue attachment is held towards the light source and the tracking pointer is set to the needle deflection. The light value is read on the light value scale (outer green scale). The red attachment is then pushed in front of the measuring cell and the light value is determined again. If both values match, the light is free of color casts for the usual daylight film of around 5800°K. The table on the color tester case provides information about the prevailing color temperature between 4700 and 18,500 °K and the required correction filter.
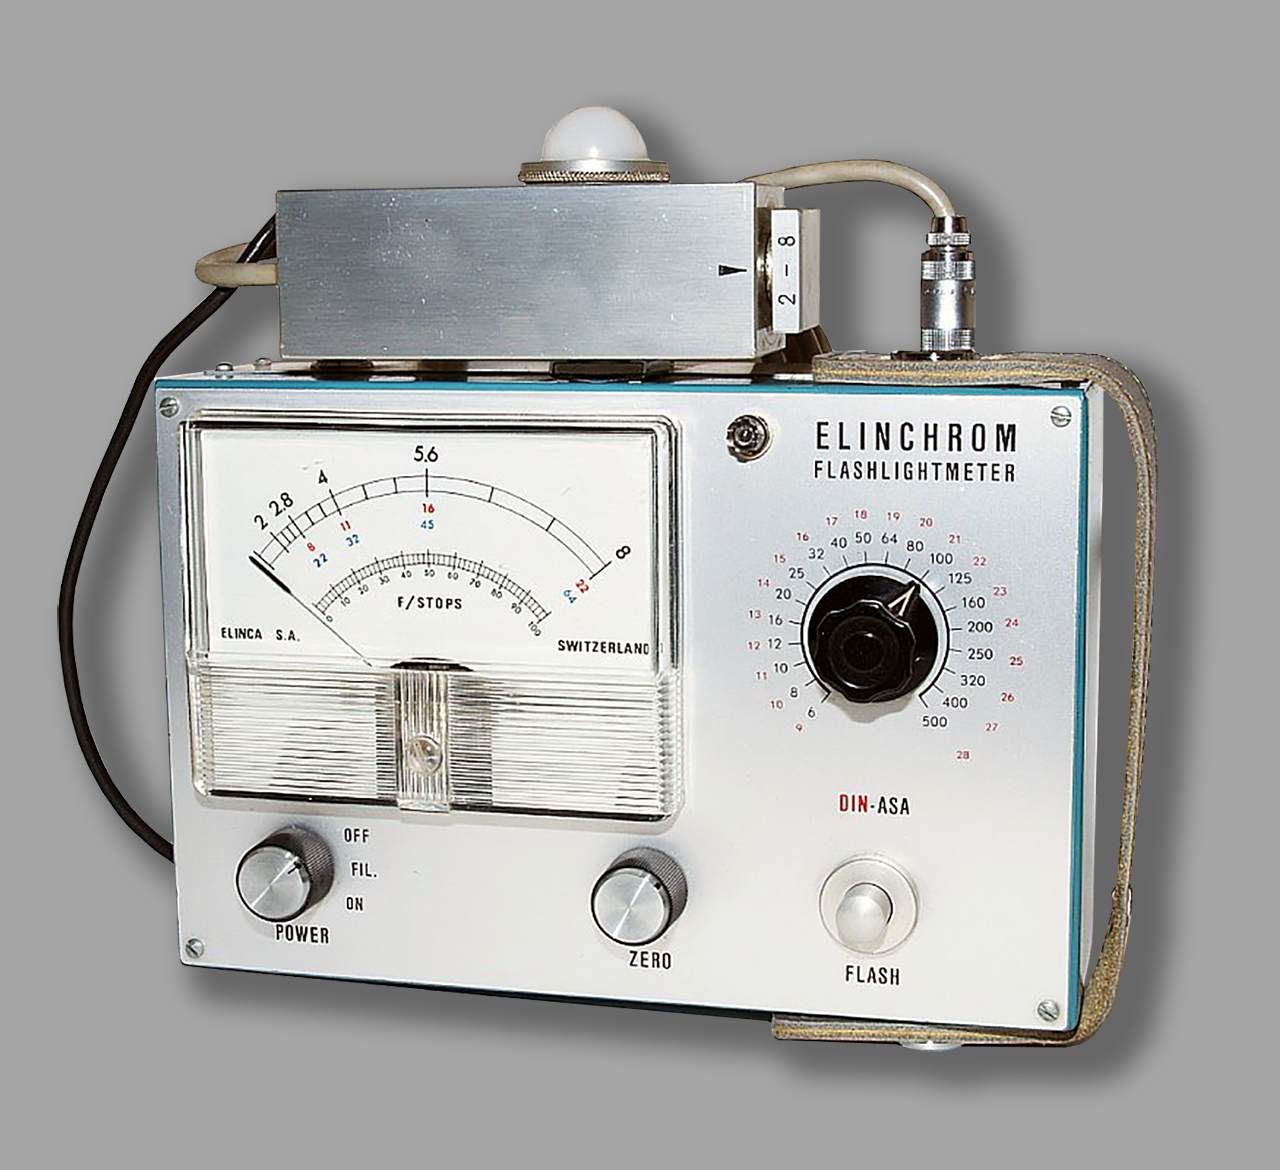
Here is an example of a flash meter from the early 1960s, the Elinchrom Flashlightmeter FLM 1 from the company Elinchrom S.A. from Renens, Switzerland. Although the device is equipped with a handle and is actually not very large (20x13x7cm), it is clearly made for use in a studio. The very fact that it is powered by 220 Volt A.C. shows that it is unsuitable for use on the road.
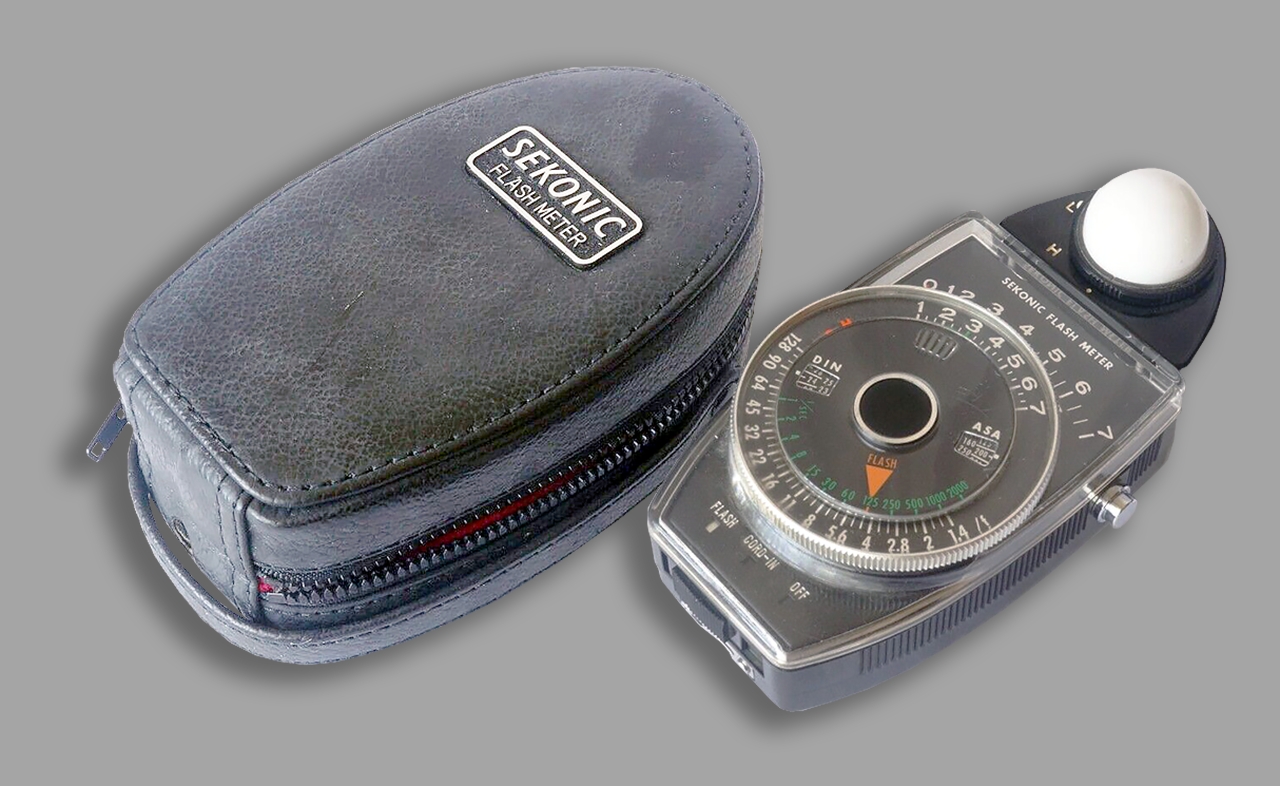
Compare the above flash meter with this Sekonic meter from the 21st century. The size and handling of a contemporary flash meter compared to the Elinchrom Flashlight Meter FLM 1 shown above, shows how exposure meters have developed since then with the help of state-of-the-art electronics.
Flash Exposure meters
A flash is a device used in photography that produces a brief burst of light (typically lasting 1⁄1000 to 1⁄200 of a second) at a color temperature of about 5,500 K to help illuminate a scene. A major purpose of a flash is to illuminate a dark scene. Other uses are capturing quickly moving objects or changing the quality of light. Most current flash units are electronic, having evolved from single-use flashbulbs and flammable powders.
Early exposure meters were very simple and could only measure ambient light. The electronics necessary to measure flash were then bulky and expensive, so dedicated flash meters were made (e.g. Gossen Sixtron). Unlike an ambient meter, a flash meter must first capture the brief output of the flash and then display its intensity, which requires electronics.
The meter itself
This makes a flash meter a pretty ingenious device that senses the flash output at the subject, and then provides a readout of what your aperture should be for a given light intensity. It measures the brightness and the flash duration via a photocell that engages the electronics of the meter to give you a number that you can use — usually the aperture of what you should set your camera.
A flash meter is great for anyone using completely manual cameras without internal meters, and flashes that are completely manual. You can use them with studio strobes, as well as on and off-camera flash. To use the flash meter, you place it where the subject would be, or have the subject hold it, aimed towards the camera. Manually fire the flash(es) and see what reading the meter gives you. You then set your camera accordingly.
There are a variety of flash meters on the market, and you ought to be able to find a used one fairly inexpensively. They are most useful where you have multiple flashes going off, such as at a portrait session.
With the reduction in both cost and size of electronics, more recent exposure meters are electronic in any case and often incorporate both ambient and flash measurement. Flash measurement requires a fast reacting light sensor, such as the so-called Silicon Blue Cell (SBC, a silicon photo diode). Some flash meters can measure flash and continuous light simultaneously. Several manufactures make these types of meters nowadays.
In 1861, artificial light was used for the first time when taking a photo. The magnesium powder developed in 1755 was used for this purpose. Flash powder, a mixture of magnesium powder and potassium chlorate, was introduced by its German inventors Adolf Miethe and Johannes Gaedicke in 1887. A measured amount was put into a pan or trough and ignited by hand, producing a brief brilliant flash of light, along with the smoke and noise that might be expected from such an explosive event. This could be a life-threatening activity, especially if the flash powder was damp.
The ‘flash’ was an adventure in itself, where the photographer had to operate the shutter with a cable release and set off the magnesium flash with his other hand, while the family looked into the lens with sweat on their foreheads. An electrically triggered flash lamp was invented by Joshua Lionel Cowen in 1899. Of course, there was no question of measuring light at that time; the photographer was happy that he (or she) escaped without burns.
The light in the studio can be controlled with flashes or continuous lamps. Continuous lamps are often supplied with a fixed softbox. An advantage for studio flashes is that, unlike continuous lamps, many accessories are available to manipulate the light. Think of softboxes to make the light less harsh, a snoot to bundle the light, a grid (honeycomb) that directs the light even better with a softbox or snoot, a diffuse sphere that ensures that an entire room is illuminated, etc. etc.
Five images of flash exposure meter
The flash meters from this overview all come from the site of photobutmore.de. It concerns meters that were on the market well before the digital age.
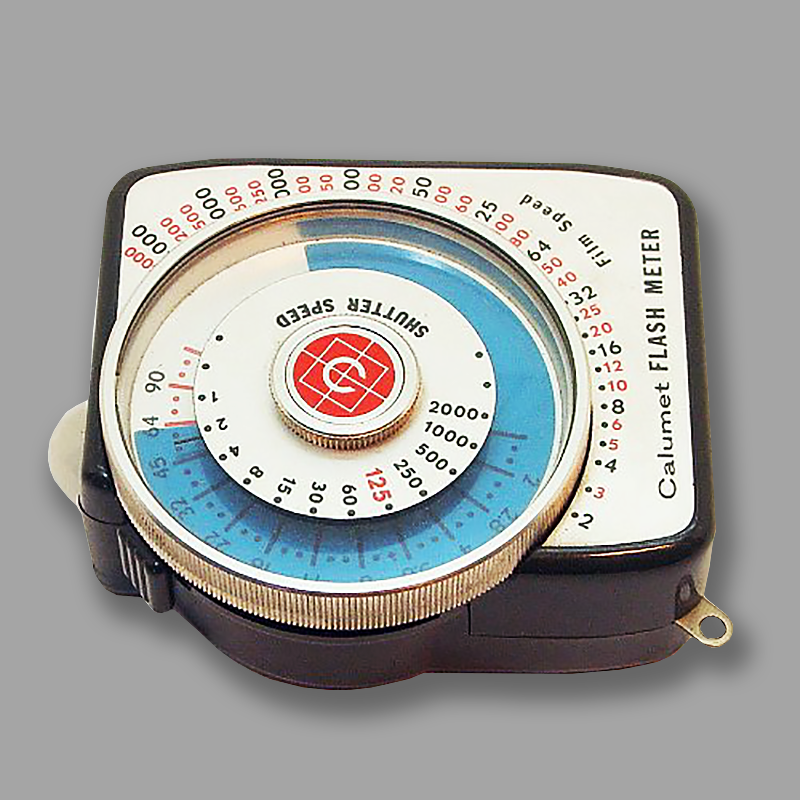
Behind the name Calumet is a US photo radio company that still sells professional photo equipment in many parts of the world.
This early flash meter type M-100 is from the 1960s and is one of the better ones. It has a silicon measuring cell and requires (sadly enough) a synchronization cable for use.
Two 6V mercury batteries PX23 are required for operation. Like many US exposure measuring devices, it has a huge setting area with 2 to 8000 ASA; Scope is 2-90, standard exposure value 1/125, but the scale includes a comparison area of 4 to 1/8000 sec.
A big meter – about the size and shape of an oven timer. The controls are big and easy to use; but it seems that it had to be used in the snow with gloves; yet it’s really meant for studio work.
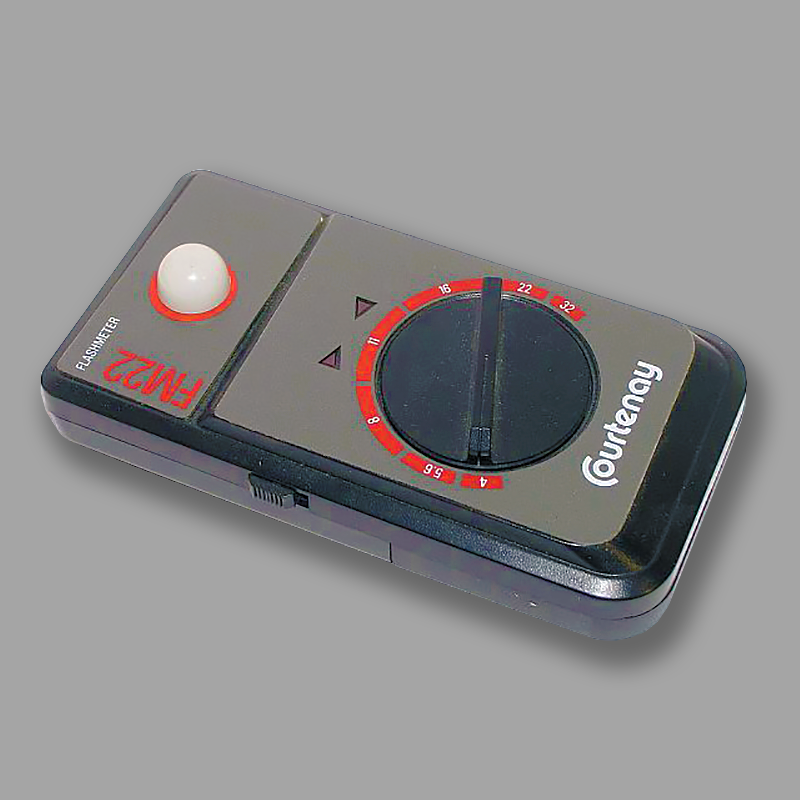
This flashmeter type FM22 is from the British manufacturer Courtenay from the 1980s. Courtenay was a Manufacturer of all kind of Studio Gear Like Flash Heads, Meters, Flash Umbrellas, Studio Flash Unit S, etc. etc. Some other types of flash meters were: the Courtenay FM1, the Courtenay Photonics Flashmeter 303, and the Courtenay M44 Flashmeter.
The FM22 is quite simple, but delivers good results. The device has digitalelectronic and is compared by measuring bridge. If both diode arrows light up, the right aperture has been found for the respective lightning lighting. Further settings are not required.
The measured value determination refers to 100 ASA, on the back there is a table for conversion in other films. The device needs a 9V block battery.
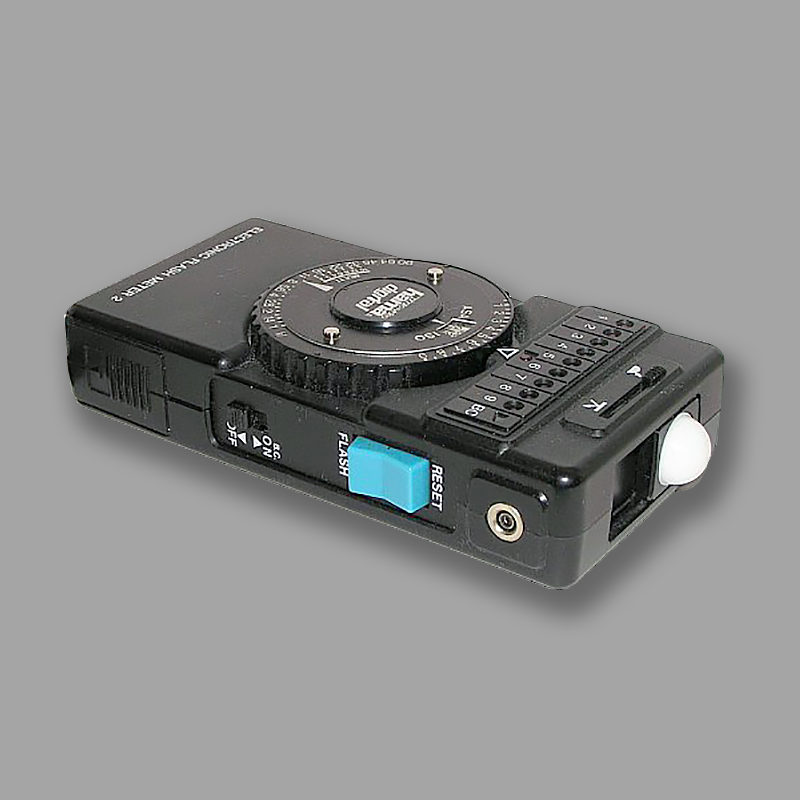
Hama GmbH & Co KG is a German Distributor of Accessories Specializing in A Number of Area Including Photo, Video, Audio, Multimedia, Computer and Telecommunications. HAMA Emmploys Around 2,500 People Worldwide, 1,500 Employees Work at the Headquarters in Monheim, Bavaria, Germany. In 1958, Hama Presented Its First Synchronized Flash Powder Device, in 1972 The World’s First Automatic Film Splicer.
Thanks to digital technology, this Hama Electronic Flash Meter 2 is a light and handy device, with which committed amateurs will also cope with the appropriate needs.
A usual 9V block battery is required for operation. With its measurements (up to 3200 ASA, aperture 1-90), it meets all conceivable requirements.
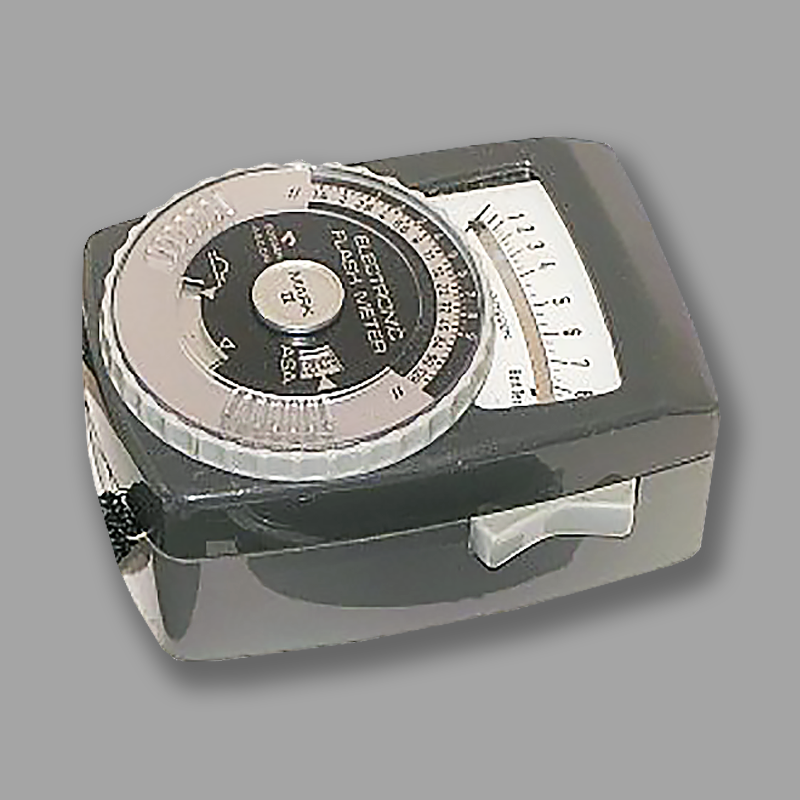
A very nice trunk is this Gossen Ascor Mark 2 flash exposure meter, the much more powerful successor to the Sixtronet. It is identical to the Sixtron Electronic 2.
As a measuring cell, this device also uses a photo transistor with subsequent IC to measure the short but extremely light light impulses of electron flash systems and requires a 15V photo battery.
The measurement method is measured with the measurement method, i.e. in the direction of the camera. A diffuser is firmly installed, with an additional diffuser, even larger amounts of light can be processed. The light with a measuring angle of 180 ° is measured on the recording motive.
Values: sensitivity 3-6.400 ASA; Apertures 1,4-128.
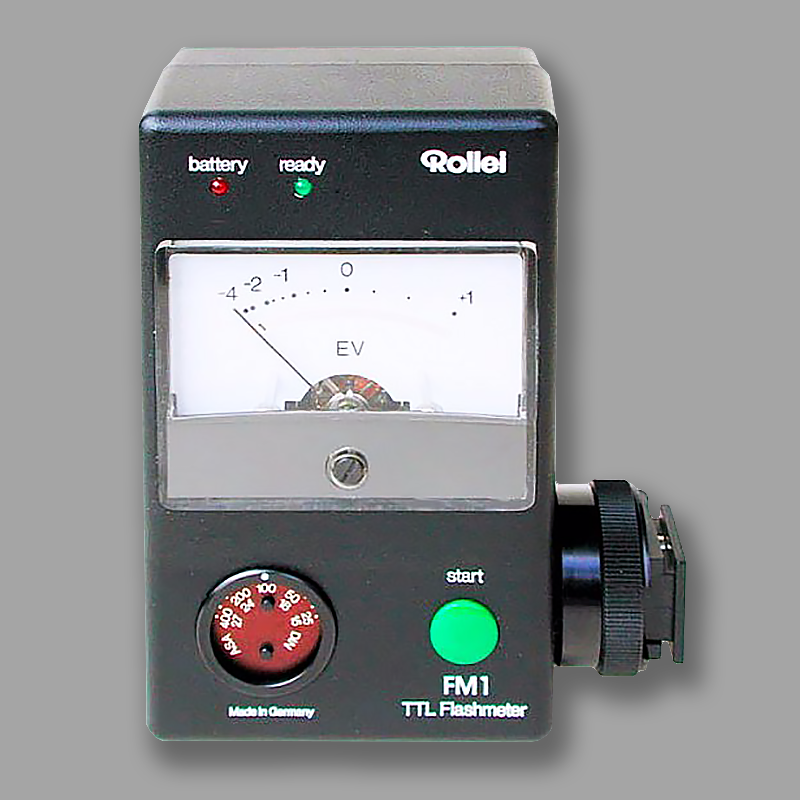
Rollei, manufacturer of optical instruments founded in 1920 by Paul Franke and Reinhold Heidecke in Braunschweig, Lower Saxony, offered this FM1 flash meter for their SL66 camera – for 1,100 DM (approx. 1985). With this precision device, an exact flash measurement with studio flash units or normal flash units on the camera is possible.
The meter is connected to the camera via the flash shoe. During the Photoshoot, the sensor integrated into the camera housing measures the light reflected by the film surface or from the measuring back wall and transmits this data to the measuring electronics of the flash light meter. In the event of error results, the light value can be corrected accordingly via the aperture or lightning dose.
Operation with a common 9V battery. Measurement options: 25 to 400 ASA / 15 to 27 DIN.

Here is an example of a picture with a high contrast. The shadows become darker, the highlights become brighter, and the entire image becomes more dramatic. “Normal” exposure meters will, more often than not, take a reading over the whole scene and give you a camera setting which results in an average result and a clear image where everything is relatively well exposed and easy to see. Comparison of light or spot metering is most useful to obtain the desired effect. These meter readings give a result for a very small area.
The photograph of the girl is typically one where the lighter tones must be correctly reproduced and the deep shadows ignored, because the contrast is outside the range of the printing paper. The highlight method was used based on the brightly lit parts in the face, a measurement that could not be made with normal photo-electric exposure meters.
Exposure meters based on the comparison of light
Particularly accurate measurement results, especially with motifs with a high contrast scope, offers the only little known exposure measurement with comparison of light. Since this is also a special subspecies of the optical exposure meter, this form is already mentioned in Group 3 Optical Extinction & Comparison Meters. In principle, such devices would be superior to most others because they can evaluate the illumination of lighter and dark motif parts. However, greater distribution also failed due to the availability of reliable comparative light sources. In addition, the operation of these devices is not easy.
The number of measuring devices working according to this procedure is manageable. Nevertheless, some exposure meters are known, which used a battery voltage for the measurement method in the 1930s.
The real number one
 Probably the best exposure meter, the S.E.I. Exposure photometer, however, used this measurement method. A light bulb serving as a comparison light had to be calibrated before the measurement. For the first time in 1946, this photometer was produced in individual production by Salford Electrical Instruments Limited, Heywood, Lancashire, England (S.E.I.). It was also an early spot exposure meter.
The production only ended in the late 1970s, the last devices were already built with LED display. It was temporarily sold by Ilford and most recently taken over by Zoomar (USA). A forerunner in almost the same design was the W.G.H. Turl.
The way of working that is apparent from the description of the is photometer also applies in a similar way to other measuring devices with this type of exposure value determination. Accordingly, as usual with exposure measurements – the luminance of the object is not measured, but the light of the internal light source (light bulb) previously calibrated and compared to the brightness of the measurement object.
The procedure was modified by Voigtländer and used without the incandescent lamp and battery in the Brilliant exposure meter supplied to some Brilliant cameras. Before the actual measurement, the Brilliant attachment must be pre-exposed about 30 seconds so that a subsequent mass is available as a comparative light source for the subsequent measurement.
With the reduction in both cost and size of electronics, more recent exposure meters are electronic in any case and often incorporate both ambient and flash measurement. Flash measurement requires a fast reacting light sensor, such as the so-called Silicon Blue Cell (SBC, a silicon photo diode). Some flash meters can measure flash and continuous light simultaneously. Several manufactures make these types of meters nowadays.
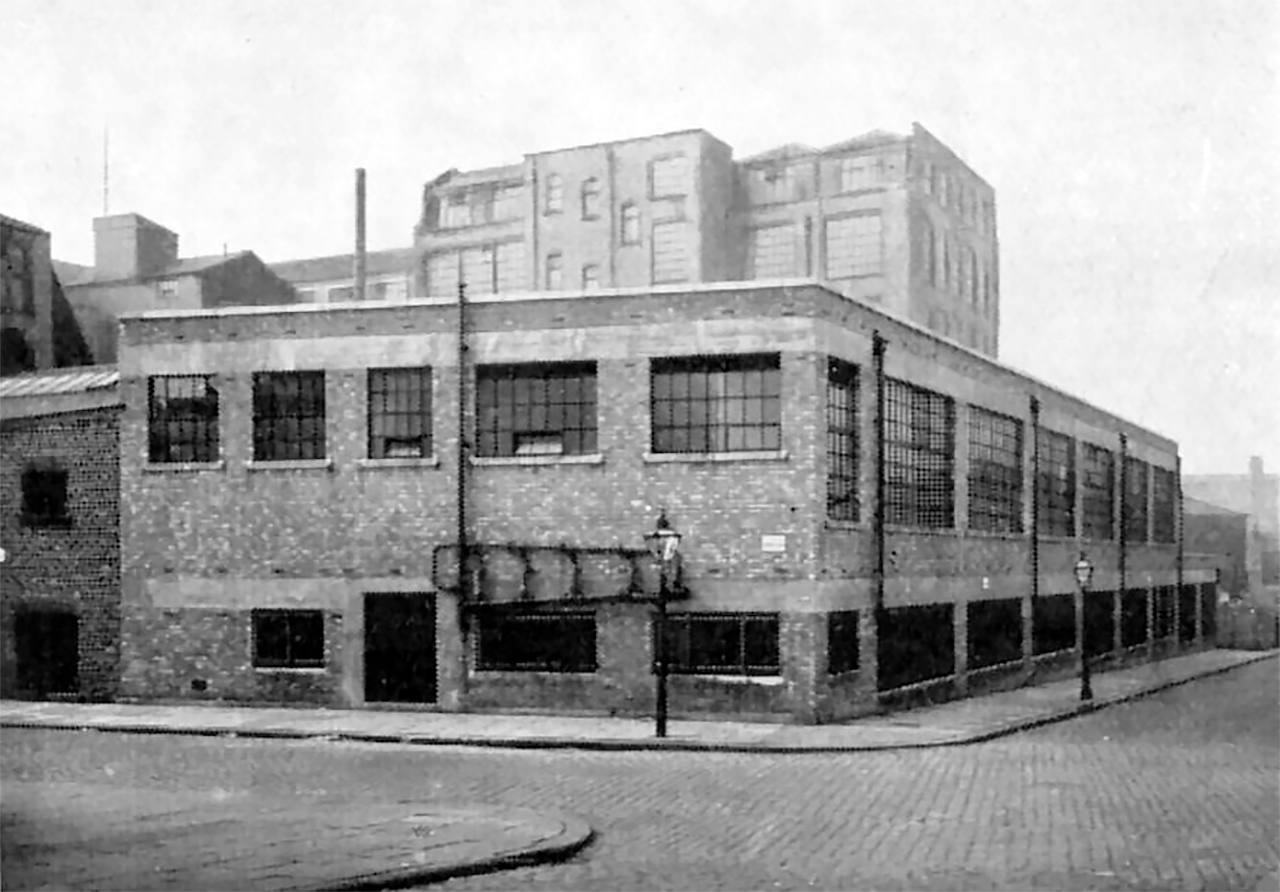
The abandoned buildings of Salford Electrical Instruments Limited (S.E.I.), Times Mill, Heywood, Lancashire, England.
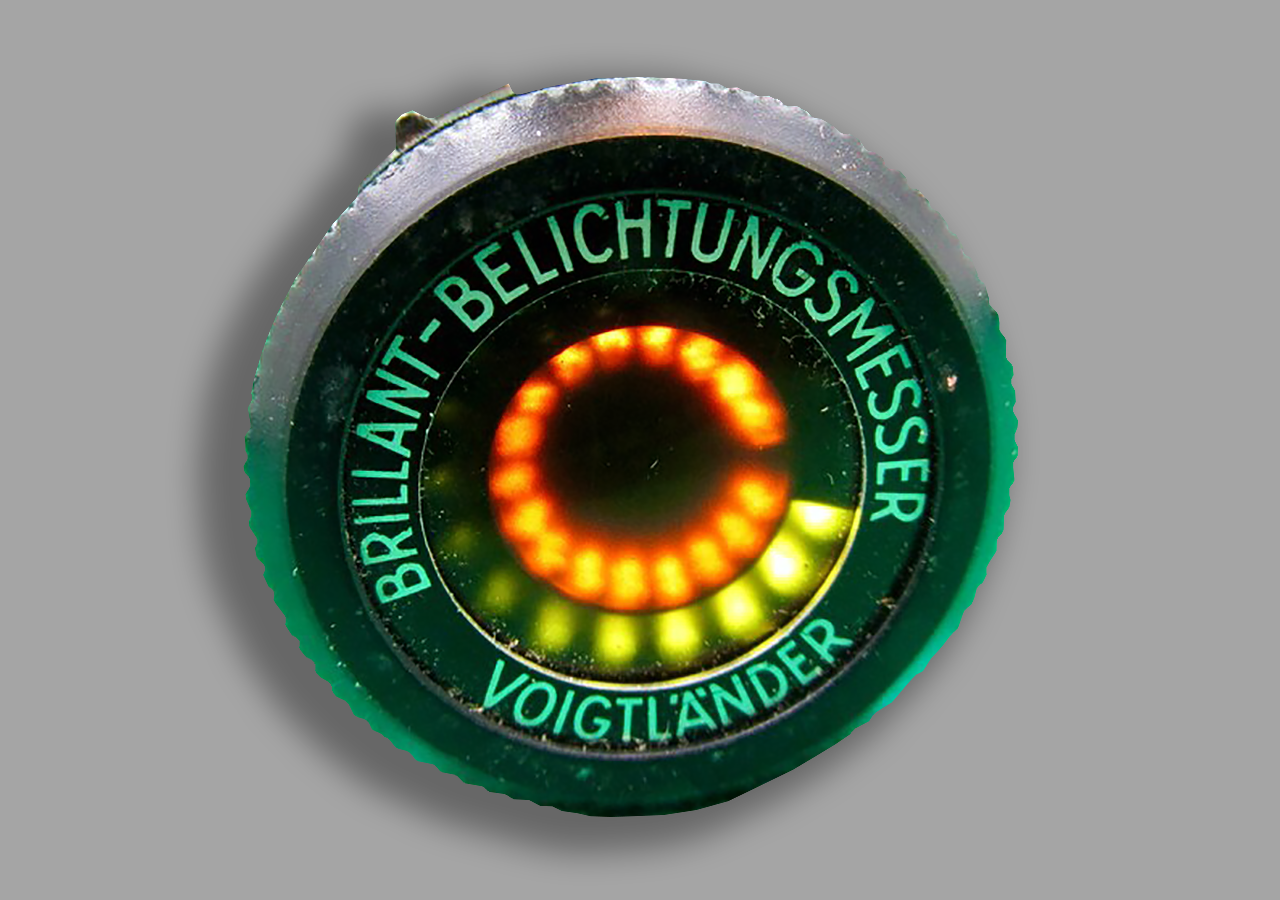
Voigtlander Brillant Extinction Meter (Belichtungsmesser). It is a lens attachment for a Voigtlander Brillant TLR style camera. It attaches to the viewing lens. The light through the lens will light up the red exposure numbers. The green ones are progressively darker. Use the number closest to the the green that is bright. A very primitive, but a very cool item.
Five images of Exposure meters based on comparison of light
The flash meters from this overview all come from the site of photobutmore.de. It concerns meters that were on the market well before the digital age.
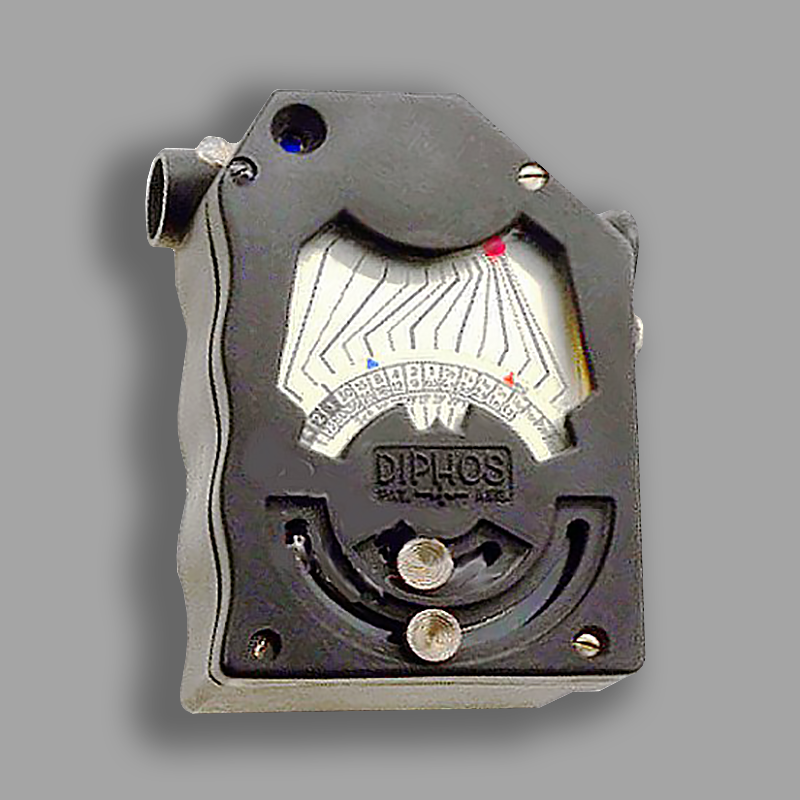
This unusual and rare device , the Diphos optical-electrical exposure meter, uses a 4.5 V flashlight battery for the comparison light source with an OSRAM dwarf lamp No. 3625. This means that the Diphos can also be used as a darkroom lamp with a special filter or as a flashlight in an emergency.
This device does not actually measure anything; it simply compares an elliptical ring to its surroundings by looking into the eyepiece and is therefore not dependent on the individual sensitivity of the eye or a measuring instrument.
There are two reading areas. After the film sensitivity has first been set, the eyepiece is aimed at the subject. The side button is then moved until the elliptical ring in the display window disappears into the blue surroundings. The exposure can then be read off using the line on the dial with the measuring button still pressed. The measurement range is given in the instructions as 1:111,200,000 between the lightest and darkest value.
The device was available with a DIN or Scheiner scale and as a special model “DIPHOS C” for film cameras. A manufacturer is not known.
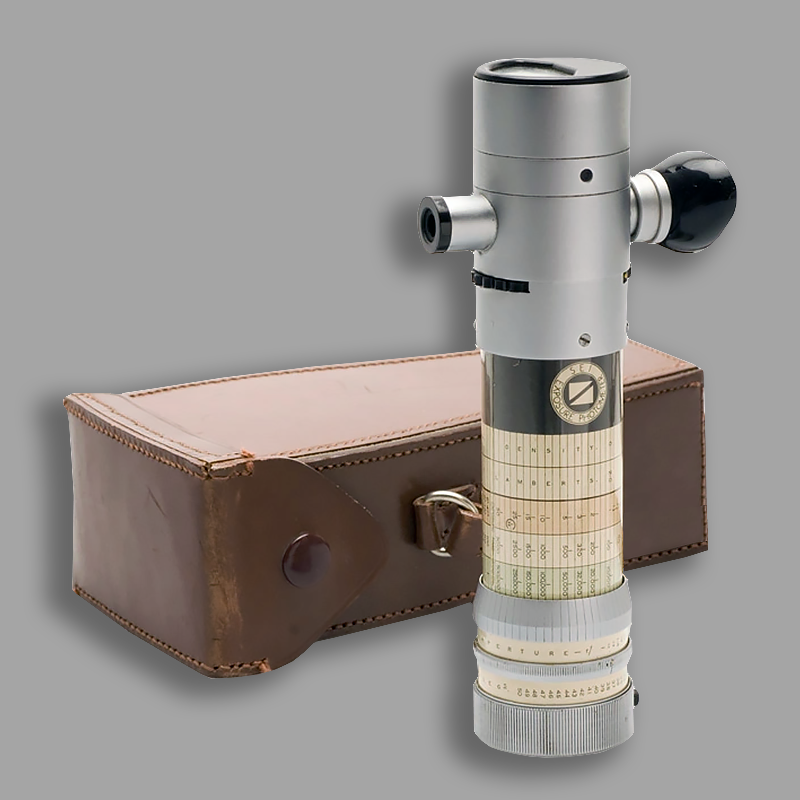
This instrument, the SEI Exposure Photometer, is considered the best light meter ever built. The instrument has been produced since 1946 by Salford Electrical Instruments Limited, Heywood, Lancashire, England and is probably also the first spot exposure meter. The last examples were built with LED displays in the late 1970s.
What sets the the S.E.I. apart from other exposure meters is its ability to measure the brightness of very small areas, even at great distances and with large differences in light. The contrast range is a million to one due to the narrow image angle of only 1/2°! The device contains a light bulb that must be calibrated before the measurement.
The photocell built into the SEI photometer does not measure the luminance of the object but rather the light from the device’s internal light bulb, which has been previously calibrated and adjusted to the brightness of the measurement object.
The device has 3 measuring ranges, which are selected with a slide switch (green/white/red scale) below the measuring cell. Values: Sensitivity 10-50° B.S.I.log.; f/1-32; Exposure times 2h47min-1/50s (red), 100-1/5000 sec. (white); 1-1/500,000 sec. (green).
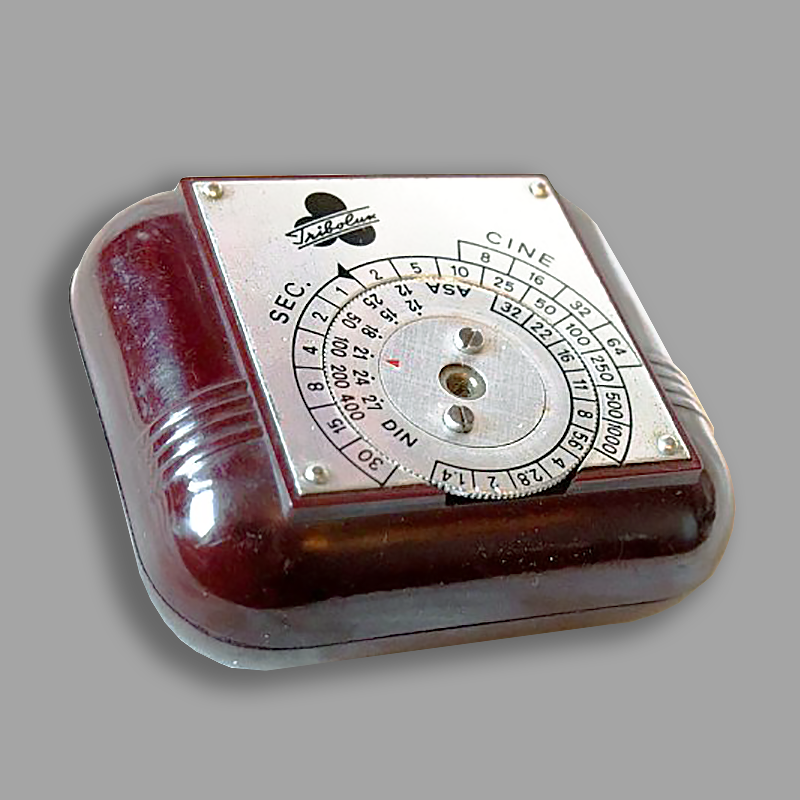
In this Tribolux comparison light exposure meter from the early 1950s, a comparison light bulb is also powered by batteries. The light meter was manufactured by the Viennese company Tribox OHG. The Tribolux was available with case/scale variants, red-brown or black Bakelite case and with black or bare scale wheel.
Pressing the white button turns the light bulb on. With the optical viewfinder, the subject image is placed over the light circle of the light bulb. You can see a vertical line, the brightness of which is adjusted to the surrounding field using the scale wheel.
Beforehand, the film sensitivity had to be adjusted on the inner dial wheel. The brightness of the light bulb also had to be calibrated every now and then as specified in the operating instructions.
Sensitivity 12-27° DIN / 12-400 ASA; Aperture from 1.4 to 32; Exposure times 30s to 1/1000s.; Cinema 8-64
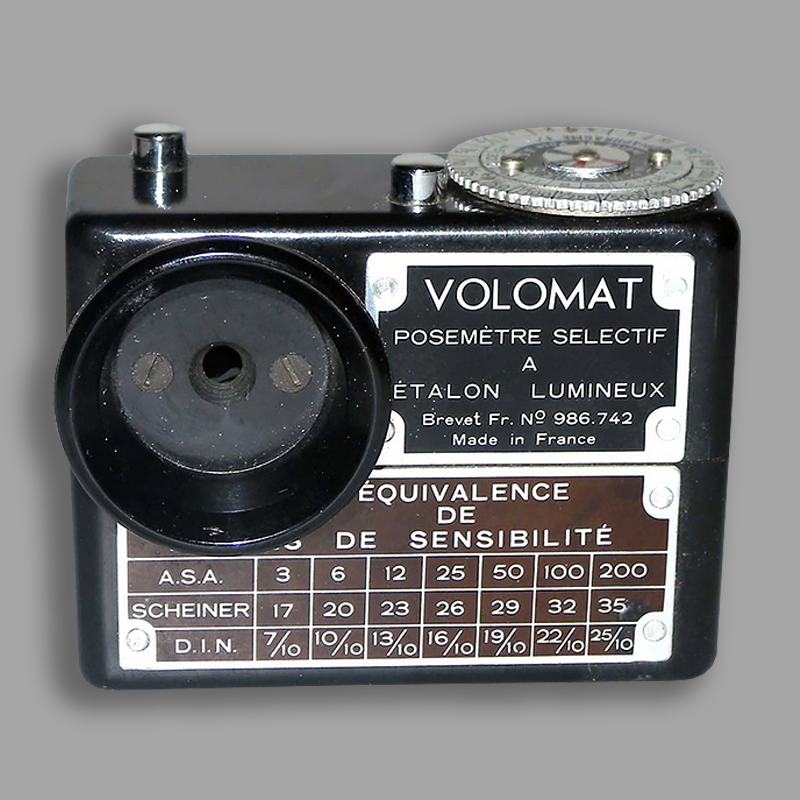
This light meter, the VOLOMAT Posemètre – Breveté S.G.D.G., was manufactured by the French company Volomat, Rue d’Hauteville, Paris in the 1940s/50s.
Breveté S.G.D.G. was a French type of patent that ceased to exist in 1968. The name was a common abbreviation for “Breveté Sans Garantie Du Gouvernement“ (patent without government guarantees).
In this meter a light bulb is powered by two batteries via a rotary resistor (rheostat). The optical viewfinder is used to place the subject image over the light circle of the light bulb and the brightness is adjusted using the rotary knob. The system enables good contrast measurement.
Sensitivity 1.6 – 200 ASA / 7/10-25/10 DIN / 17-35° spotlight; Aperture from 1.4 to 45; Exposure times 120s to 1/1000s.
In a later version of the VOLOMAT Posemètre with an extended adjustment range, the battery holder was removed from the measuring device.
The values were then:
Sensitivity 12 – 800 ASA / 13-31° DIN / 23-41° spotlight; Aperture from 1 to 45; Exposure times 120s to 1/1000s.
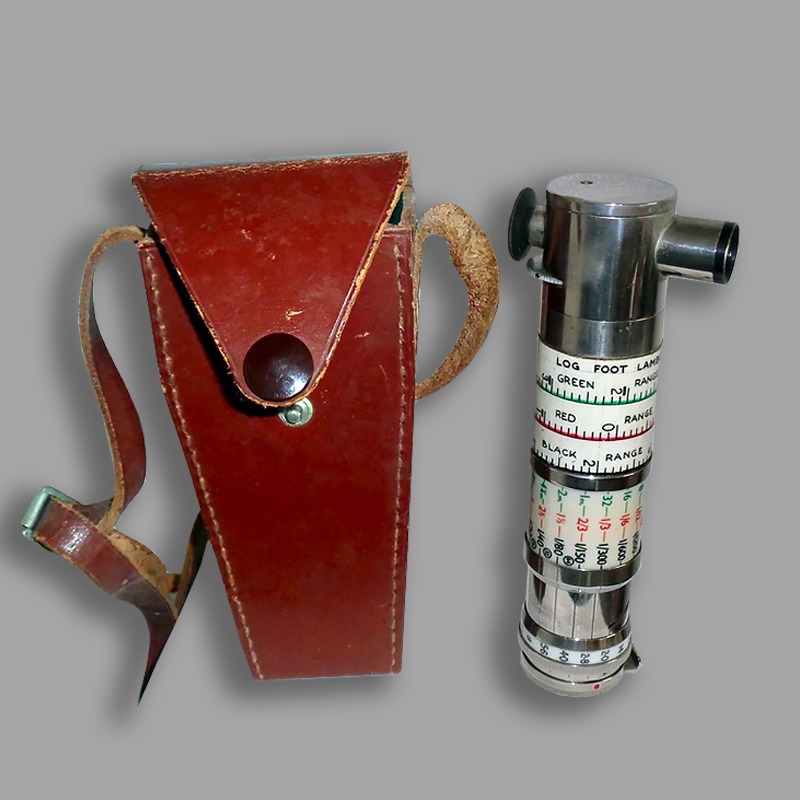
In the process of researching articles dealing with the SEI Photometer I came across reference to an earlier “Spot” meter known as the Ainger Hall Photometer. British Patent 508122 was issued for this invention on June 27, 1939. The inventors are listed as John Ainger Hall, Francis Harold Schofield and William George Haughton Turl..
This Ainger Hall comparison light measuring device is the direct predecessor of the S.E.I. Photometer. In any case, both its design and the way it operates with battery and light bulb are almost identical. Whereas the Ainger Hall instrument relied on calibration with a candle flame in a darkened room and depended on stable battery voltage between calibrations, the SEI provided a photocell and rheostat that allowed for calibration at any time.
The years 1938 and 1939 were probably the worst time to try and market a photographic exposure photometer that was not particularly suitable for use by military photographers. This instrument was originally manufactured by the Bowen Instrument Company in England. Some of these instruments were still being hand made on special order in the 1950’s by one of the inventors, William George Haughton Turl.
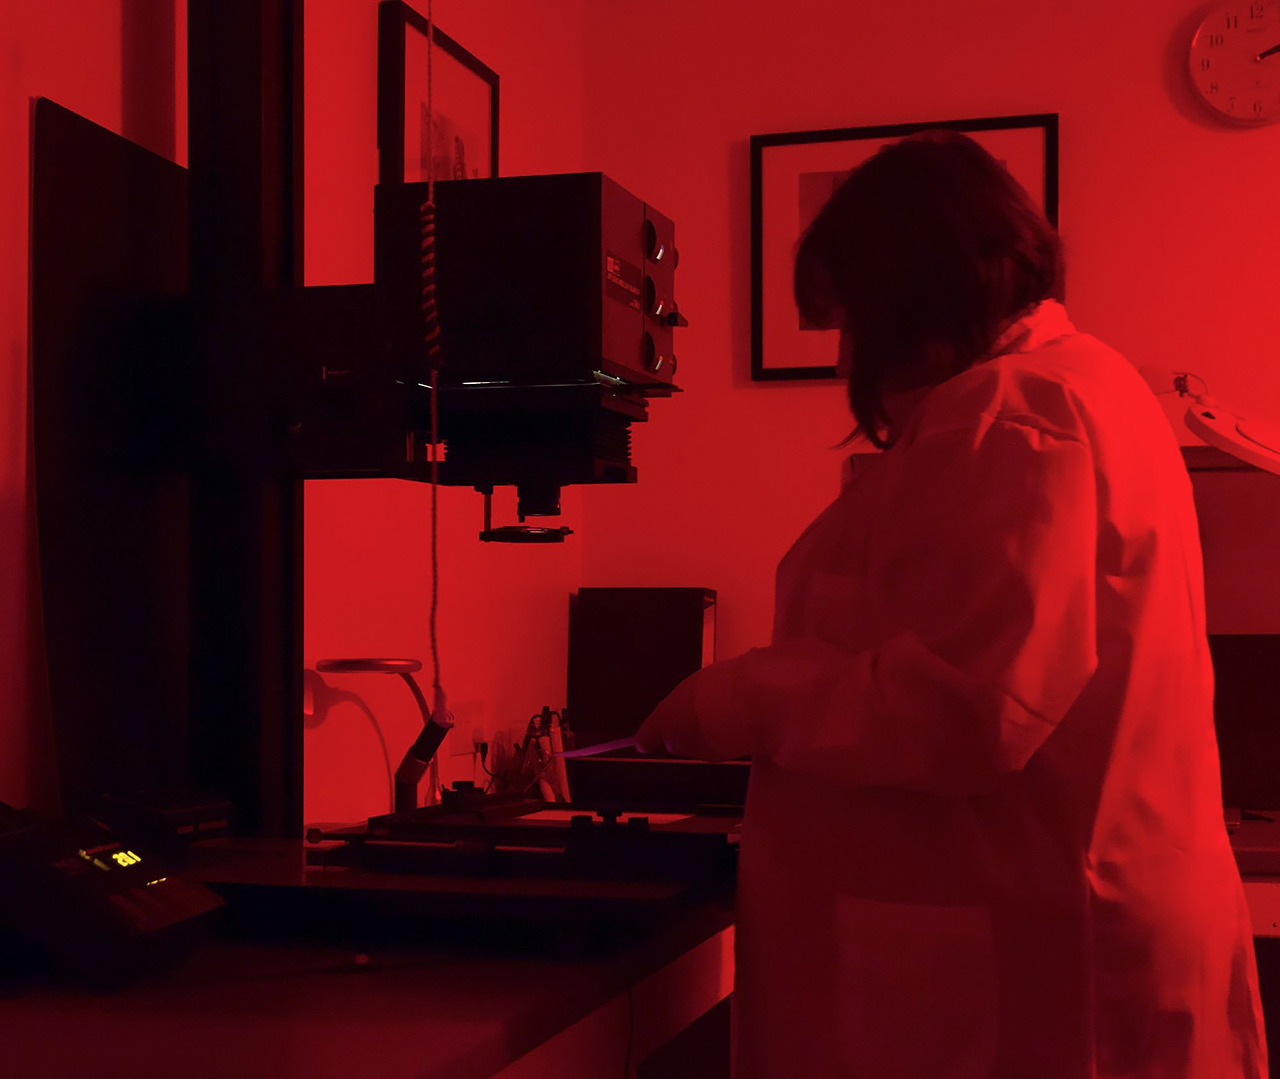
Exposing photographic paper in the darkroom using an enlarger.
darkroom measuring devices
Initially in the early twentieth century, the common way to determine the exposure time of the bromide and other developing papers was to make a test strip by multiple exposure. No additional equipment was required for this. Step wedges were produced consisting of glass or celluloid, divided into different opacity levels, requiring only one exposure to produce a complete test strip.
Densitometers in which the density of the negative was read directly were used by dedicated amateurs, but were an exception. In the 1930s, electric meters were produced that used the spot metering principle and other comparison methods. Later, meters using photoelectric cells were introduced, such as the Majus of the late 1930s.
Mechanization in the darkroom
Naturally, the use of exposure meters was not limited to use when taking pictures. They also found use in the darkroom when enlarging negatives into black and white enlargements. Particularly in the 1930s through the 1960s, when self-enlarging black-and-white negatives became common, they were often used to facilitate finding the correct exposure time and thus prevent wastage of (valuable) photo paper. .
Of course, the darkroom at that time was also equipped with a timer that made twenty-one – twenty-two – twenty-three counts unnecessary when exposing the photo paper. Another solution available at the time in luxury darkrooms was electric exposure meters in the magnification window. The Agfa Variomat and the Belimat were such “darkroom computers”.
Photo Exposure meters came in many versions; from simple to complicated; from cheap to expensive. Below you will find the overview with two groups of six meters; six items from the beginning of the twentieth century and six items from a later date.
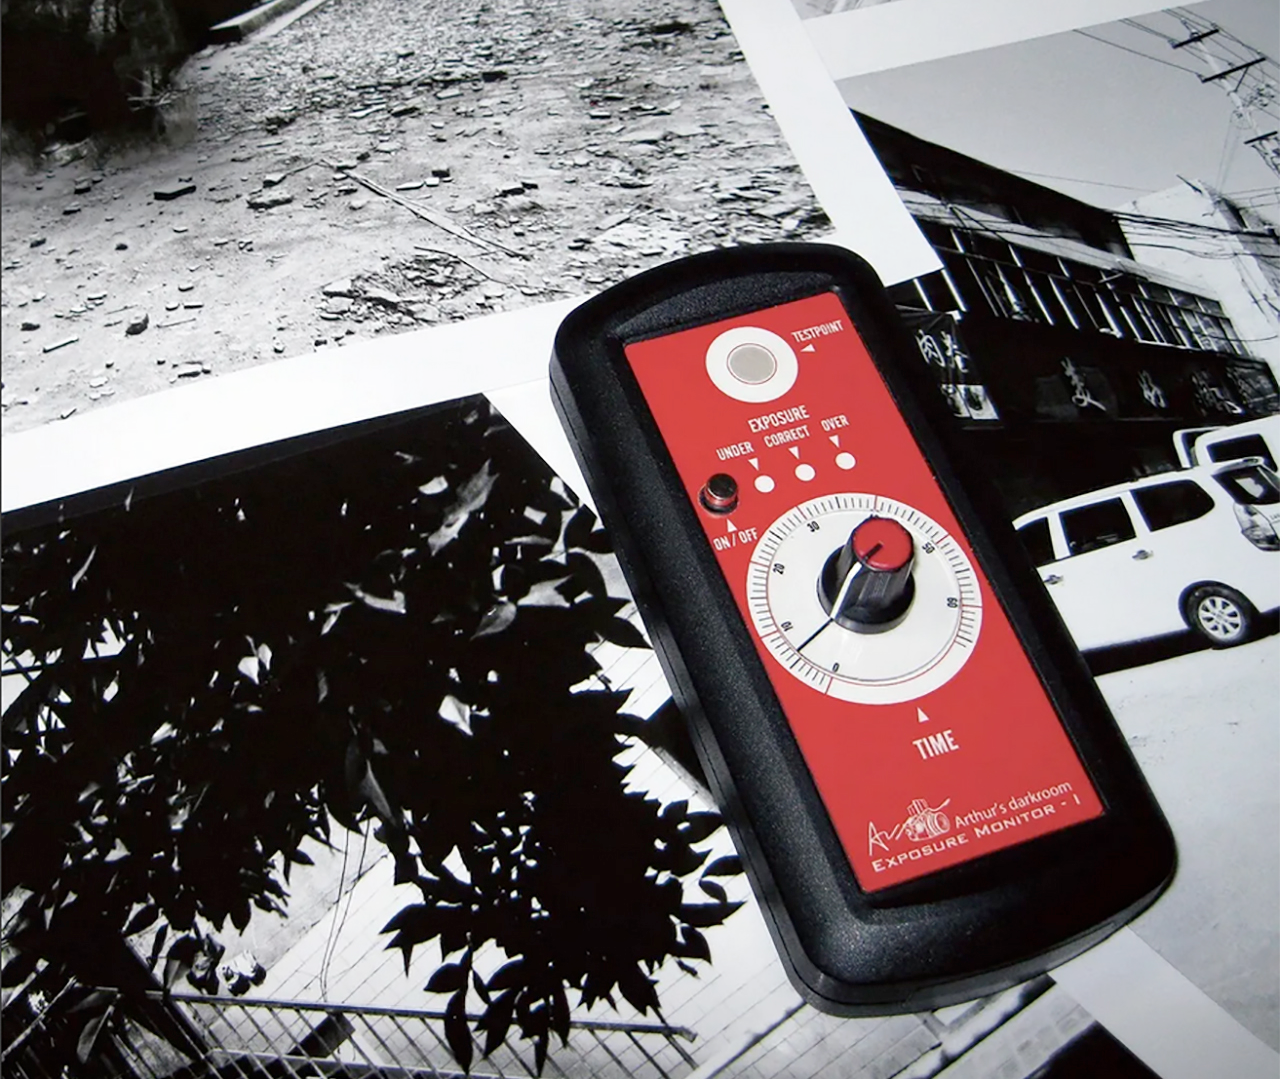
Modern digital Exposure Meter type Arthur EM-1 for the Darkroom.
twelve images of darkroom Exposure meters
The meters from this overview come from the sites of photobutmore.de and earlyphotography.co.uk. It concerns meters that were on the market well before the digital age.
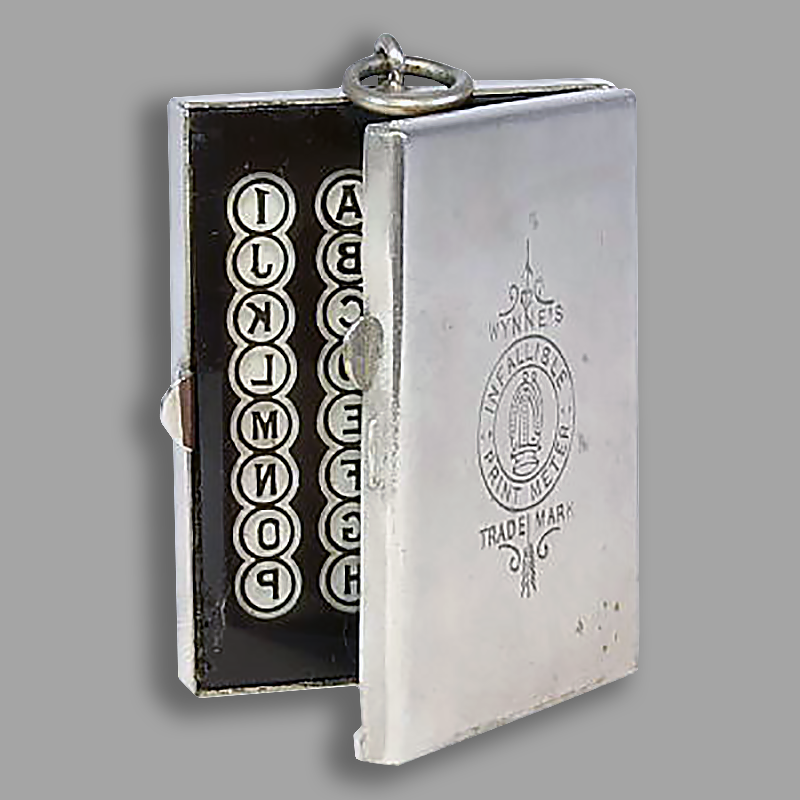
This 1897 Wynne’s Infallible Print Meter from the Infallible Exposure Meter Company, Wrexham, Wales, was one of the most popular of the early meters. On some examples there is more elaborate engraving on the corners of the case. It was developed for use with carbon or platinotype papers. A series of figures of varying density are printed onto printing-out paper.
It consisted of a plated metal box with paper holder in lid. Series of transparent numbers and letters (1-16; A-P) through perforated metal plate with graduated holders and opal glass diffusers.
Experience was used to judge which figures should print for the density of the negative or a trial could be made by printing the negative onto printing-out paper at the same time as exposing a test strip in the meter, when the print was correctly exposed the value that was just visible on the test strip indicated the density of the negative and was used in subsequent carbon or platinum prints.
The price was around 6/-, a solid silver model was advertised at 15/-.
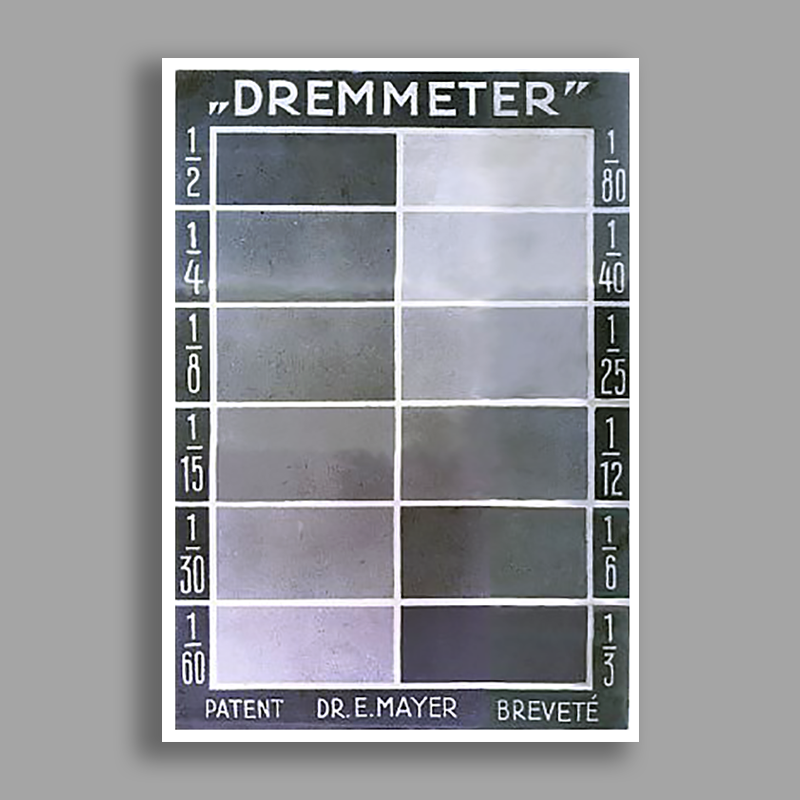
The copy exposure Dremmeter for the paper laboratory from the 1930s is probably not a light meter in the true sense of the word. Nevertheless, the German DREM Society, Frankfurt/DREM headquarters, Vienna – better known for its Justophot and Justodrem exposure meters – advertised it as a “copy exposure meter for development papers”. It was a very simple device for producing a test strip.
The buyer received a 6×9 film negative with 12 fields of different densities. A test strip from the plate or film is exposed onto photo paper with any exposure time. The Dremmeter is placed in the copy frame between the plate and paper or, when enlarging, on the paper to be exposed.
The image field with the optimal result is then used as the scale for the copy or enlargement; The fraction number next to the field shows how much the exposure time selected for the sample should be shortened.
A relatively simple procedure that the company owner, Dr. E. Mayer held a patent.
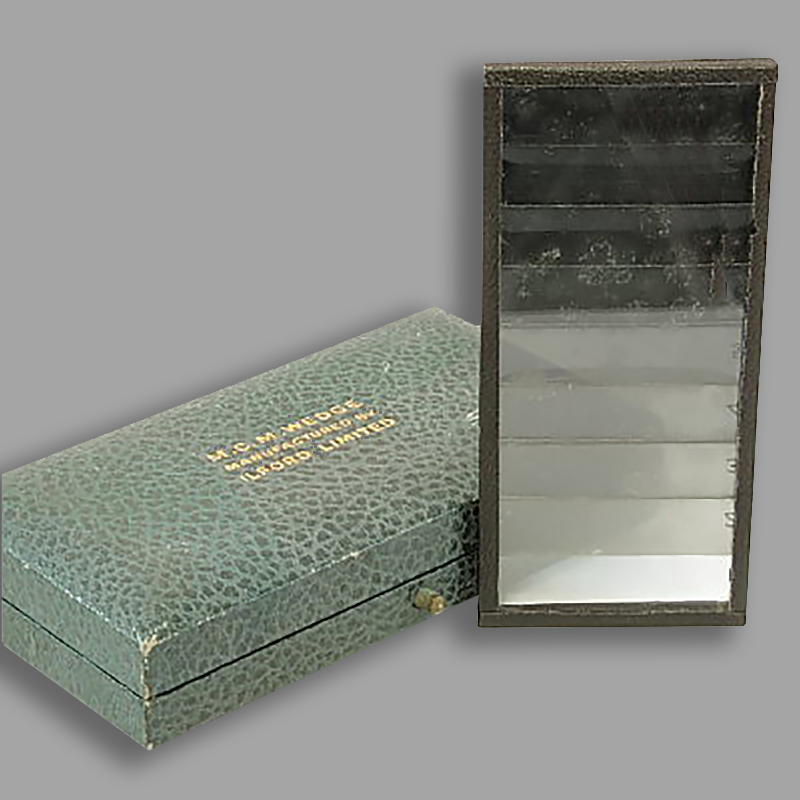
This Step Wedge of 1939 was designed by the editor of Miniature Camera Magazine, Percy Wooten Harris, in collaboration with the Research Department of Ilford. The magazine was founded by Percy Wooten Harris and launched in December 1936. Although he had people working for him it was clearly very much a one man project with his authority stamped everywhere.
The magazine was close to A5 in size. It ran until sometime in the early 1950’s when it was renamed Modern Camera Magazine and seems to have continued perhaps until the very early 1960’s. It began with a cover price of 6d (2.5p) and then in 1938 doubled in price to 1 shilling (5p) when it started with a colour cover.
The M.C.M. Step Wedge was intended as an aid to classifying photographic paper. The wedge has 8 densities plus clear, the densities differ by a density of 0.3 thus each step in the test strip receives twice the exposure of the previous.
It has a satin lined fitted case labelled M.C.M Wedge Manufactured by Ilford Limited.
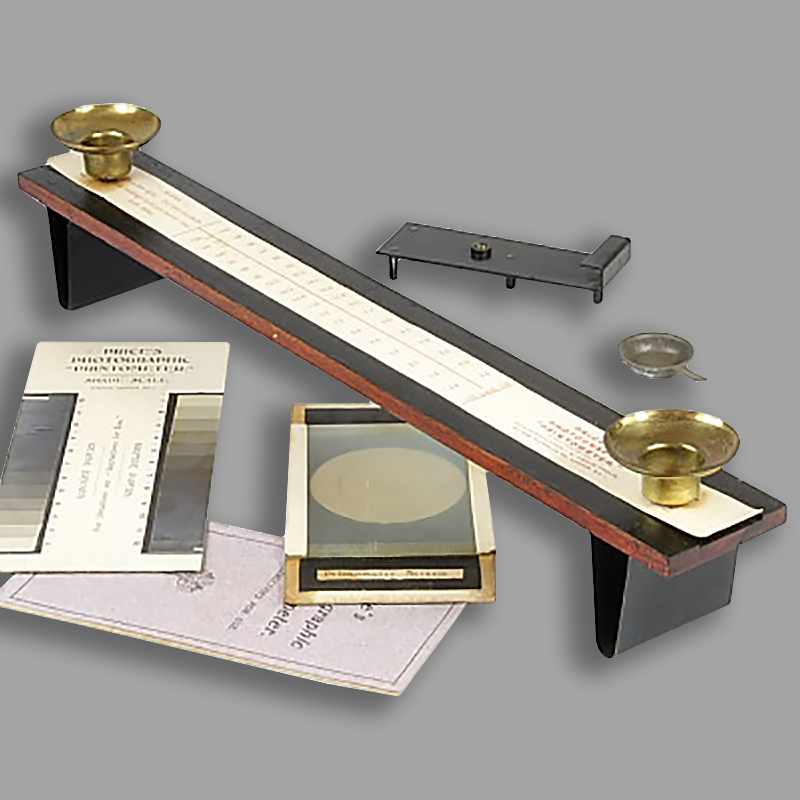
Price’s Photographic Printmeter is a rather cumbersome device to introduce in the 1920s. The inventor was Aubrey Leigh Price. It uses the familiar grease spot principle to determine the exposure required when printing from a negative. The negative is placed against the screen between the two light sources (candles), the screen is then moved along the strip until the transmitted light through the negative matches the surrounding reflected light from the other light source. At this point a value which indicates the exposure required can be read from a scale.
The scale has first to be calibrated by finding the correct exposure time for the printing papers to be used, a test negative is used for this. A successful print is made from the test negative, the test negative is then used in the photometer to find the scale value, the exposure time, for the successful print, is divided by the value to give a constant for this type of paper.
For different negatives the constant is multiplied by the value found on the photometer, a further calculation involves the distance of the light if this is not fixed.
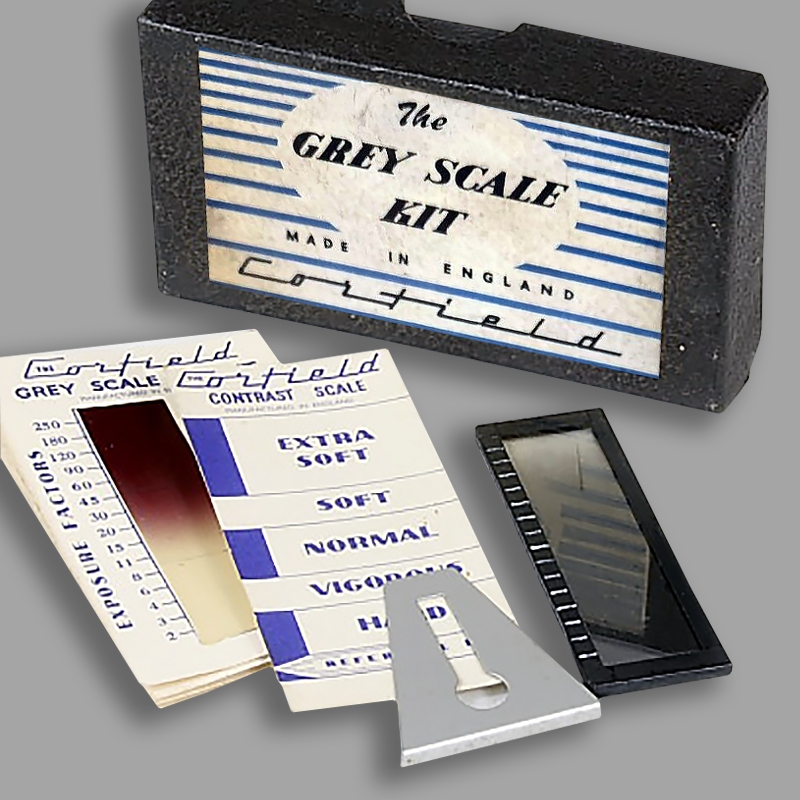
K. G. Corfield Ltd was an innovative camera and lens manufacturing company based in Wolverhampton. The company also produced other photographic equipment including the Lumimeter, an exposure meter for use in the darkroom based on the comparison between reflected light from the enlarger and a variable transmitted light from the meter observed in a split screen and the density step wedge named the Corfield Grey Scale Kit.
The kit was introduced around 1951. It contained a continuous density wedge, a contrast scale and 25 used and unused grey scale mounts. All supplied in a sturdy card board box. This Grey Scale Kit was used to compare and categorise printing paper; the kit was supplied with cards on which to mount the finished test strips, a Contrast Scale could be held against the strip which would show the contrast rating of the paper.
The driving force behind the company was Sir Kenneth Corfield; he passed away on 11th January, 2016 at the age of 91. K. G. Corfield Limited finally closed in July 1971.
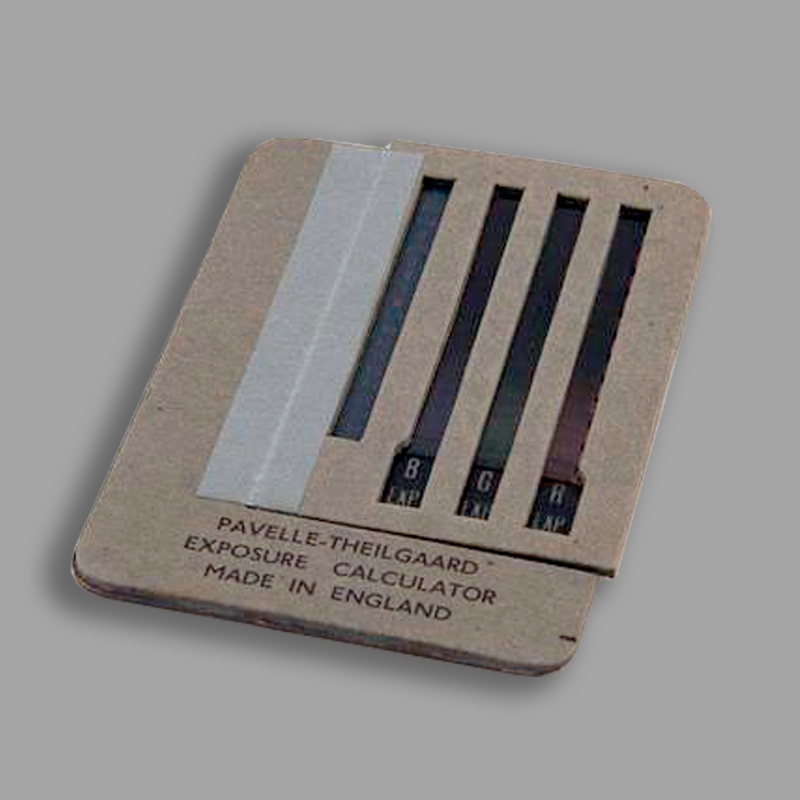
The Pavelle-Theilgaard Exposure Calculator of the 1960s is an ingenious device consisting of three density step wedges (red, green, blue) mounted on a hinged flap and are printed along with an exposure factor. The base holds a piece of colour printing paper 4½ x 6 cm. Supplied in the UK as part of a colour printing kit.
The negative is put in the enlarger and focused up to the required size. After stopping down the lens, a diffuser is placed over it, and the enlarger switched off. A piece of colour printing paper is put in the calculator, and the flap closed down. Next a timed exposure is given, after which the paper is developed and examined. The lightest step visible in each wedge is found, and the number opposite to it is read off. By referring to the chart it is simple to calculate the three relative exposures by the additive system, or the correct filtration with the subtractive method.
With most negatives an acceptable colour print will result. The great advantages are the saving of time and material spent in testing.
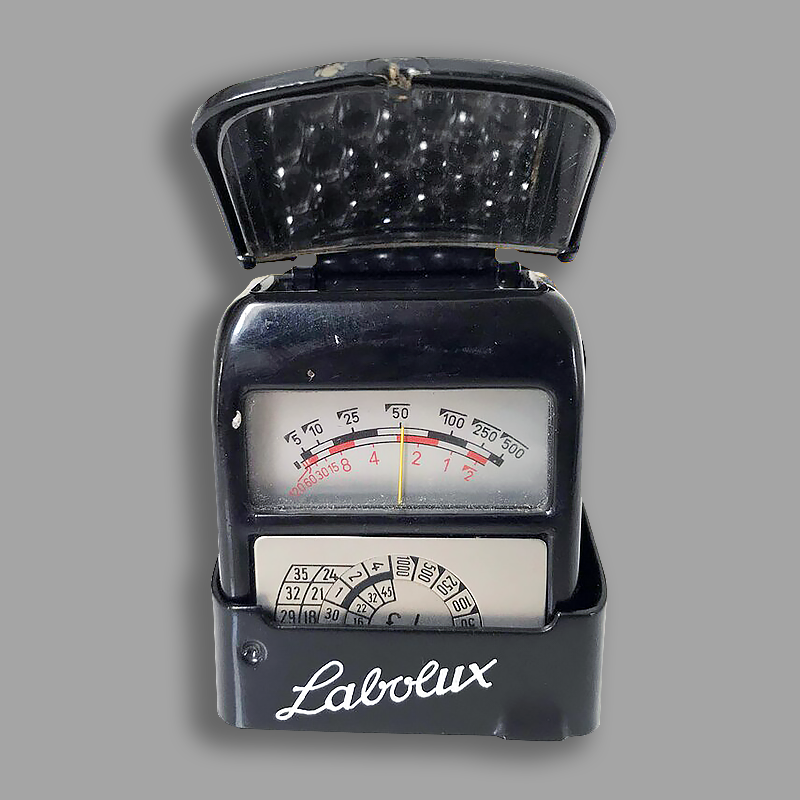
In the 1930s, Gossen offered an additional device called “Labolux” for measuring exposure with enlargers in the darkroom.
It was not a stand-alone measuring device, but rather an addition to the Sixtus and Ombrux light meters. These were placed in a holder with a mirror through which the light from the enlarger was redirected onto the measuring cell.
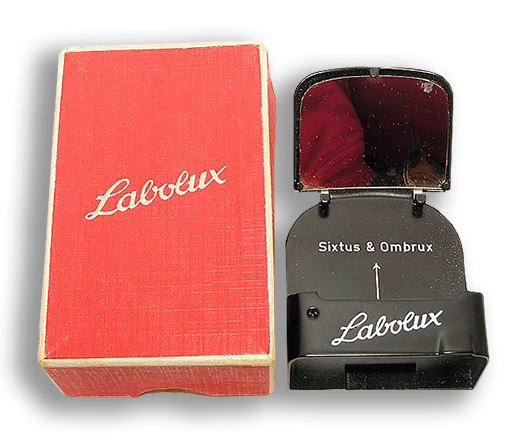
Using a comparison table, the exposure times for paper enlargements could be determined.
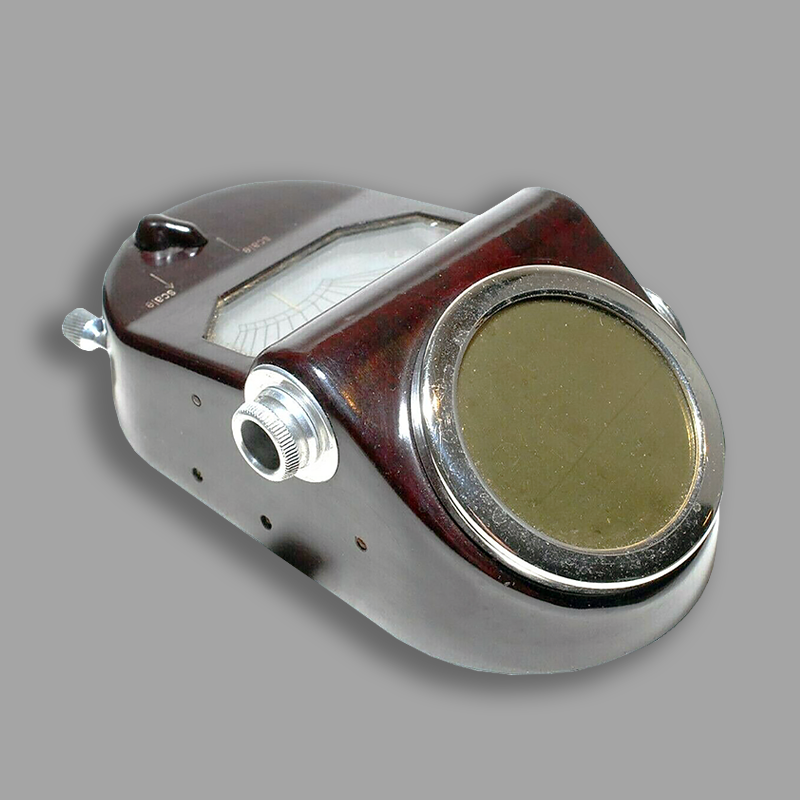
Antique Gossen Selenium magnifying exposure meter model Majus in a Bakelite housing – built around 1937.
With the large measuring cell of the Majus, measurements can be taken directly under the magnifying lens. The scale, divided into exposure times, showed times between 24 minutes and 1/4 second.
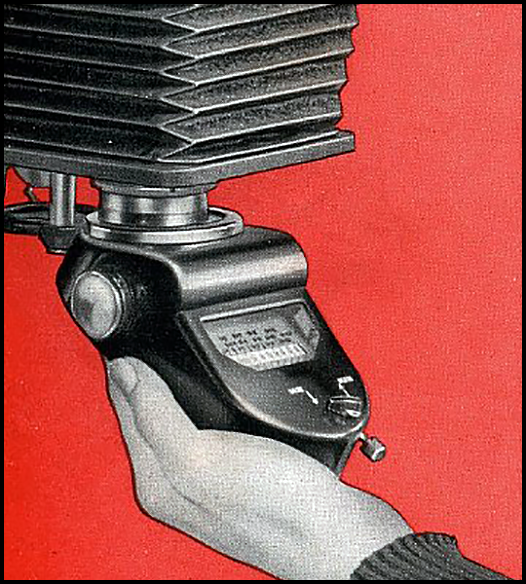
A built-in lamp enables the pointer and scale to be read even in the dark.
- The power comes from a 3V AAA-battery.
- The Majus weighed 370g and cost RM96 around 1938.
- Sensitivity: 5 – 29° Scheiner;
- Apertures: 1.4 – 45.
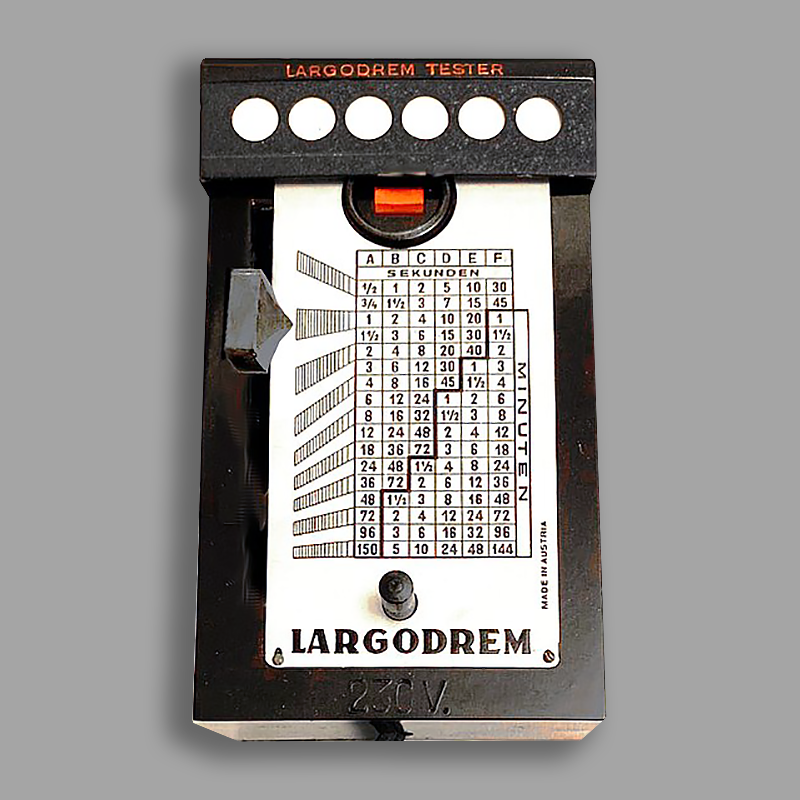
Dr. E. Mayer in Vienna, “DREM” for short, covered the entire range of light meters with his devices. This “Largodrem” is a light meter for dark laboratory rooms.
The device measures the exposure time for enlargements after focusing on the negative to be enlarged. To do this, the Largodrem is placed on the magnification board so that the measuring field is in an area that is characteristic of the negative density. After pressing the button, the measuring field lights up. The slider on the left side is then moved until the two rectangles in the measurement window are equally bright. The exposure time that corresponds to the sensitivity of the paper is then read from the table.
A paper tester was sold with the meter, at first as an extra then included. After a test exposure, the tester assigned the types of paper used to the letters A-F shown on it. Exposure times: ¼ s – 144 min.
In the 1938 Photo Porst catalog the Largodrem cost 18 RM.
The picture shows the Largodrem with the “tester” placed on top. During the test exposure, the fields on the tester show the letters A-F, which can be assigned to the respective paper sensitivity.
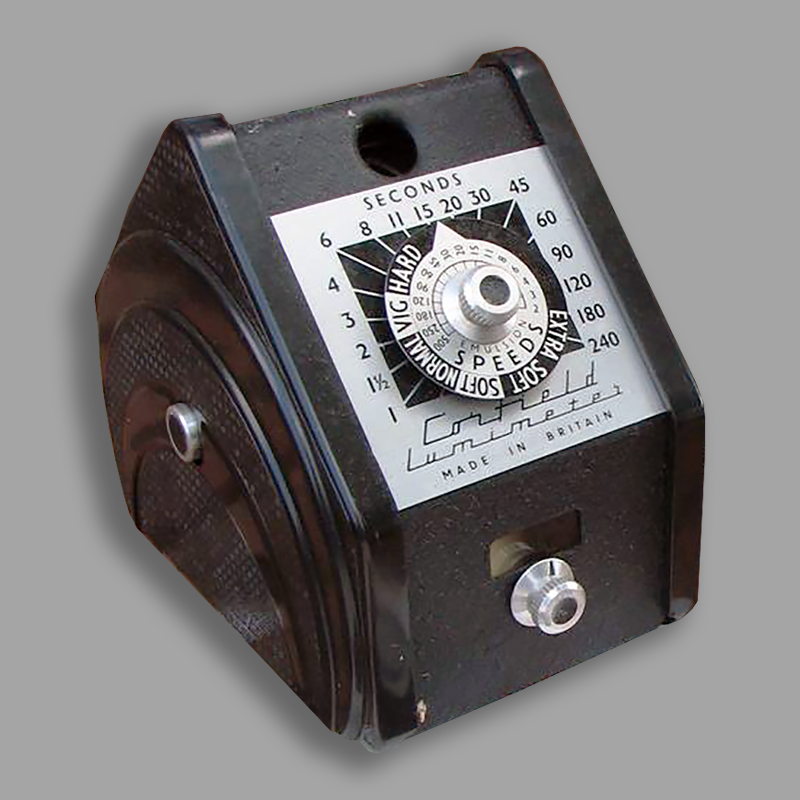
K. G. Corfield Ltd. was an innovative camera and lens manufacturing company based in Wolverhampton. The company also produced other photographic equipment including the Lumimeter, an enlarging exposure meter for use in the darkroom based on the comparison between reflected light from the enlarger. The meter was introduced in 1948.
This is a grease spot photometer, light from the enlarger is reflected by a mirror onto the back of a screen that contains the spot. A standard lamp illuminates the front of the screen. As the lamp is moved towards or away from the screen the front and back light are equalised and the spot will disappear. The exposure time can then be read from a scale between the lamp-house and the screen. The lamp-house carries a set of rotating apertures, which varies the light according to the paper speed.
Other versions of the Lumimeter were powered from a battery. A voltmeter and regulator were included to adjust the voltage.
The driving force behind the company was Sir Kenneth Corfield; he passed away on 11th January, 2016 at the age of 91. K. G. Corfield Limited finally closed in July 1971.
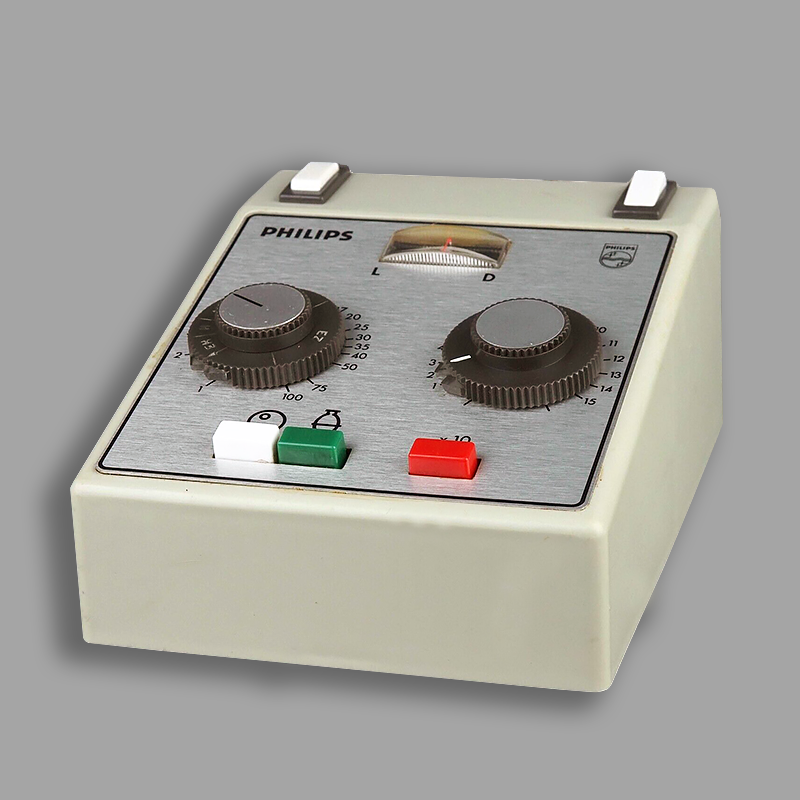
The Philips PDT 021/01 Analyzer and Automatic Timer is connectable with the enlarger and the darkroom lamp. It was manufactured as from 1968. Later versions were also suited for color paper (PDT 022 – PDT 024)
The enlarger and darkroom safelight are plugged into the back of the PDT 021. A measuring probe is used to asses the exposure time and the grade of paper to be used. The darkroom safelight is automatically switched off during measurement.
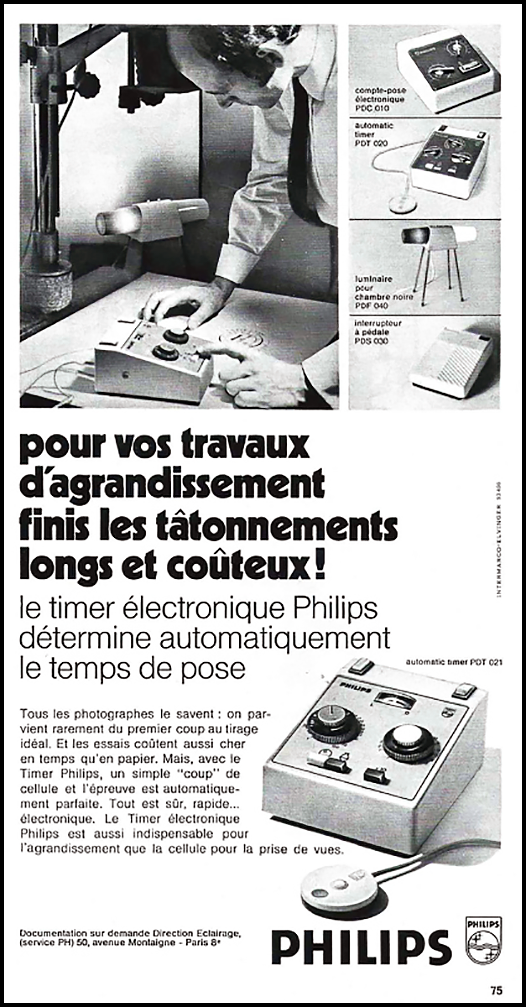
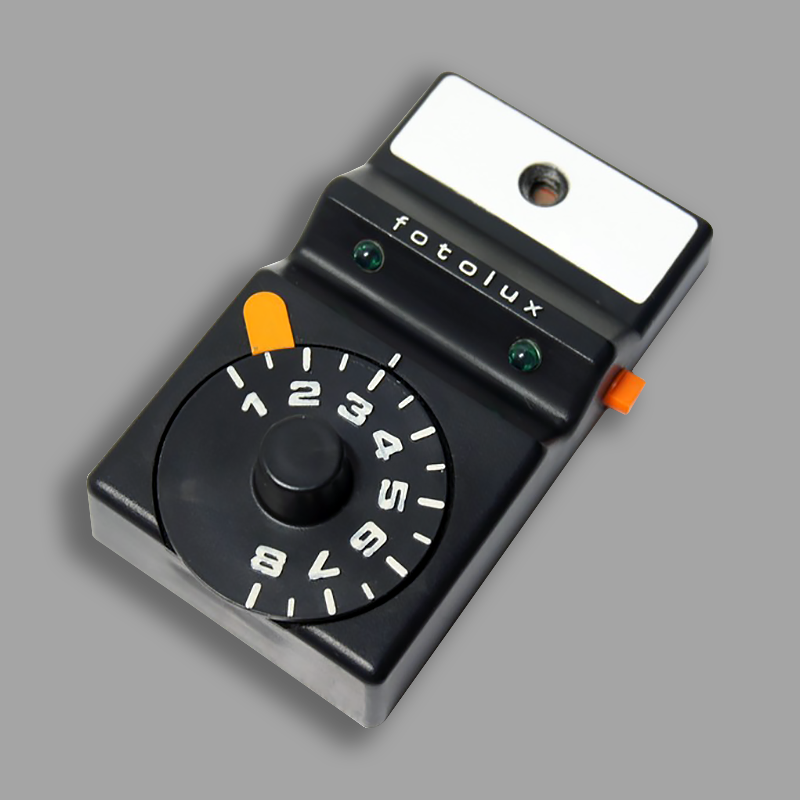
This darkroom auxiliary device was manufactured by VEB Schaltanlagenbau Zörbig in the 1970s/80s. This in turn belonged to VEB Starkstrom-anlagenbau Magdeburg/VEB Elektromotorenwerk Wernigerode.
This VEM-Fotolux type DM223 is a so-called consumer device that many combine companies in the GDR had to produce at times in addition to their actual production program. The Fotolux was actually built in the Zörbig engine factory.
The Fotolux can be used to determine the density of the negatives for paper enlargements, i.e. the exposure of the type of paper required. In the device, a photoresistor measures the light emitted by the magnifying lens after pressing a button. The rotary potentiometer is turned between 1-8 until a light level made up of two green LEDs lights up evenly. This finds the paper guide number and compares it with the photo paper used. The device requires two 1.5V batteries (R6) to function.
The Fotolux was sold until around 1986; the selling price of 95 GDR marks was quite high for GDR standards at the time. The device was also not exported.
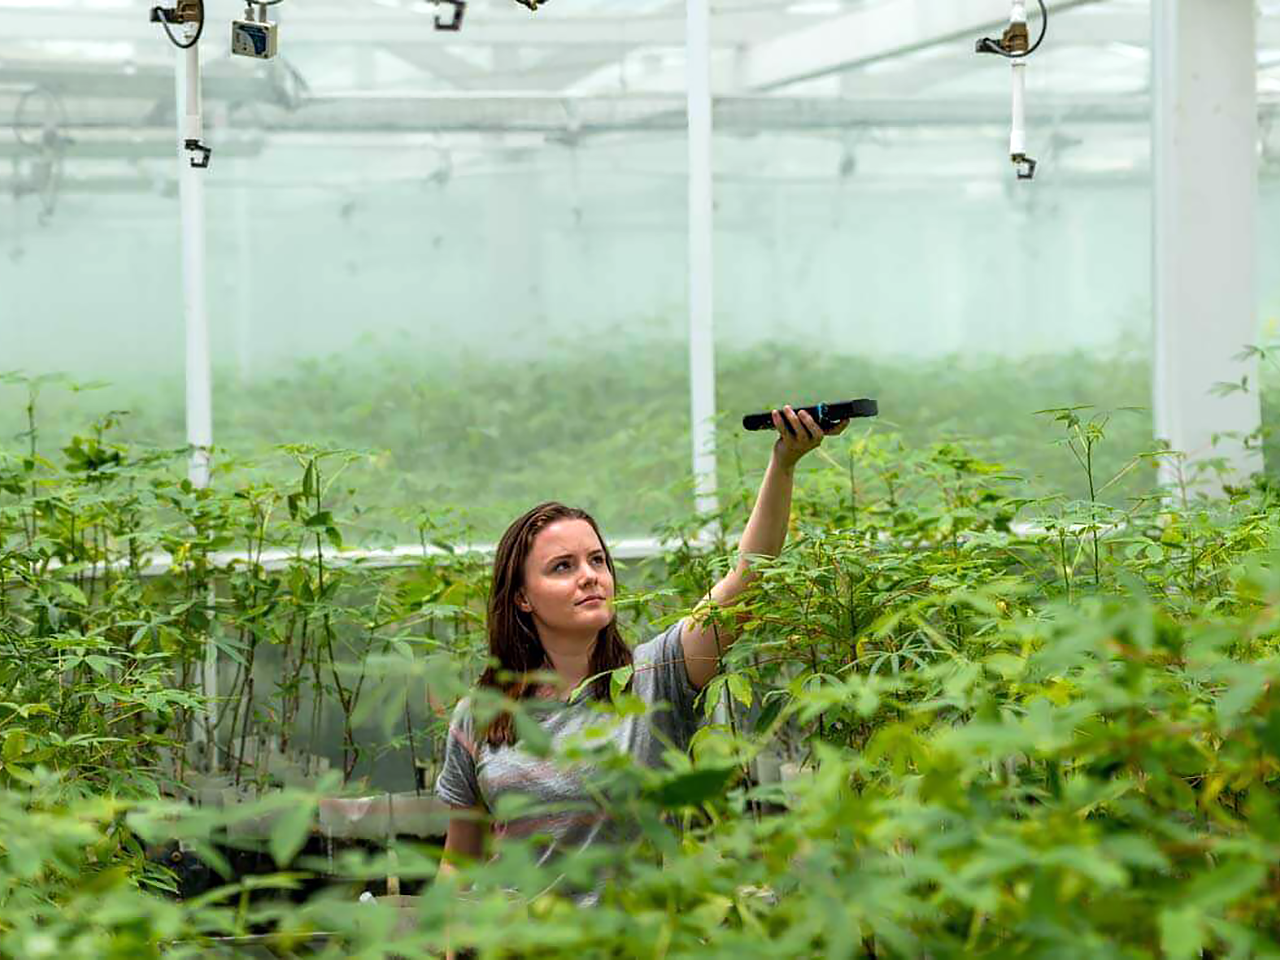
Light measurement in a greenhouse
Lux meters
A Lux meter or light meter determines the exact number of Lux or Footcandles in a specific environment. The light meter is a welcome addition to the human eye, as the eye only perceives light with a wavelength of approximately 380 to 750 nanometers. That’s where the light meter comes to the rescue, as it measures much further than the human eye can see.
At this moment (we are now well advanced in the twenty-first century) there are simple manual Lux meters for random checks, Lux meter data loggers that measure the number of Lux over a longer period of time, Lux meters with an alarm and Lux meters with a relay function. Almost all devices from the digital age. And since this website is (almost) exclusively concerned with equipment from the analogue era, we will not discuss this digital equipment.
What we are concerned with are some Luxmeters from the last century, which can be used for general light or lighting measurements. Actually, these are ordinary photographic exposure meters that are of course also suitable for Lux measurement; To obtain the display in Lux values, only the correct conversion tables are missing.
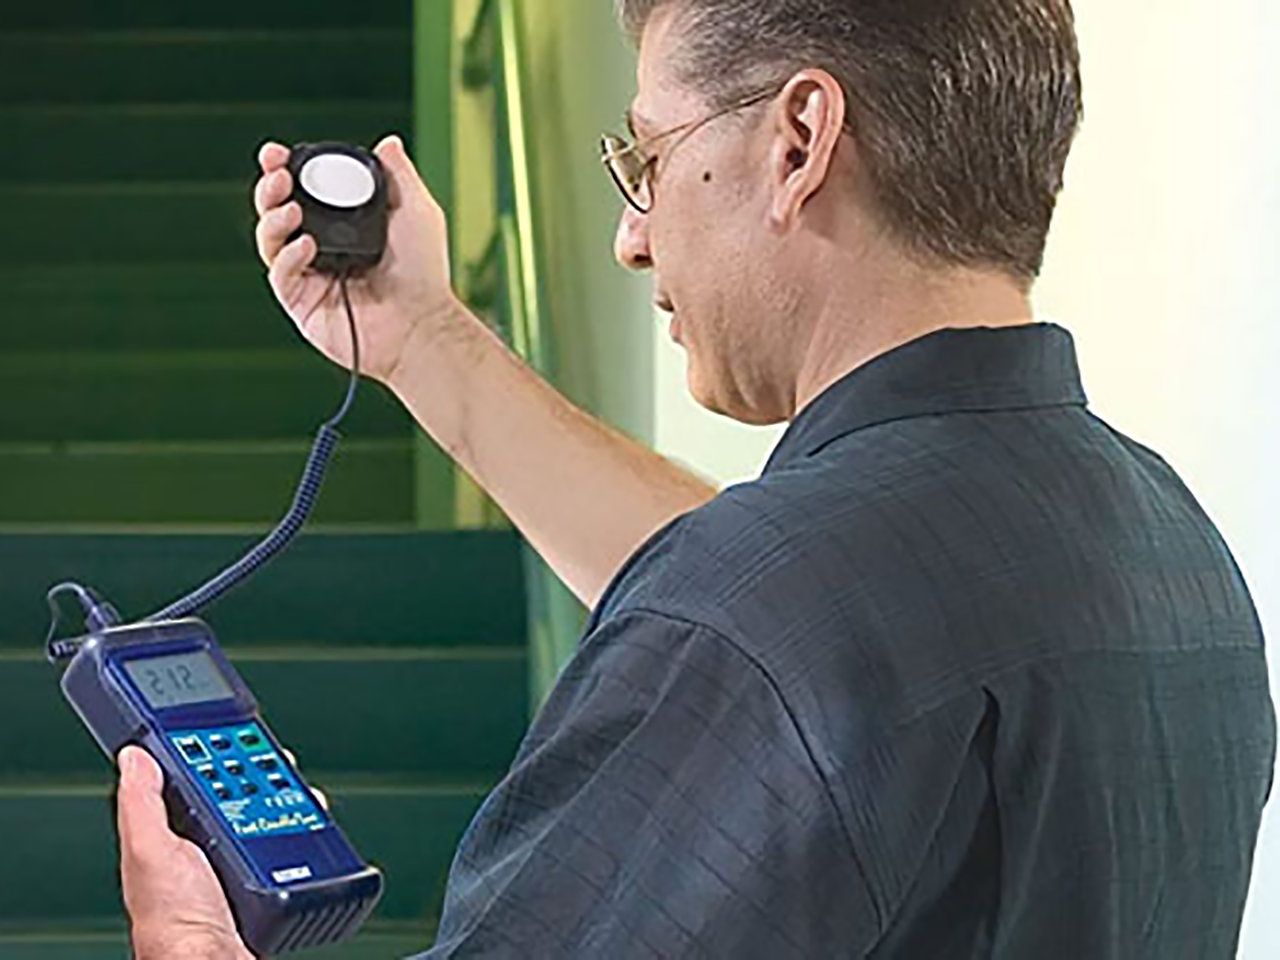
Light measurement in a stairwell
To give an indication, an overview of the most common light sources including the luminous flux in lumens.
| LIGHT SOURCE | LUMEN |
| Light bulb | 15 |
| Halogen | 20 |
| Energy saving lamp | 60 |
| Fluorescent tube (T8) | 70 |
| Fluorescent tube (T5) | 100 |
| LED TL | 110 |
| LED PL PRO | 115 |
| LED T5 PRO | 210 |
| LED TL PRO | 210 |
It is not without reason that light bulbs are no longer allowed to be sold. In terms of waste and environmental impact, an incandescent lamp takes the cake with 15 lumens per watt.
LED is the most recently developed and most efficient lighting technology. LED TL PRO, developed in collaboration with Osram and Samsung, produces 160 lumens with 1 watt. This is the system efficiency of the entire product. The Samsung LED itself produces 172 lumens with 1 Watt.
The efficiency of LED will increase further in the coming years. In April 2012, scientists achieved an efficiency of 254 lumens per watt.
Lux stands for the light flux/lumen that falls on the surface. This is abbreviated to lumen/square meter or lm/m². Footcandle is a unit of measure used in countries such as the United States. This is abbreviated to footcandle/square foot or lm/ft².
A Luxmeter measures the intensity of light by means of a photodiode or a light-sensitive cell that is exposed to the light. The device then detects the amount of light and converts it into a measurable value in Lux, a unit of measurement for light intensity.
Lux meters are often used in the design of lighting systems to ensure that the correct amount of light is provided for a specific application. They are also used to measure whether a room is sufficiently illuminated for the safety and comfort of its users. Other applications include testing the brightness of displays and measuring the light intensity of plants to determine if they are receiving adequate lighting.
An instrument that is currently used in addition to the Lux meter is the Luxmeter data logger. These are devices used to continuously collect and store light intensity measurements. This data can be used to analyze and identify trends in light levels in a given environment.
Luxmeter data loggers are often used in buildings to check whether lighting systems meet prescribed energy efficiency standards and to determine whether there are opportunities to reduce energy consumption. Especially areas where users cannot be expected to pay attention to manually switching off the lighting are suitable for this. Examples include corridors, stairs and large halls.
Here are a few more reference values for lux measurements:
- outdoors, the illuminance is around 15,000 lx when it is sunny, and around 5,000 lx when it is cloudy.
- The full moon provides 0.3 lx, a candle around 1 lx.
- A 1000W halogen spotlight produces 3,500-5,000 lx at a distance of 1 m.
- In direct sunlight when the sun is shining, up to 100,000 lx can be measured if you have the right measuring device.
- For workplace lighting, around 1,000 lx is a value that meets requirements.
For the physicists among us. Lux and lumen are both physical units that indicate light intensity:
- • Lumen is the unit for luminous flux. This measures the total amount of light emitted by a light source.
- • Lux (which means ‘light’ in Latin) is the amount of light on a given surface. 1 Lux equals 1 lumen/m².
The European Union has set standards for lux values in various indoor lighting environments. See the NEN standards for detailed information on workplace lighting.
| OFFICE BUILDINGS |
LUX | SCHOOLS | LUX |
| Workplace | 500 | Gymnastics room | 375 |
| Meeting room | 500 | Classroom | 300 |
| Corridor | 100 | Lecture room | 500 |
| Reception | 300 | Practice room | 750 |
| Archive | 200 | Toilet | 100 |
| INDUSTRIAL HALLS |
LUX | SPORTS FACILITIES |
LUX |
| Storage and stock | 100 | Gymnasium | 300 |
| Shipping/packaging area | 300 | Sports hall | 500 |
| Metalworking | 300 | Fitness | 200 |
| Aisle | 150 | Martial arts room | 200 |
| Assembly | 300 | Pool | 300 |
| Laboratory | 500 | Dressing room | 150 |
six images of LUX meters
Most of the meters from this overview all come from the site of photobutmore.de and John’s collection of Weston Light Meters. It concerns meters that were on the market well before the digital age.
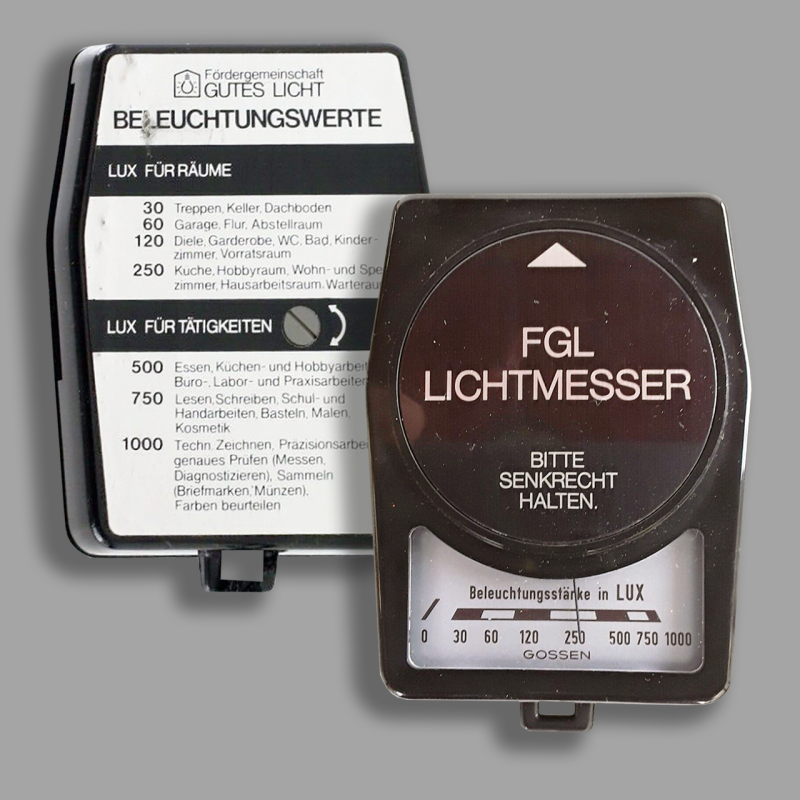
This is a lux meter produced by Gossen for the Good Light Association in the 1970s. The industry initiative based in Frankfurt am Main was founded in 1970 as one of the first bodies for cooperative marketing – at that time under the name Fördergemeinschaft Gutes Licht (FGL).
Today licht.de has around 125 member companies from the lighting industry that are part of the ZVEI e. V., Frankfurt am Main – are organized. They not only support licht.de financially, but also provide the specialist knowledge of their lighting experts.
The device was also sold by Gossen as a “light meter”. The simple device is suitable for determining lighting values for rooms and activities in rooms. It is calibrated for artificial light at 2850°K. The measurement is determined using a selenium photocell.
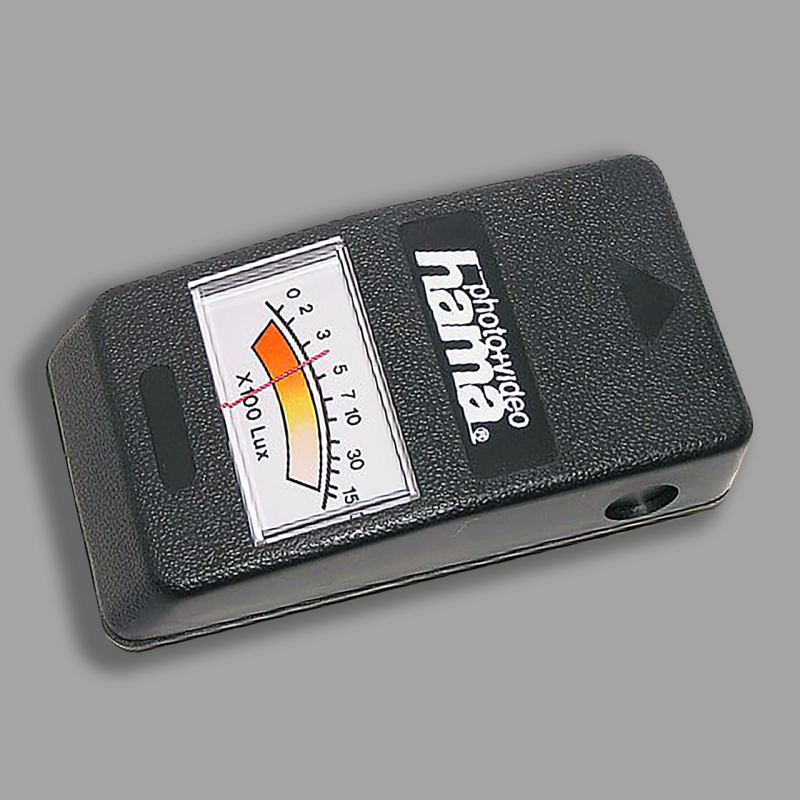
A lux meter is used to determine a lighting situation just like this Hama lux meter will do. Every light meter is also a lux meter, only the different scale or method of operation makes the difference.
Many light meters have references to lux measurements in their operating instructions, and some even have scales for this.
Hama GmbH & Co KG is a German distributor of accessories specialising in a number of areas including photo, video, audio, multimedia, computer and telecommunications. The company also acts as a distributor of various product ranges.
Hama employs around 2,500 people worldwide, 1,500 employees work at the headquarters in Monheim, Bavaria, Germany. Hama is represented by 17 subsidiaries and numerous commercial agencies in Europe and beyond.
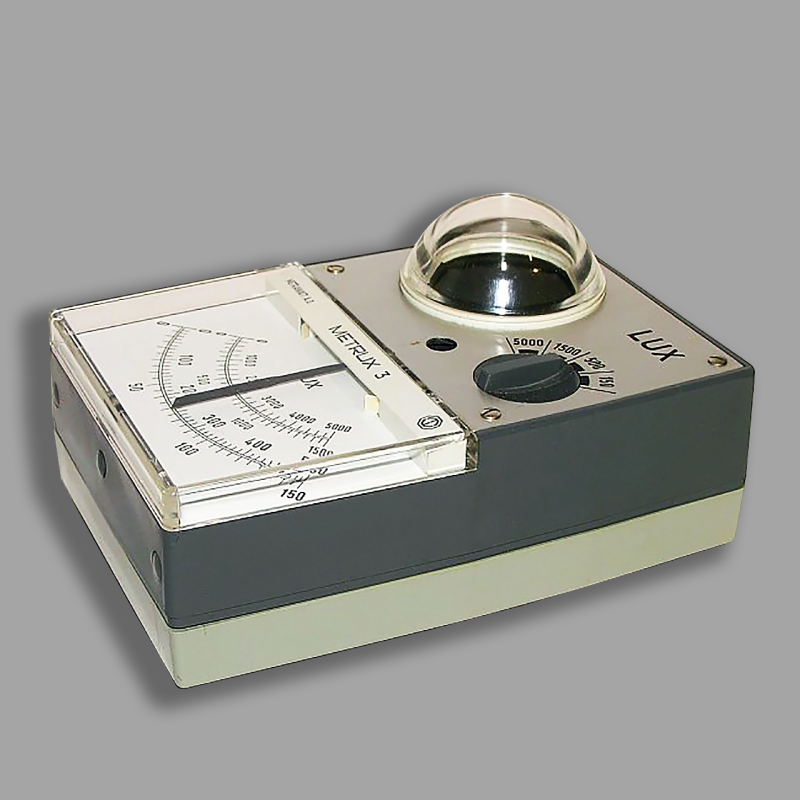
Many light meters have references to lux measurements in their operating instructions, and some even have scales for this.
On the other hand, lux meters also come with tables for photographic purposes. This Metrawatt measuring device has a conversion table for lux / footcandle in 18 DIN/50 ASA printed on the bottom.
This Metrux 3 from the 1970s – the operating instructions describe it as Metralux – has a selenium photo element integrated into the device housing. While a photographic light meter should have the narrowest possible measuring angle, with a lux meter, it is important to also measure light incident from the side. That’s why the Metrux has a measuring angle of approx. 85°. The measurement method is light measurement, for which a photo exposure meter, in contrast to this lux meter, requires a diffuser.
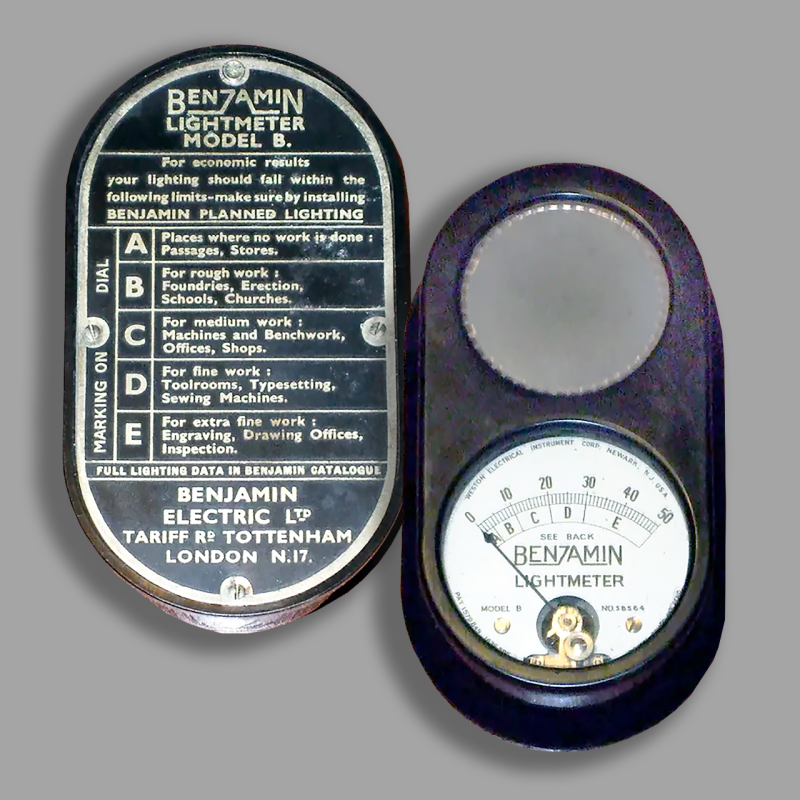
This is a Benjamin Light Meter Model B (Weston E703). c1940, USA Manufacture. Weston made a number of bespoke models for major electrical suppliers and installers. Benjamin were a major installation company internationally.
As the back plate indicates, this meter would have appeared in their trade catalogue. The light readings are divided into zones to indicate suggested minimum lighting levels for various workplaces and occupations.
The use of the term ‘economic results’ to describe the zones is interesting. It suggests that energy costs can be reduced by keeping below the maximum level of the relevant zone. It also suggests that working productivity (and uneconomic accident avoidance) can be optimised by setting lighting levels within the specified zone for an activity or environment.
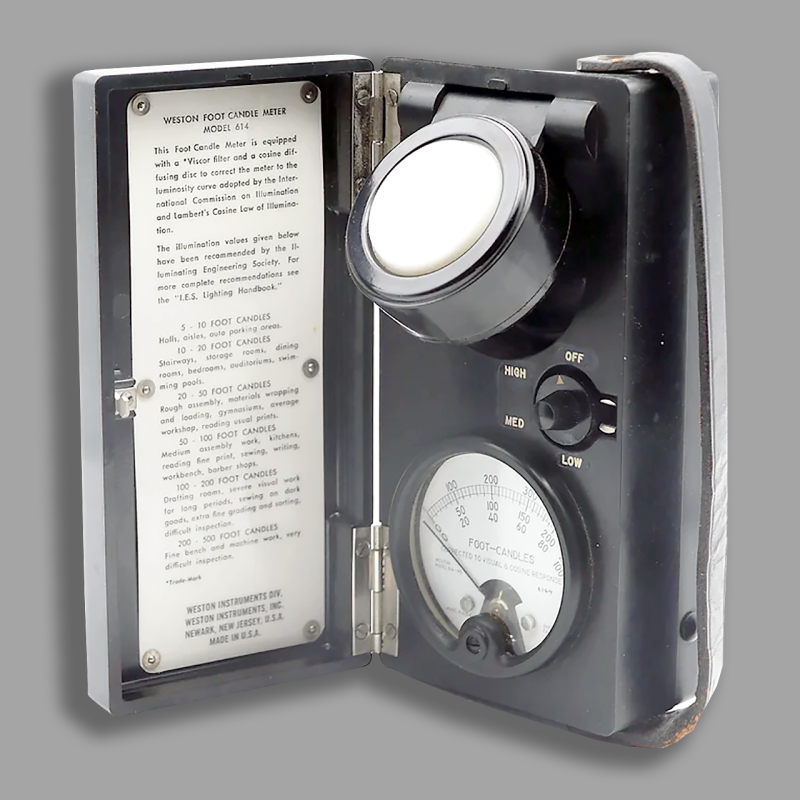
This model of industrial light meter, the Weston Light Meter Model 614, measuring foot candles was in production with Weston continuously from the ’30s to the ’50s. The early Model 614 appears almost identical, excepting that the grey or green photronic cell is exposed. Later variants of the 614, as in this example, have diffusing perspex covers fitted.
A rheostat selects from three ranges for the incident cell: to 100, 250 and 500 foot candles. An incident cone is mounted over the cell (on this model) which hinges upwards to direct to the light. Stood on a flat surface using the box lid for support, the unit can be angled towards any light source.
Full instructions for use and recommendations for levels in different work environments are printed on a panel attached to the inside hinged cover.
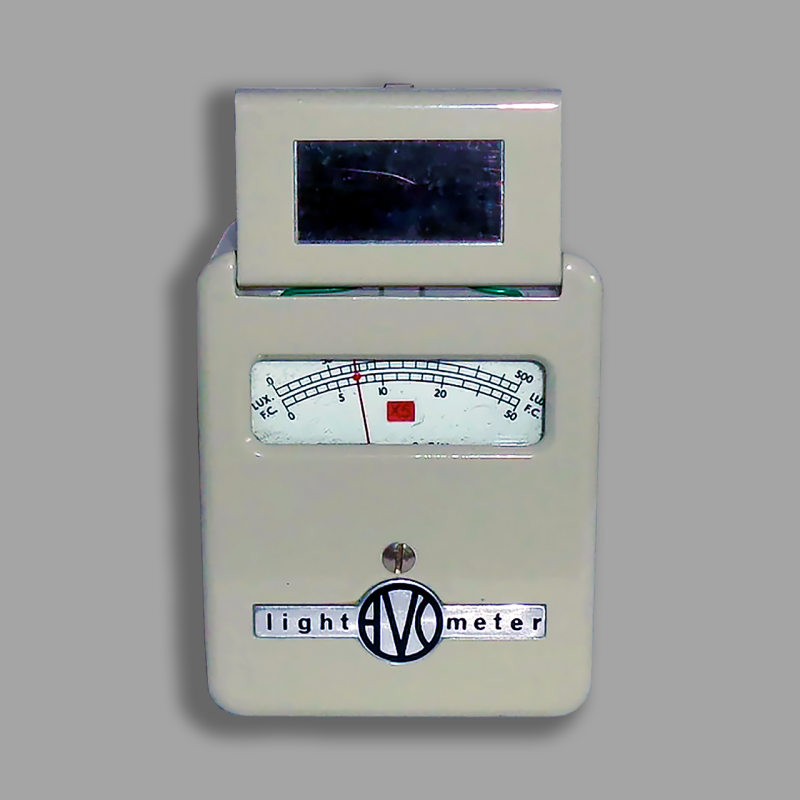
This little piece of vintage tech is a 1970s AVO Pocket Light Meter Model 3 LM3. It was manufactured by Avo Limited, Archcliffe Road, Dover, Kent. (Part of the Thorn Measurement Control and Automation Division).
It has been used by Lighting Engineers to measure the lighting source in different working environments e.g. office, classroom, factory floor e.t.c. It has a table on the back of the instrument, and in the operating booklet, giving a selected set of recommended illumination values for different types of work/working environment.
It has two ranges of sensitivity, and is calibrated in both foot-candles (lumens per square feet) and lux units. A switch on the side moves the meter from the lower (x1) to higher (x5 measuring up to 2500 lux) sensitivity range. For most lighting conditions, the light meter would be used in the lower range.
